Full Guide (Refer to the pictures for more help. The pictures will be numbered to match the step for each section. Refer to the video embedded above if you need additional references).
0 – Tutorial (Click on pictures to embiggen)
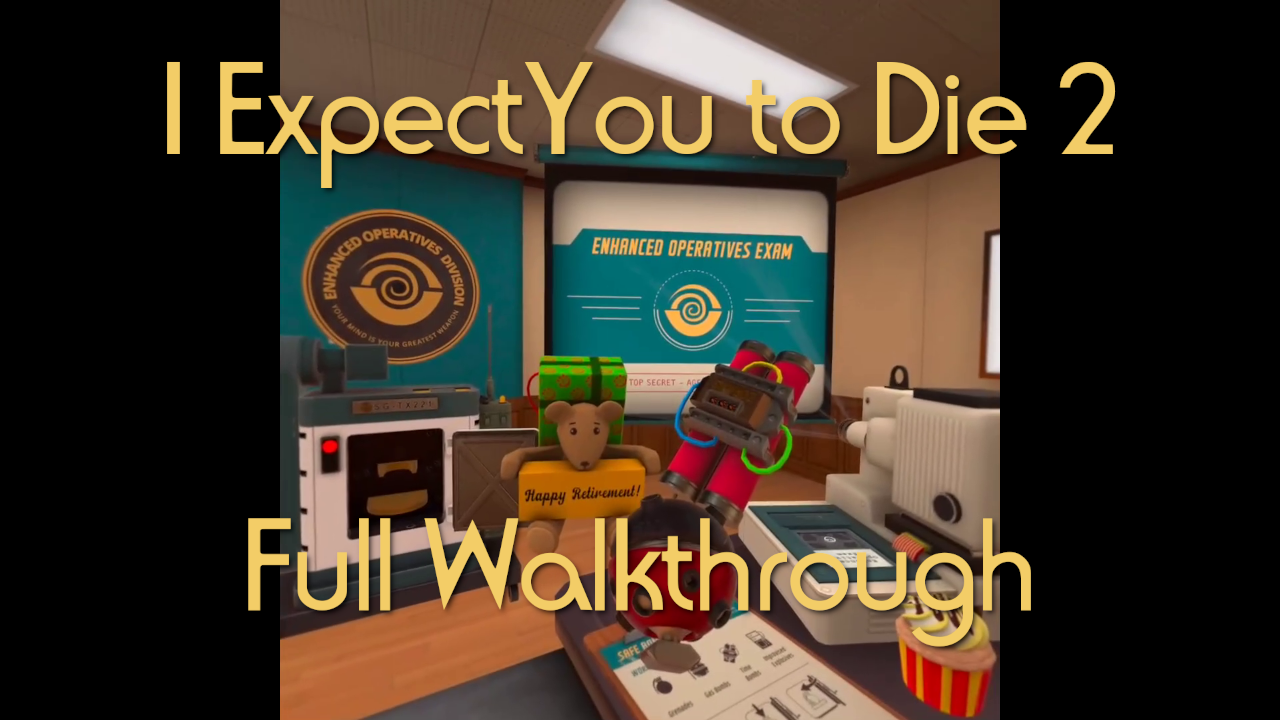
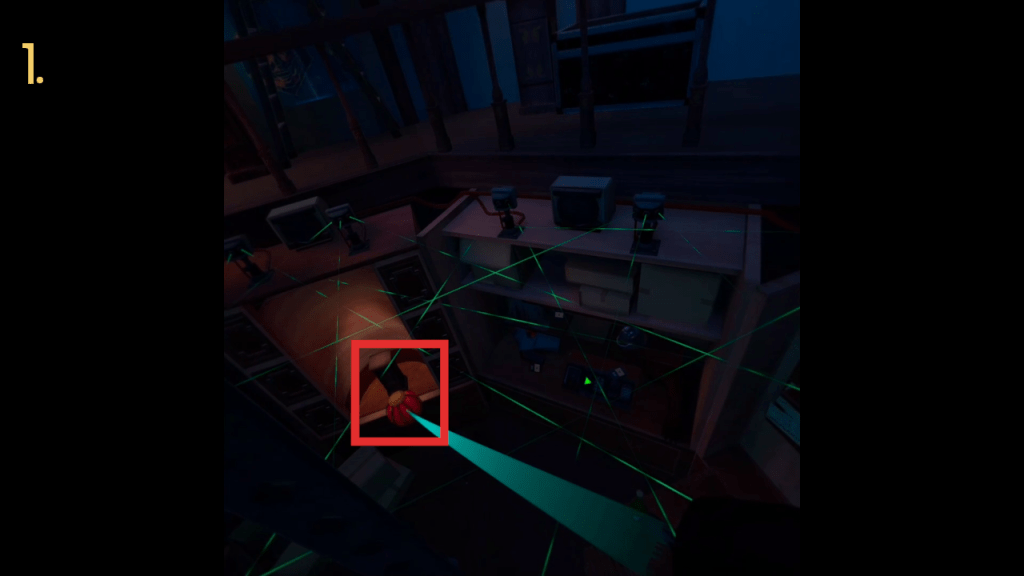
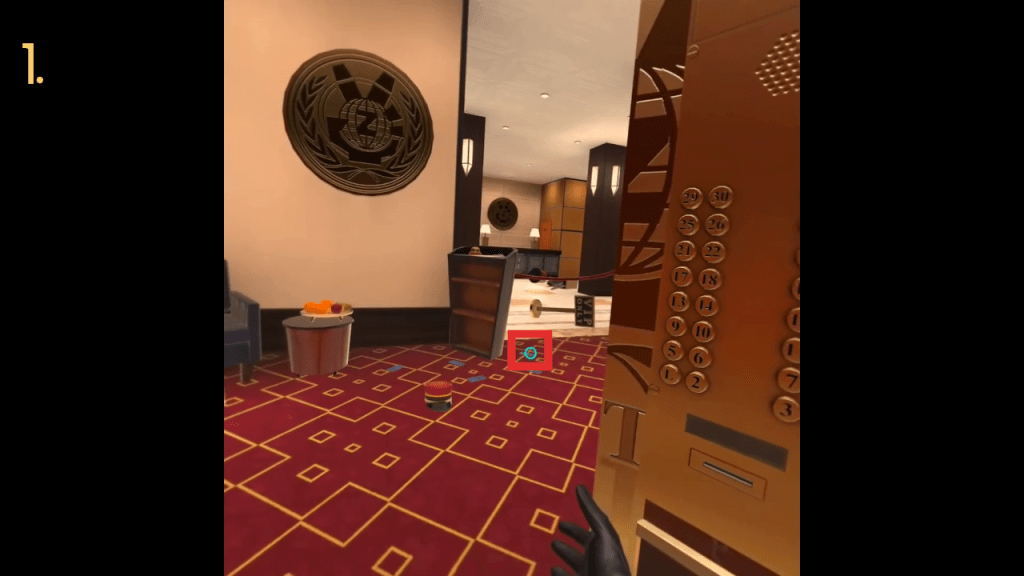
Bomb in drawer to your right. 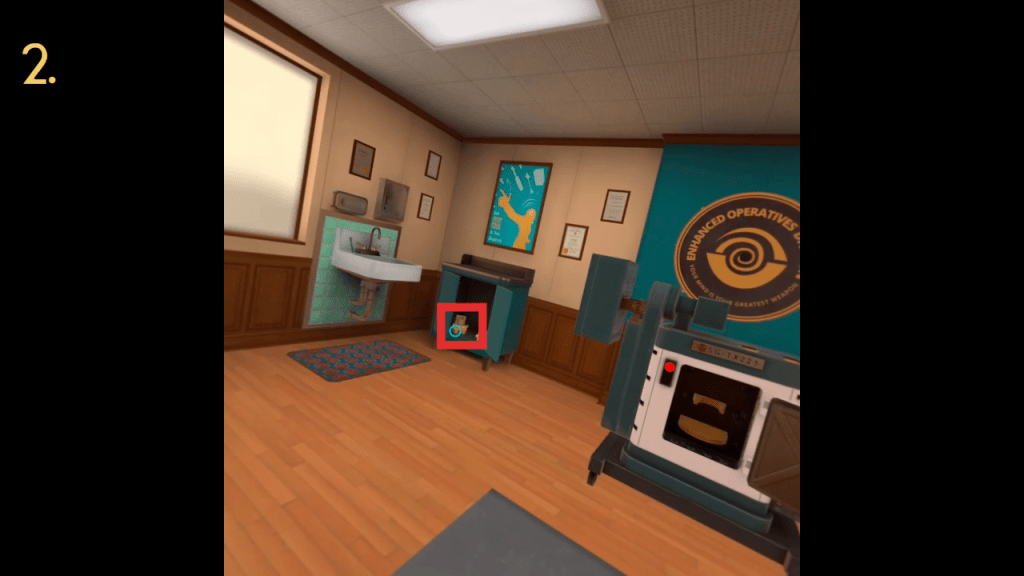
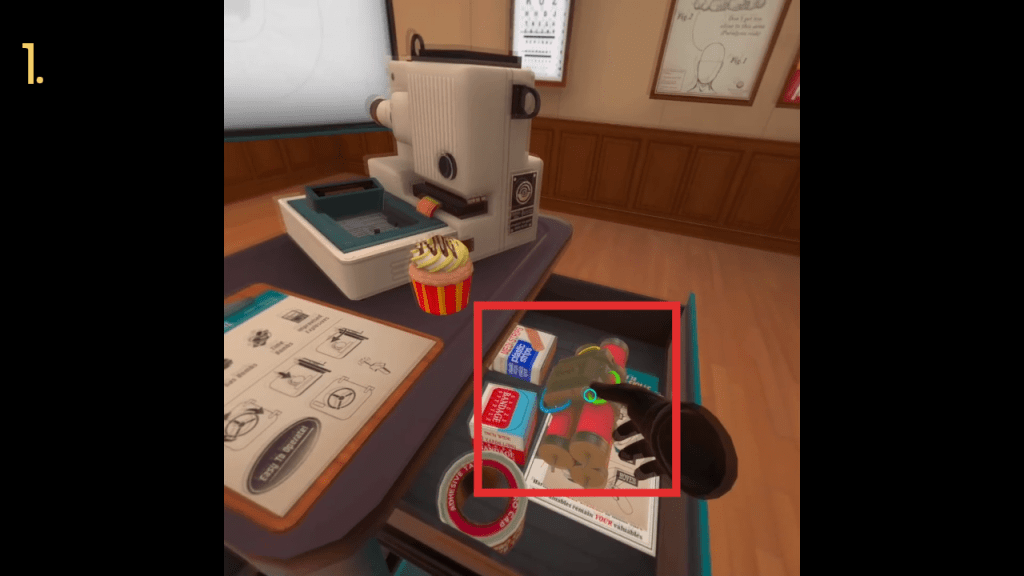
Bomb in far cabinet. 
Bomb underneath examination table.
1. One bomb is located in the top drawer to your right.
2. Another bomb is located in the cabinet drawer.
3. The last bomb is locate under the medical examination stand to your far left.
1 – Stage Fright (Click on pictures to embiggen)
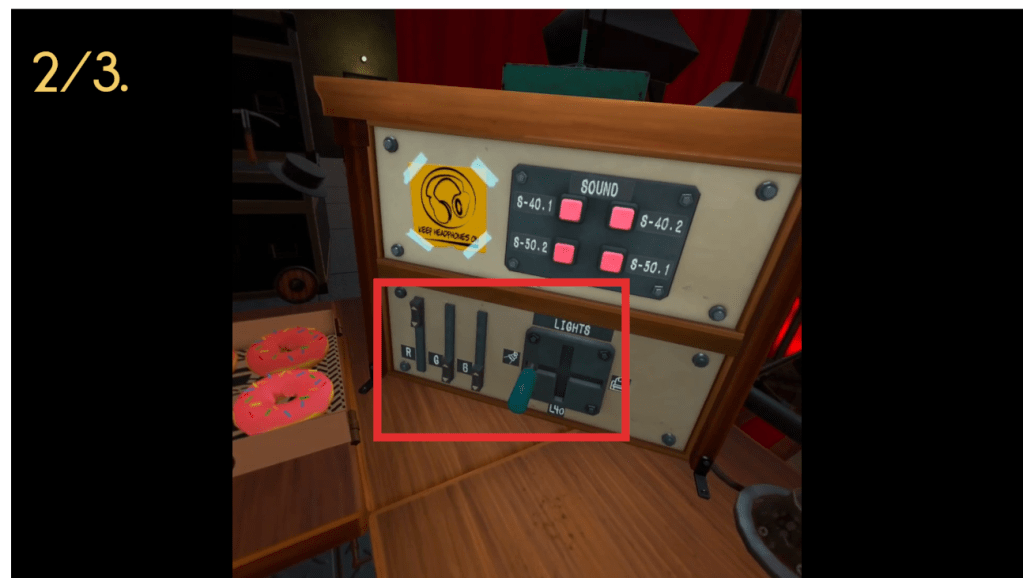
R down, G + B up 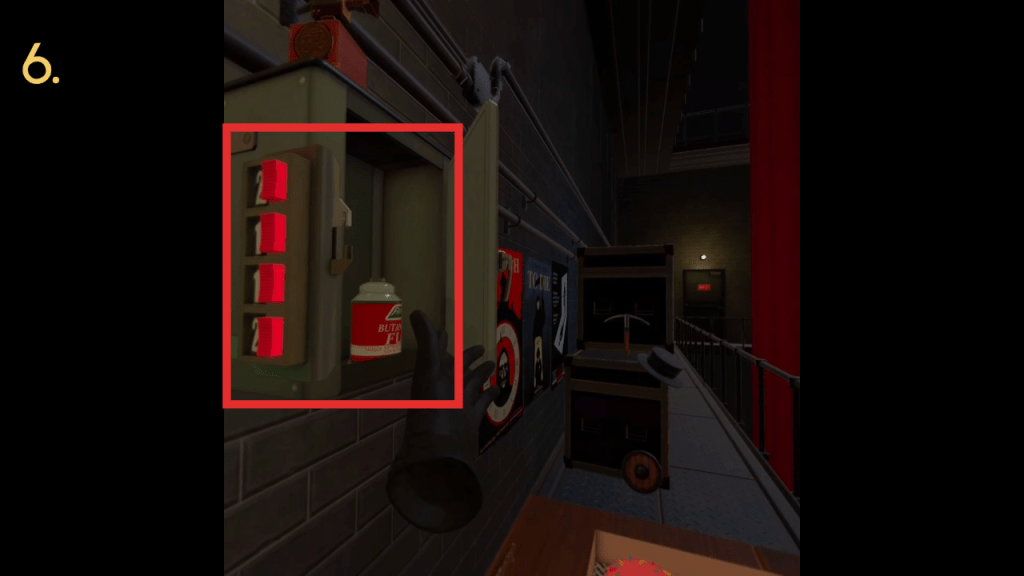
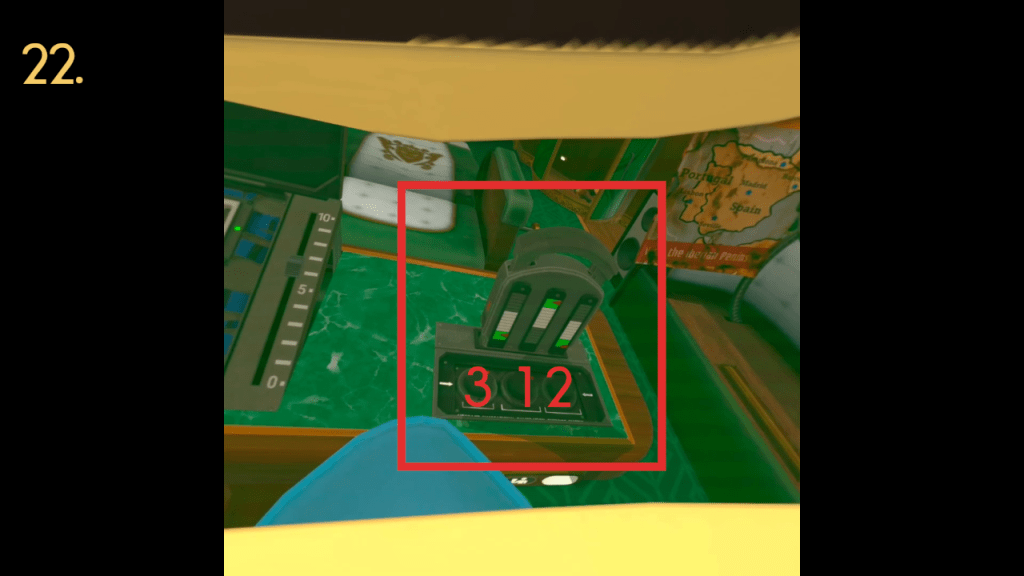
2112 is the code 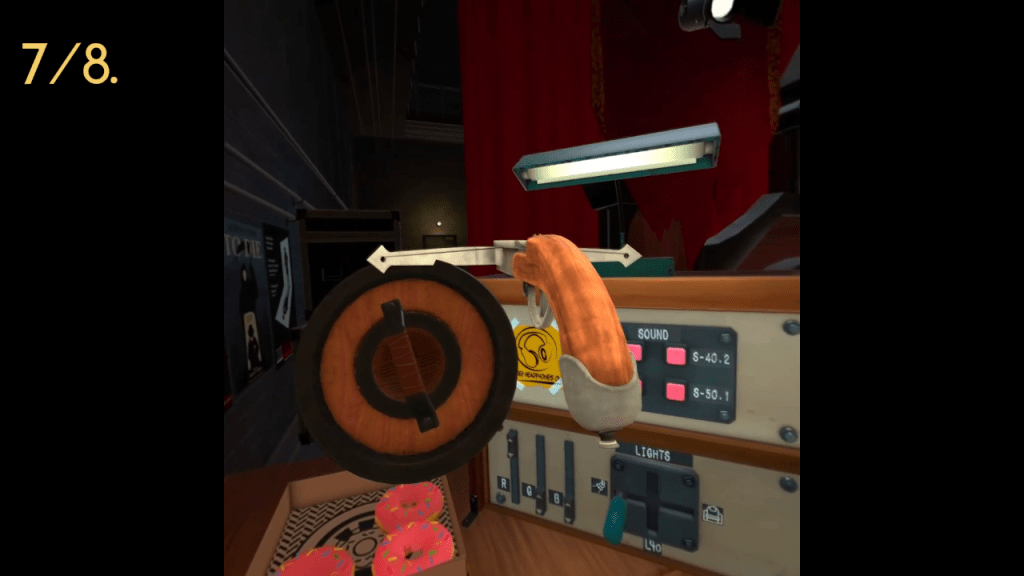
Position the items to save time. 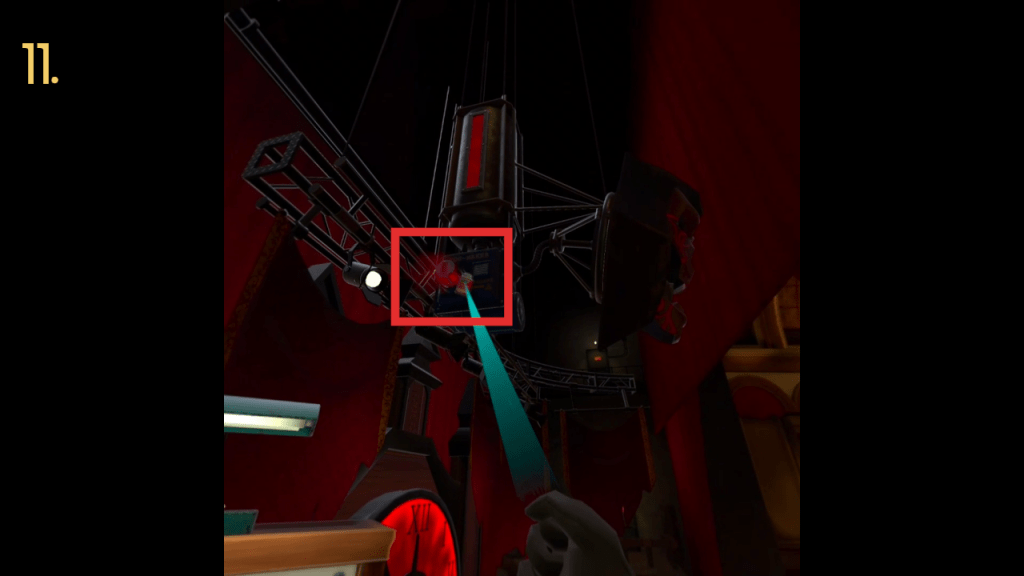
Replace the canister in the mask. 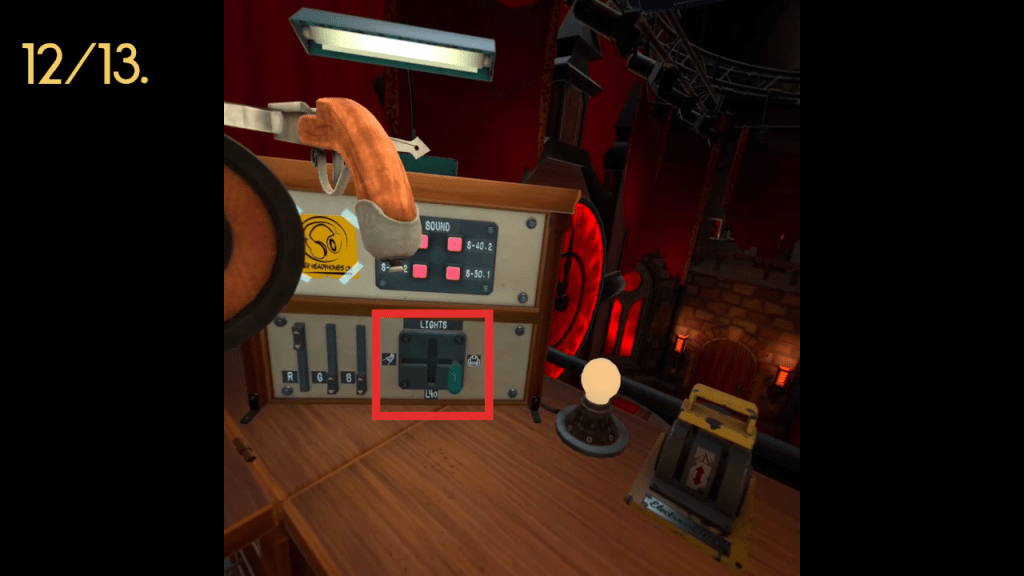
Move the light switch to the right and then to L40.
1. Pull the yellow lever up to raise the clock.
2. Set R all the way up, and G and B all the way down.
3. Drag the Lights switch all the way to the left.
4. Pull the right rope lever down to let the curtains down.
5. Pull the middle rope down and lock it into place.
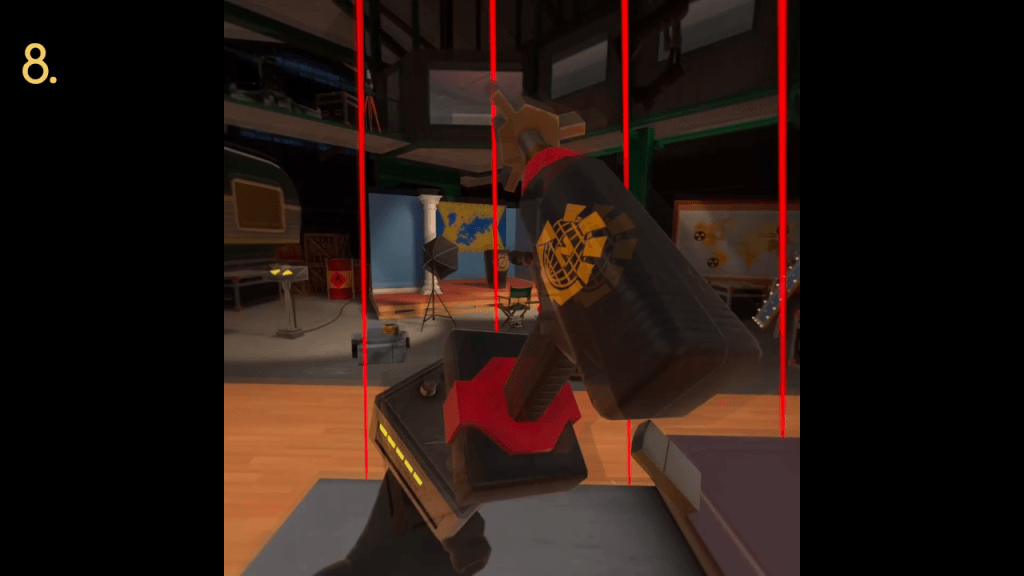
6. Enter code 2112 into the locked box and grab the canister.
7. Grab the crossbow and aim it at the door to your left.
8. Grab the shield and have it block the area to your left.
9. Use the key from the drawer on the right most rope.
10. Pull the curtain rope all the way down and lock it in place.
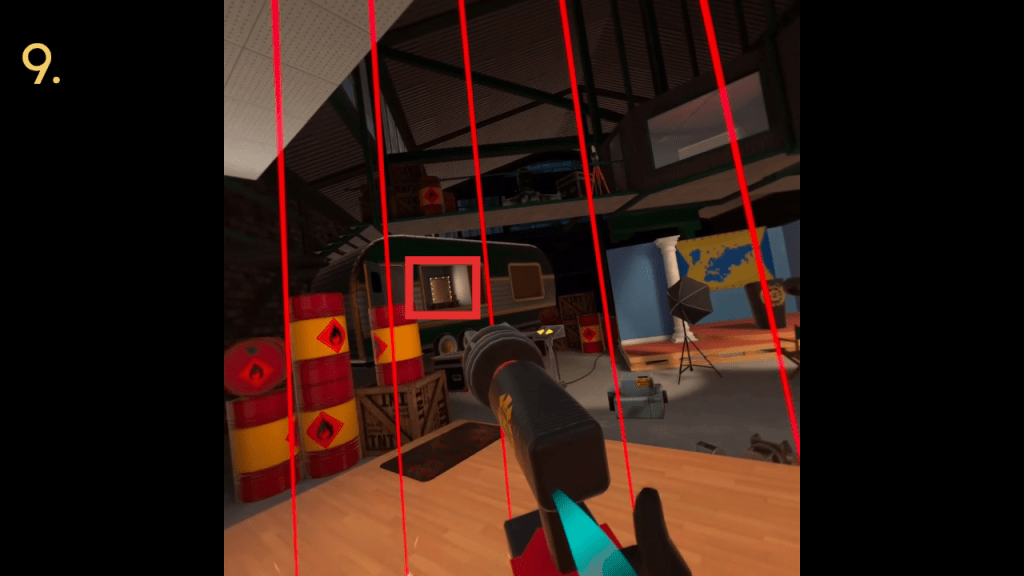
11. Pull open the access hatch and replace the canister when the mask is down.
12. Drag the Lights switch all the way to the right to blind your first attacker.
13. Drag the Lights switch to L40 to blind the other attacker.
14. Throw the grenade back at the ground attacker.
15. Grab the arrow and load it into the crossbow and shoot the attacker to your left.
2 – Operation Jet Set (Click on pictures to embiggen)
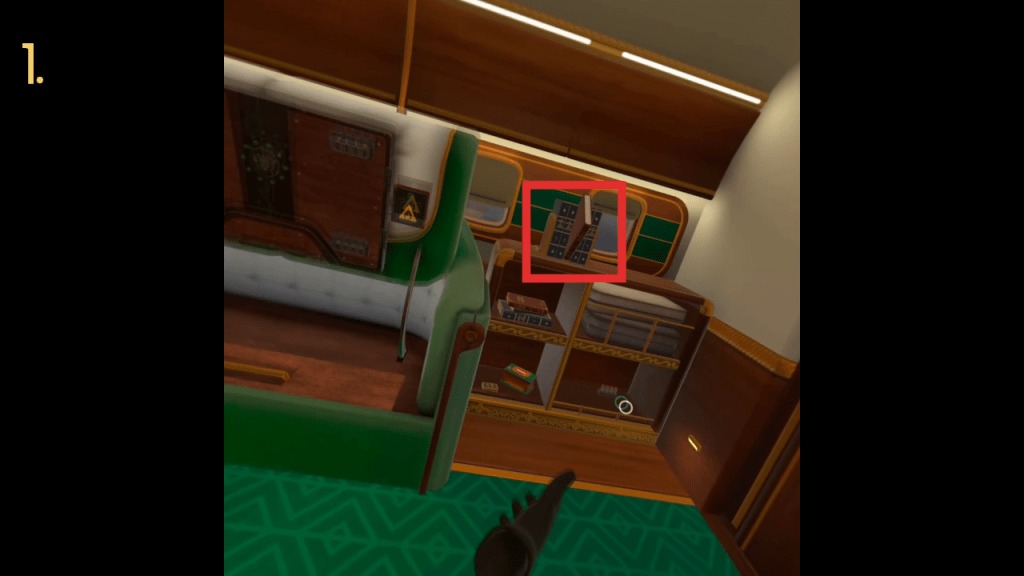
Pull the middle book to reveal the secret compartment. 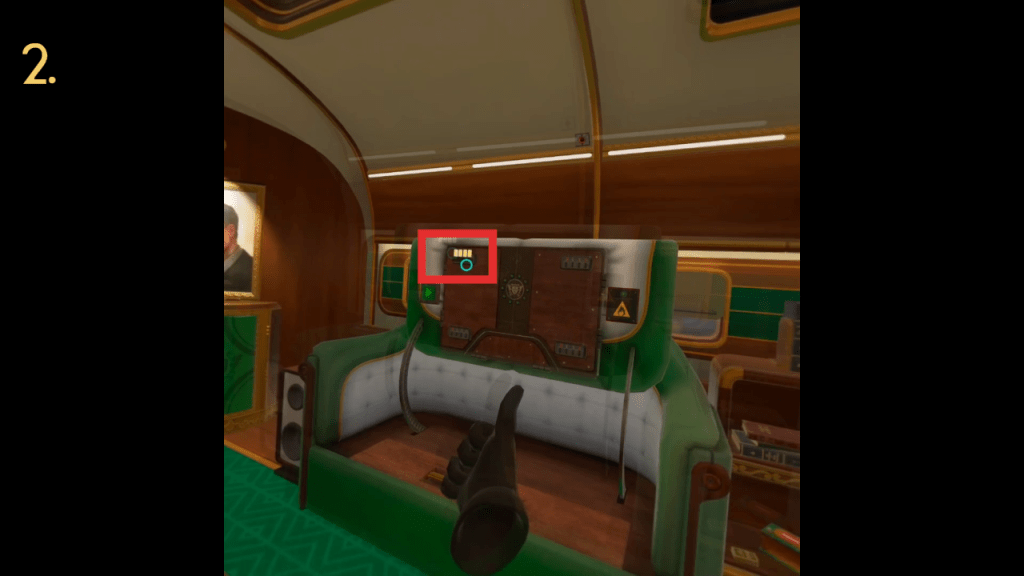
Place the 4 tubed device on the upper right. 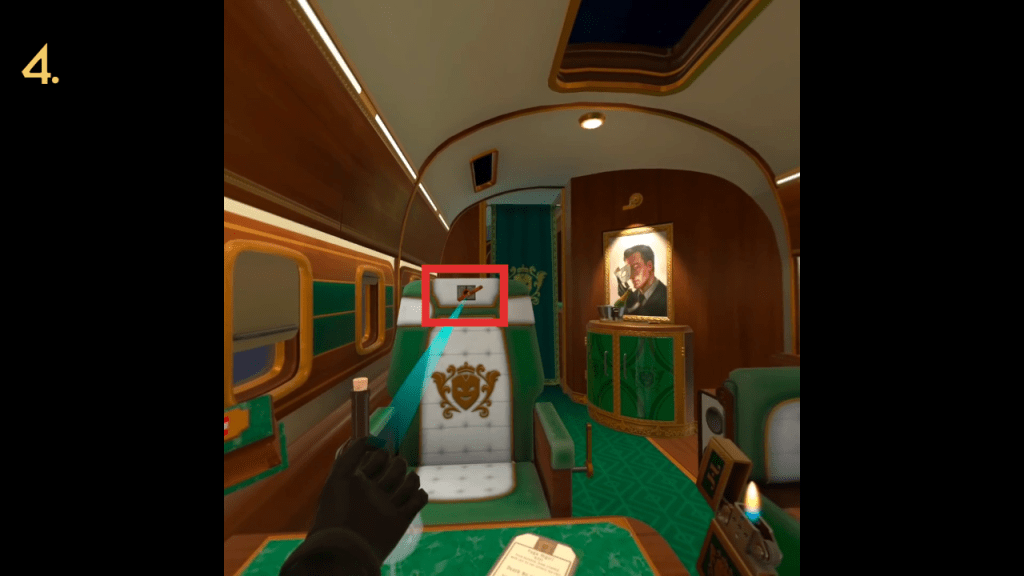
Place one explosive cigar on the chair in front of you. 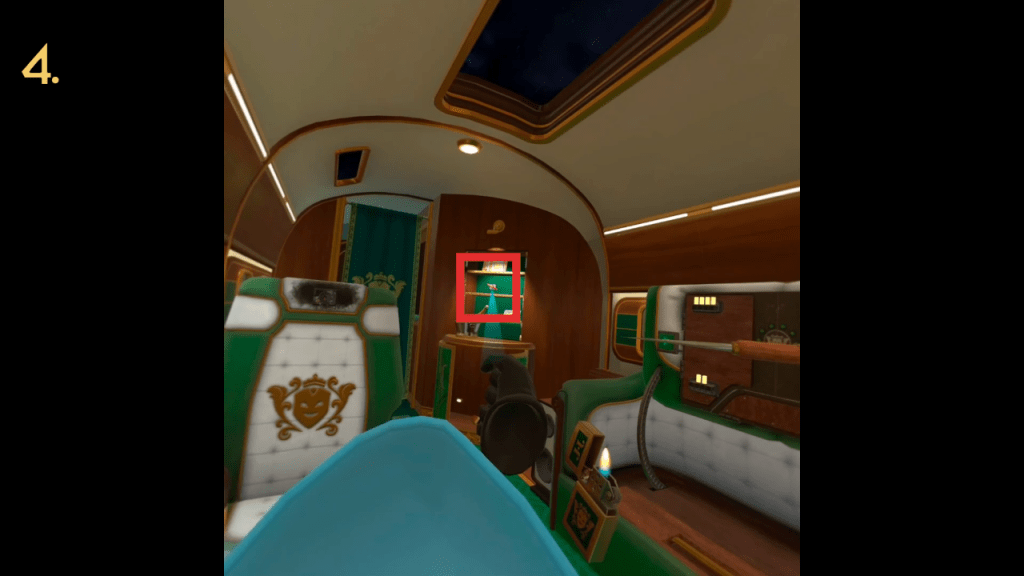
The second laser is hidden behind the painting. 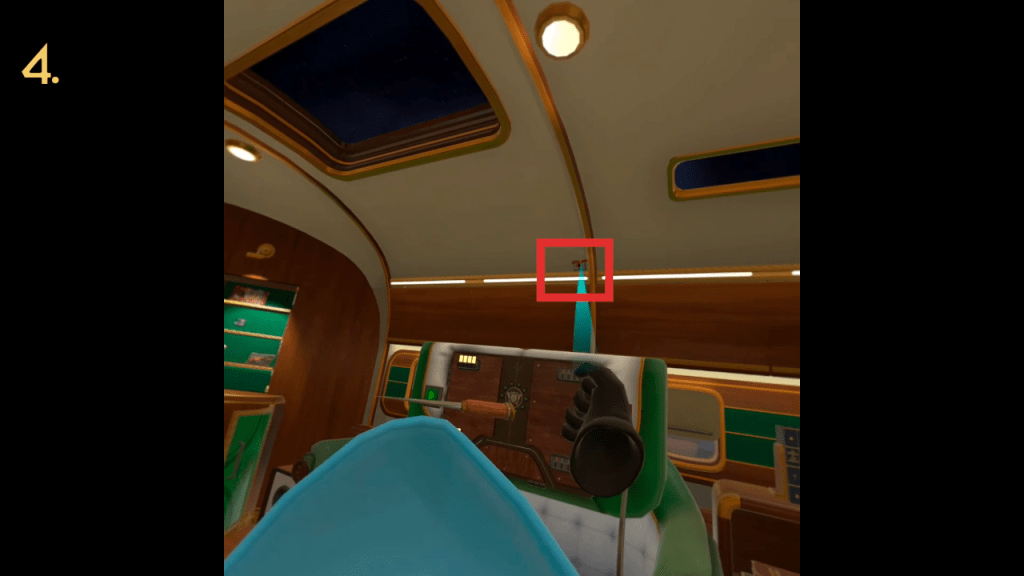
The final laser is on the wall above and to the right of you. 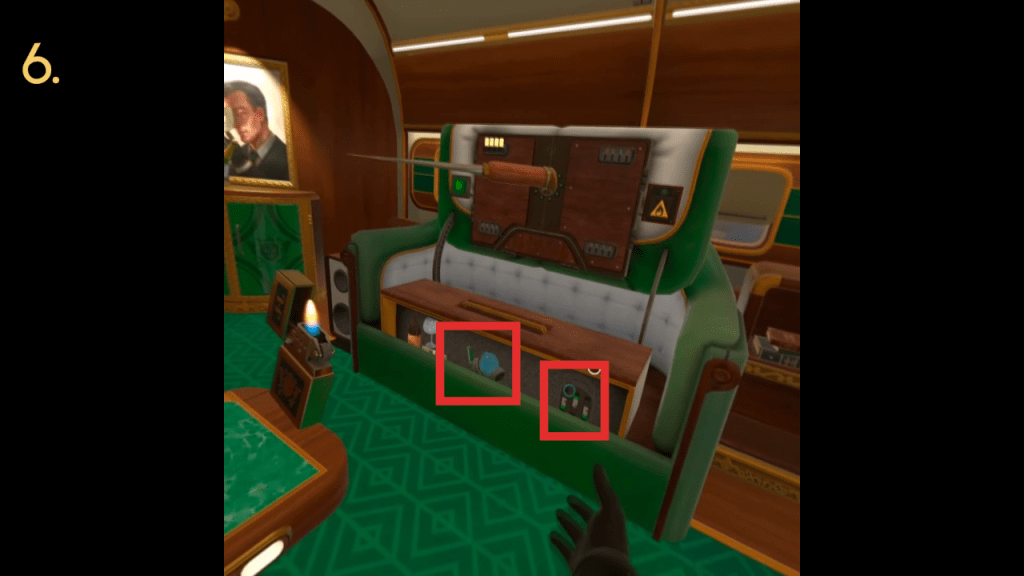
Grab the oxygen mask and the device.
1. Pull the middle book on the shelf to activate the secret compartment.
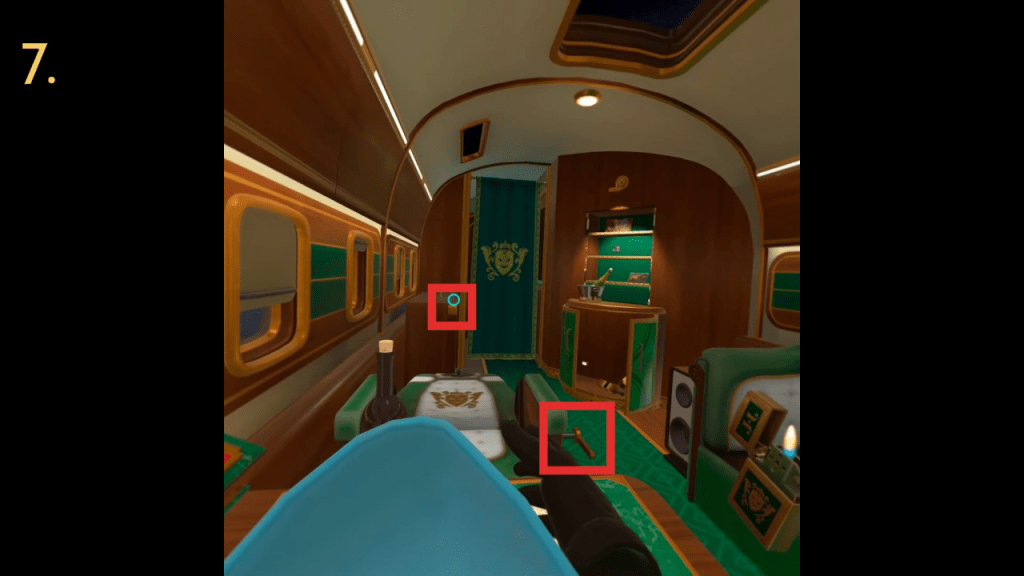
2. Grab the device with four bulbs from the same shelf and place it on the top left hand slot on the secret compartment.
3. Grab the lighter and cigar box from the same shelf.
4. Use the lighter and cigars to explode the three laser devices. One is located on the chair direct in front of you, the other is hidden behind the painting (accessed by the button underneath the painting behind the wine bottle), and the third is to your right and above.
5. Grab the tube device from the cabinet underneath the painting and place it on the lower left hand corner of the secret compartment.
6. Pull up on the handle in the secret compartment and grab the oxygen mask and electrical device.
Pull the arm lever to reveal another tube device. 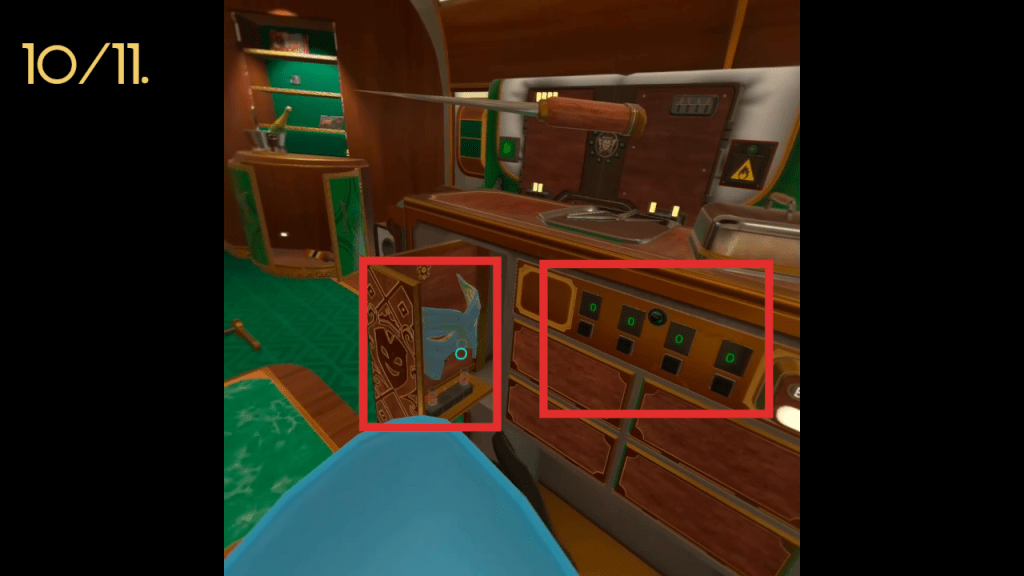
Enter code 1313 to reveal a mask and another tube device. 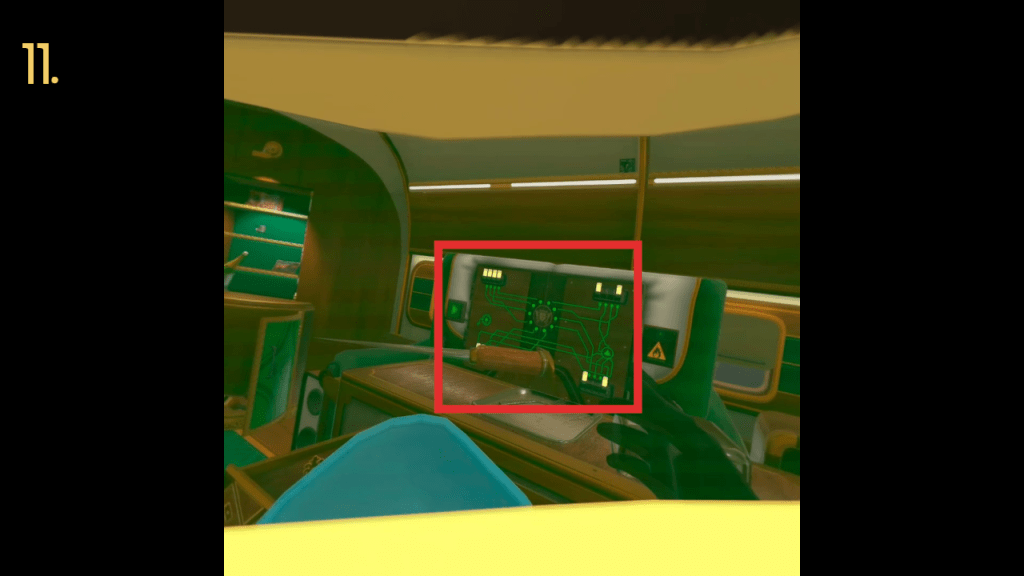
The board should look like this once completed. 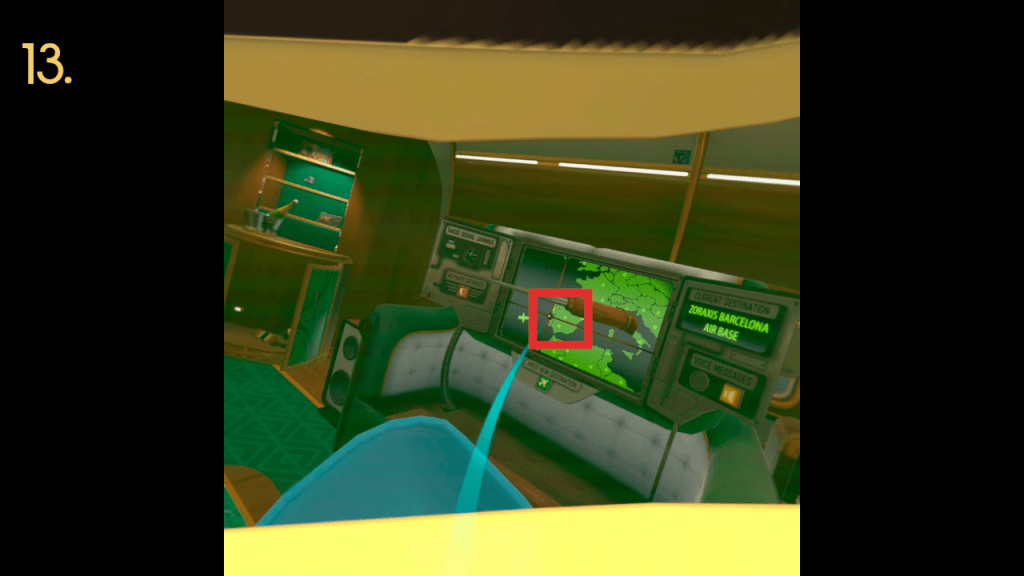
Place the coordinate on this city. 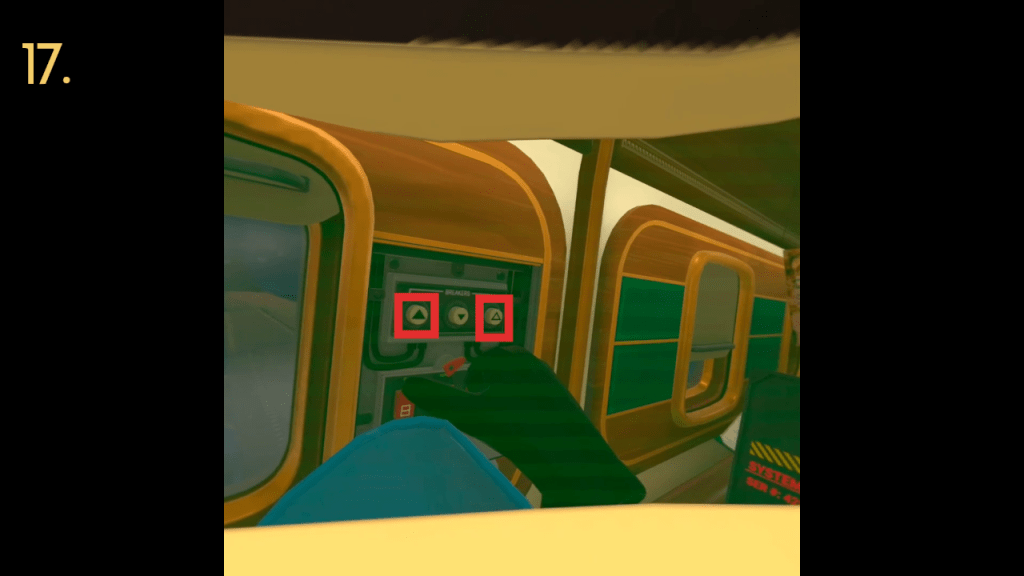
Press the right and left buttons. 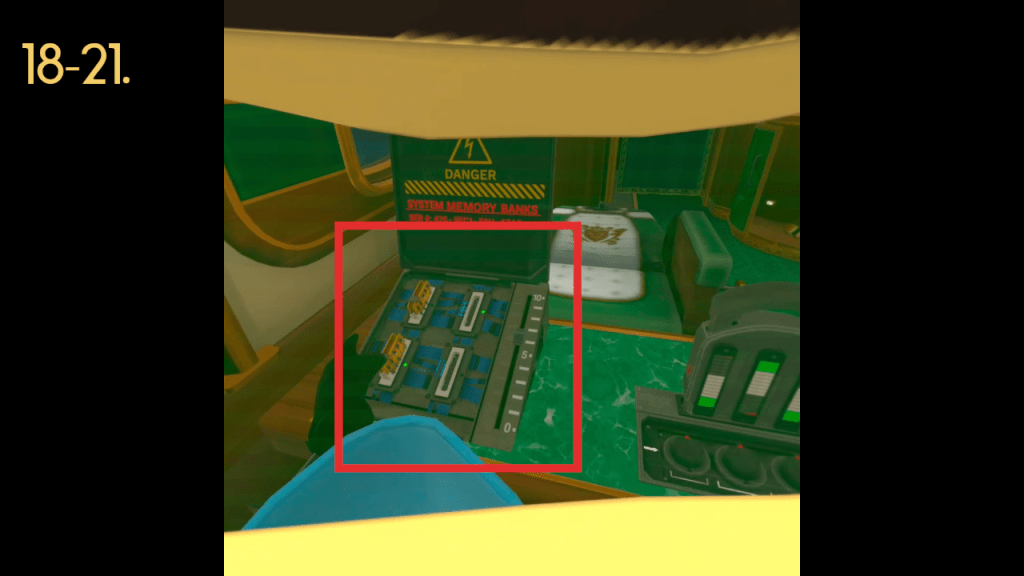
This is how the board should look like once completed.
7. Pull the arm lever on the chair in front of you to access another tube device. Place it on the lower or upper right hand slot on the secret compartment.
8. Press the service button to call the dining cart.
9. Enter any code on the dining cart to trigger the defense mechanism.
10. Enter code 1313 on the dining cart to open the secret compartment.
11. Grab the final tube device from the secret compartment and place it on the top or lower right hand slot, and press the green arrow button to activate.
12. Remove the jamming device to talk to your handler.
13. Place the coordinate selector to the lower middle city and press the new coordinate button.
14. Press the activate defenses button once the missiles are launched.
15. Turn the two dials all the way to the right on the panel in front of you.
16. Plug the electrical device into the slot.
17. Push the left and right buttons on the left wall panel (triangles pointing upwards).
18. Remove the two circuit boards from the device in front of you.
19. Place one back into the top left slot.
20. Push the slider up to six.
Middle first, right, and then left dials. 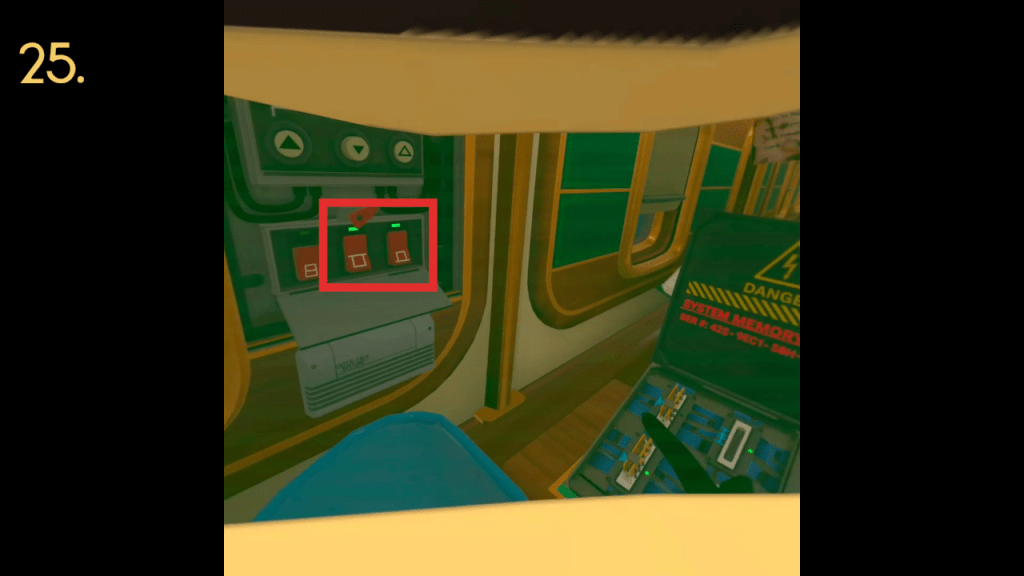
Flip the middle and right switches. 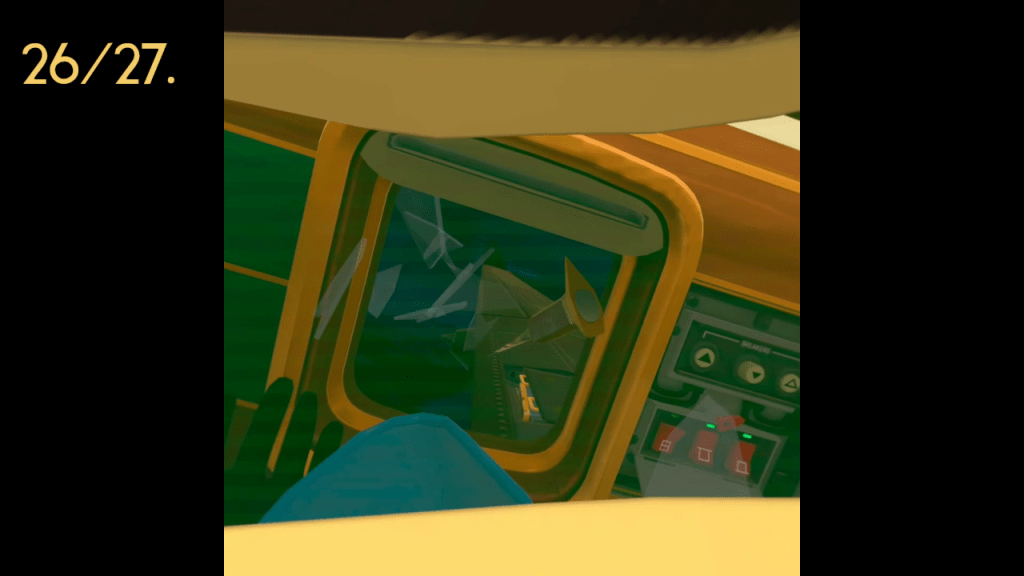
Break the window and then pull the jammed panel.
21. Place the second circuit board on the lower left hand slot.
22. Set all the arrows to green. Use the middle dial first to adjust the middle arrow, the right dial to adjust the right arrow, and finally the left dial to adjust the left arrow.
23. Set all the arrows to black. Use the same order, middle dial, right dial, left dial.
24. Set the slider down to two.
25. Flip the middle and right switches (look like top hats).
26. Take the ice pick (from underneath the painting) and break open the window.
27. Drag the jammed wing panel open.
3 – Operation Eaves Drop (Click on pictures to embiggen)
Grab the lantern underneath you. 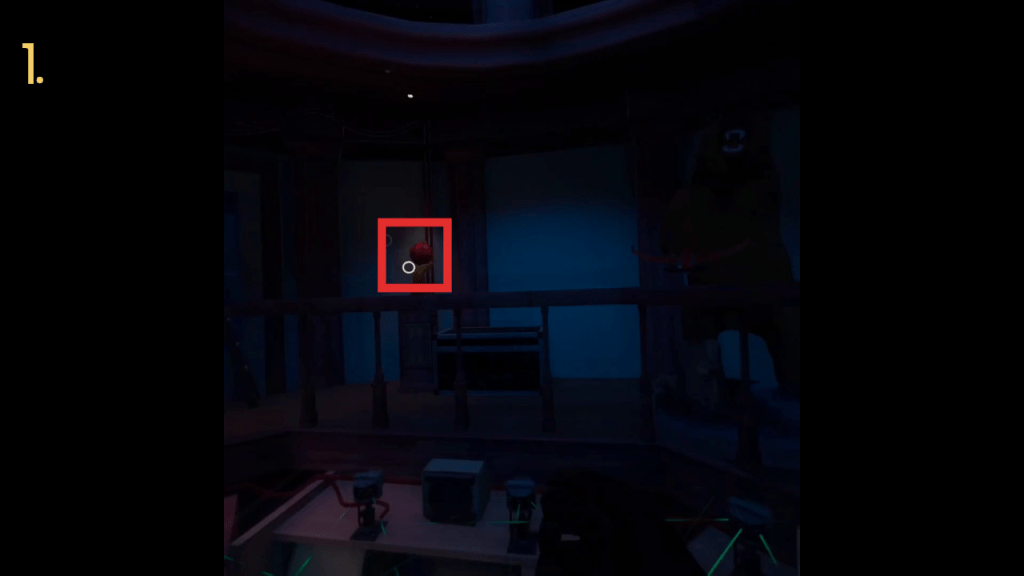
Place it on this empty lamp stand. 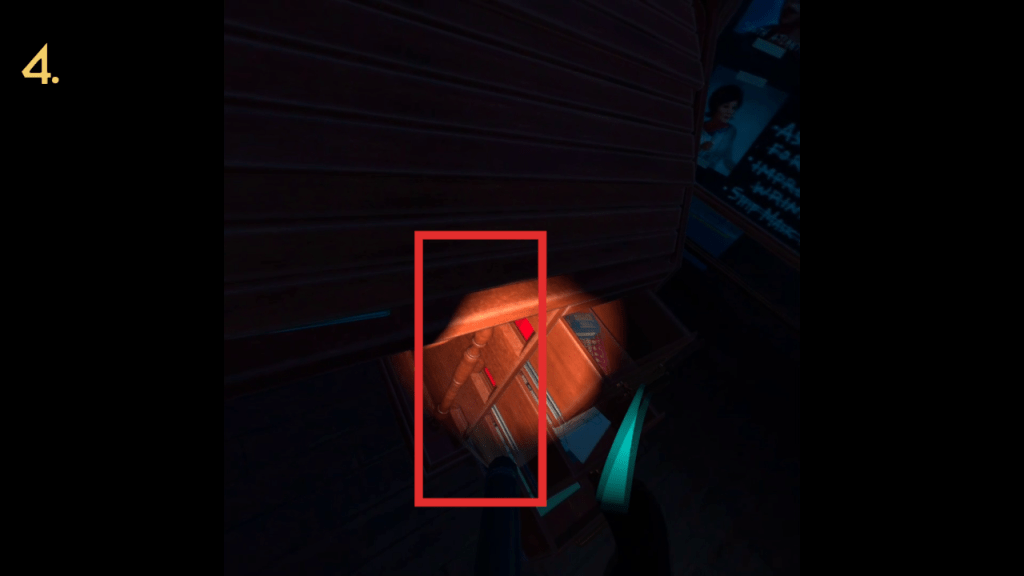
Make sure the red squares are aligned to the cut outs. 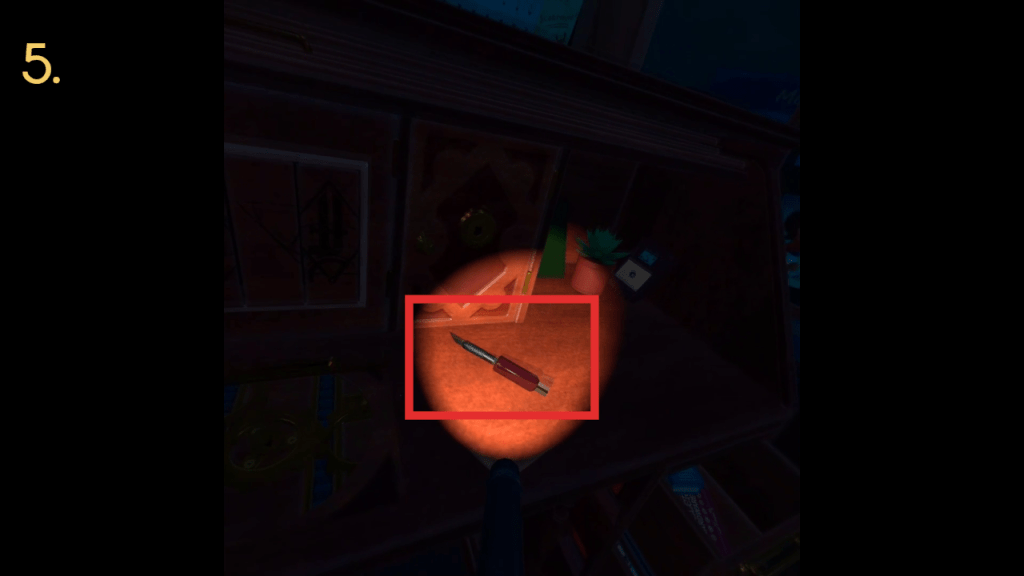
Grab this tool. 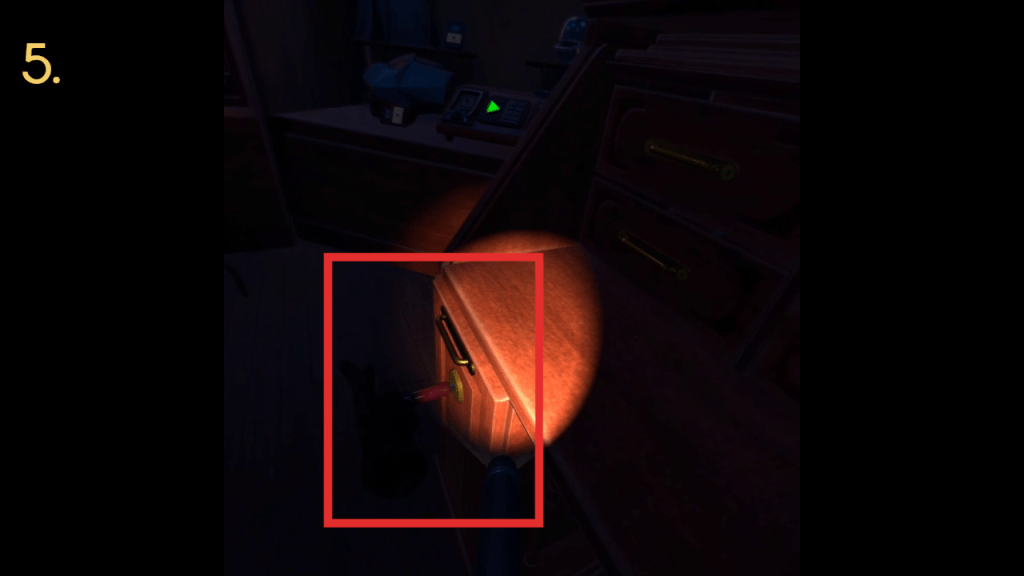
Insert the tool into the left set of drawers. 
Rotate the dial inside the cabinet.
1. Grab the lantern from below and carefully bring it past the lasers and place it on the lamp stand. This will deactivate the lasers.
2. Descend once the lasers deactivate. You can choose to grab the flashlight or not. It is pretty dark.
3. Grab the wine bottle and make it hover on the far left side next to the railing.
4. Once down, slowly pull the drawers out on the right hand side until the ride square shows up on the cutouts. This will unlock the desk.
5. Grab the tool on the right hand side of the desk and insert it into the lower left drawer.
6. Once open, rotate the dial inside to form an upside down triangle.
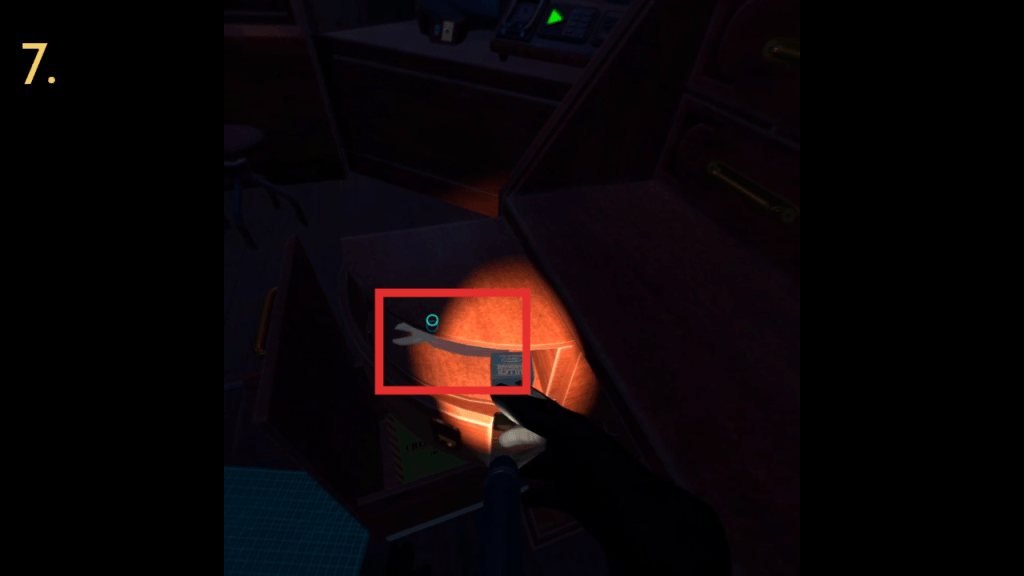
Grab the wire cutters from the top. 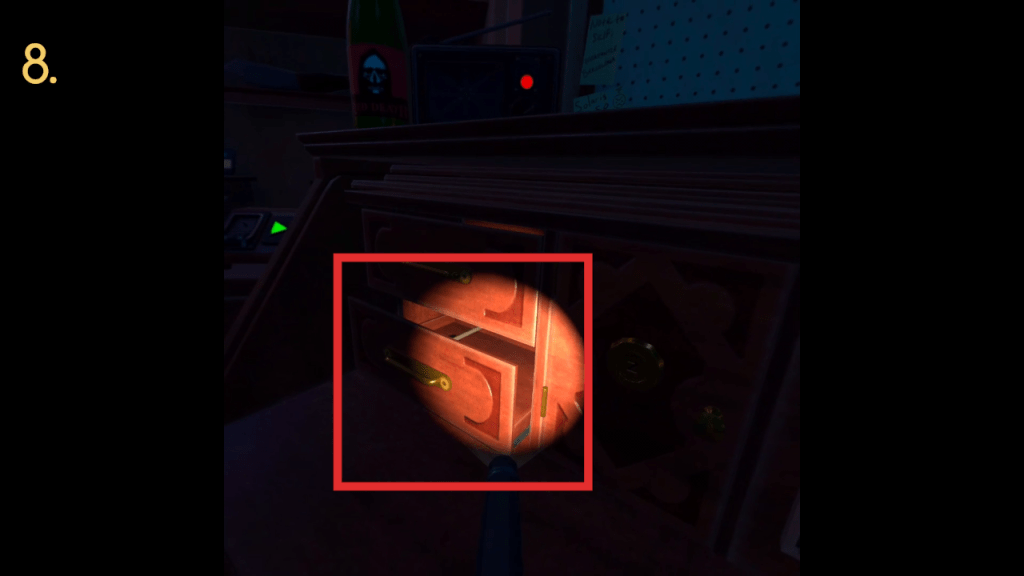
Slightly open this bottom drawer so you can cut the wire with the wire cutters. 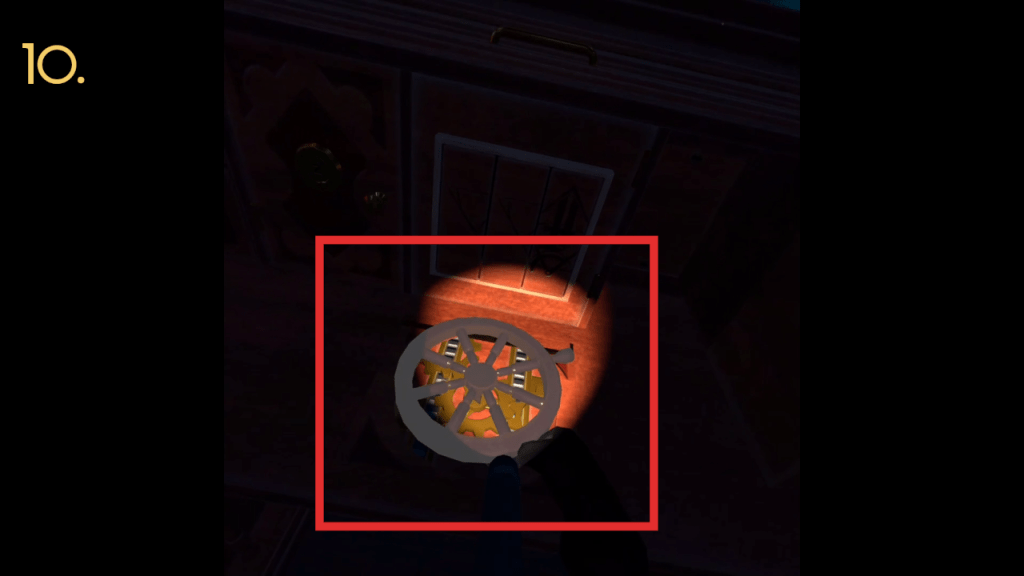
Insert the small wheel on top of the desk. 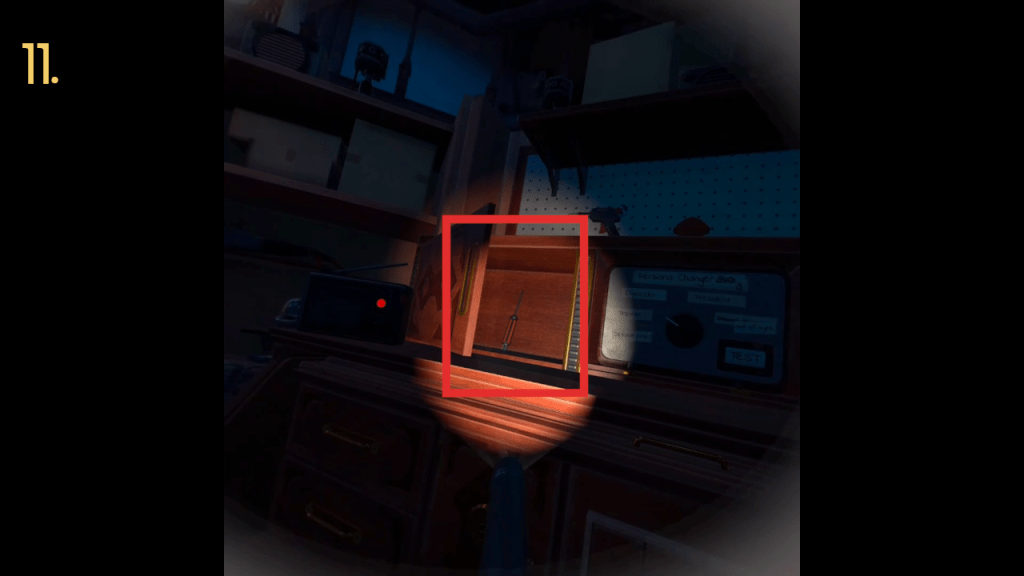
Grab the screwdriver from the left cabinet. 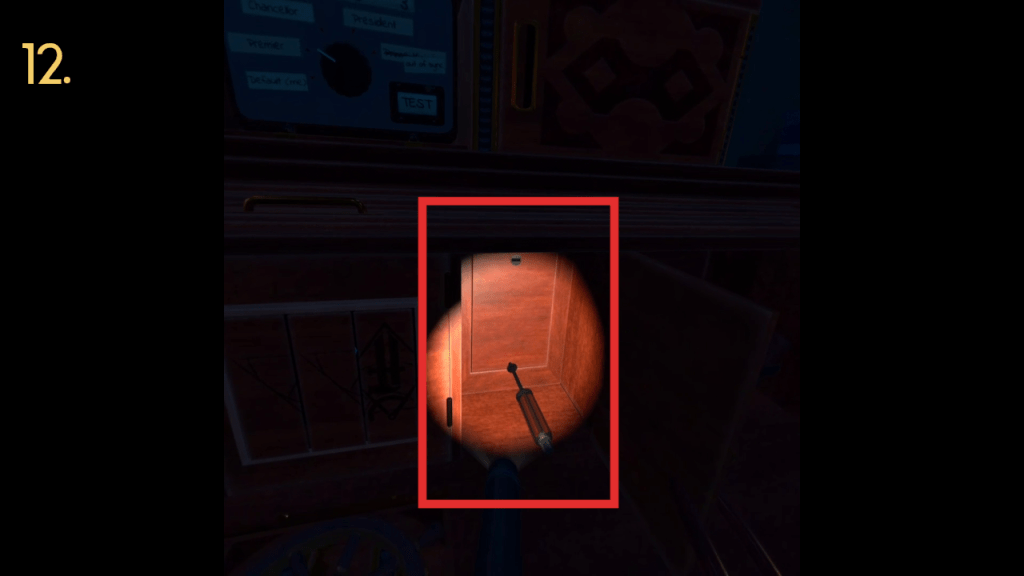
Use the driver to remove the screws. 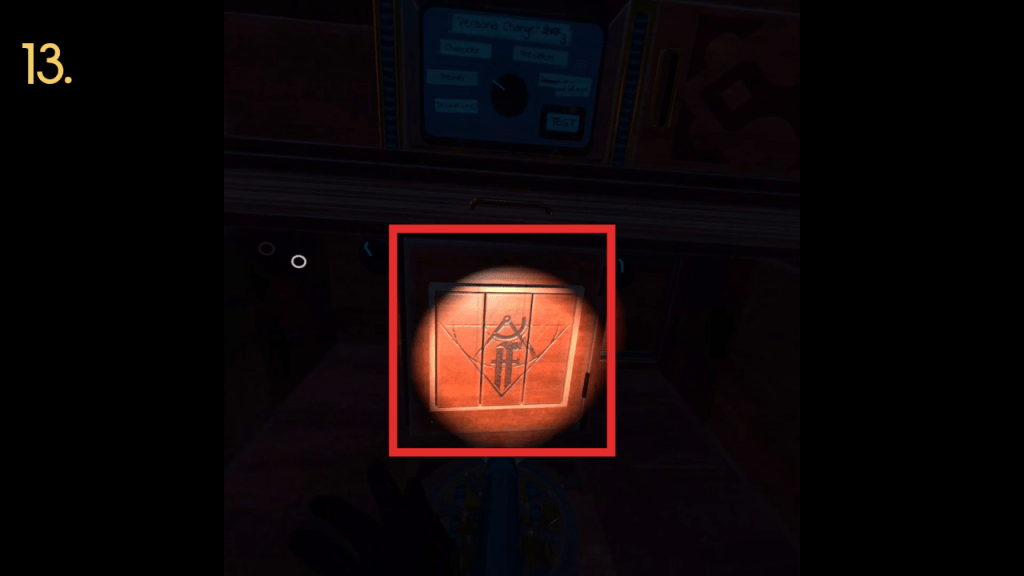
The finished logo should look like this.
7. Open the top section of the drawer and grab the wire cutters from the top section.
8. Pull the bottom drawer on the top left side slightly ajar and use the wire cutters to disable the booby trap.
9. Grab the chisel from the now open drawer and insert it into matching slot on the upper right side of the desk.
10. Grab the small wheel from above and insert it into the gears on the desk right in front of you. Rotate the wheel to raise another hidden compartment.
11. Open the left hand cabinet to grab the flathead screwdriver.
12. Use the screwdriver to remove the screws from the previously opened section on the upper right side of the desk. This will reveal another dial. Rotate to create an upside down triangle.
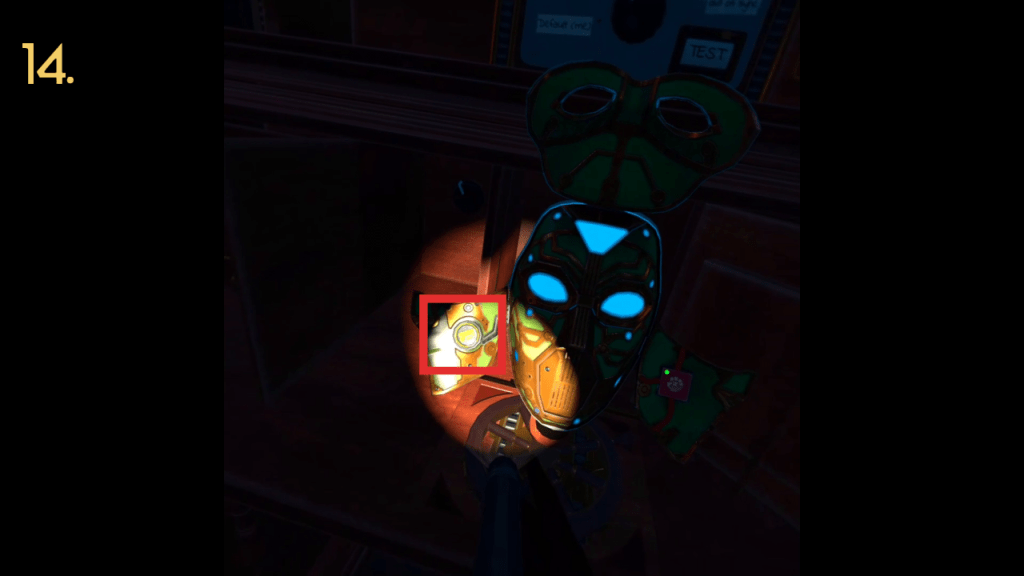
13. Insert the flathead into the corresponding slot on the left hand side to reveal the final dial. Rotate to finish the upside down triangle. This will reveal the new mask.
Remove the battery on the left hand side. 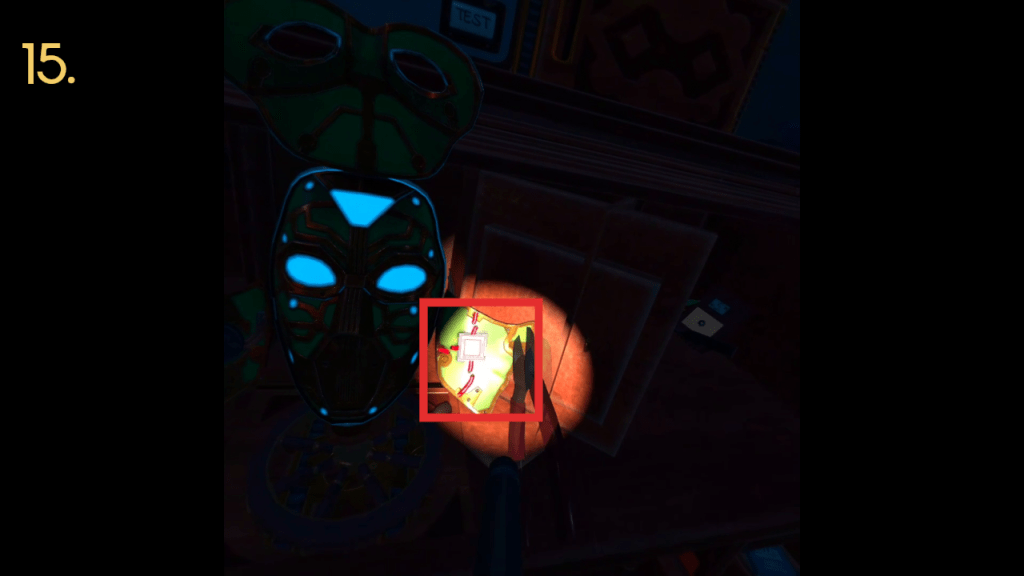
Cut the wires of the chip and remove it to place the tracker underneath. 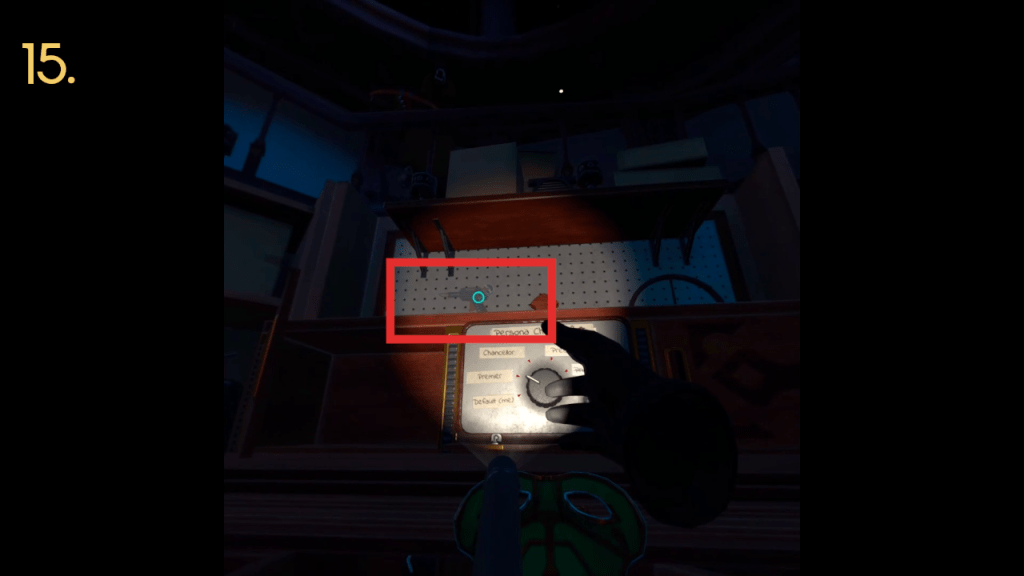
Use the soldering gun on the wall to repair the wires. 
Use the wine bottle on Juniper to escape.
14. Remove the battery on the left hand side of the mask.
15. Cut the wires with the wire cutter on the right hand side. Remove the chip and place the tracker inside, then replace the chip and use the soldering gun hanging on the wall in front of you. Replace the battery to finish.
16. Wait for John Juniper to walk into side and smash the bottle into him.
17. Winch up to finish the level.
4 – Operation Party Crasher (Click on pictures to embiggen)
Grab the middle wine bottle. 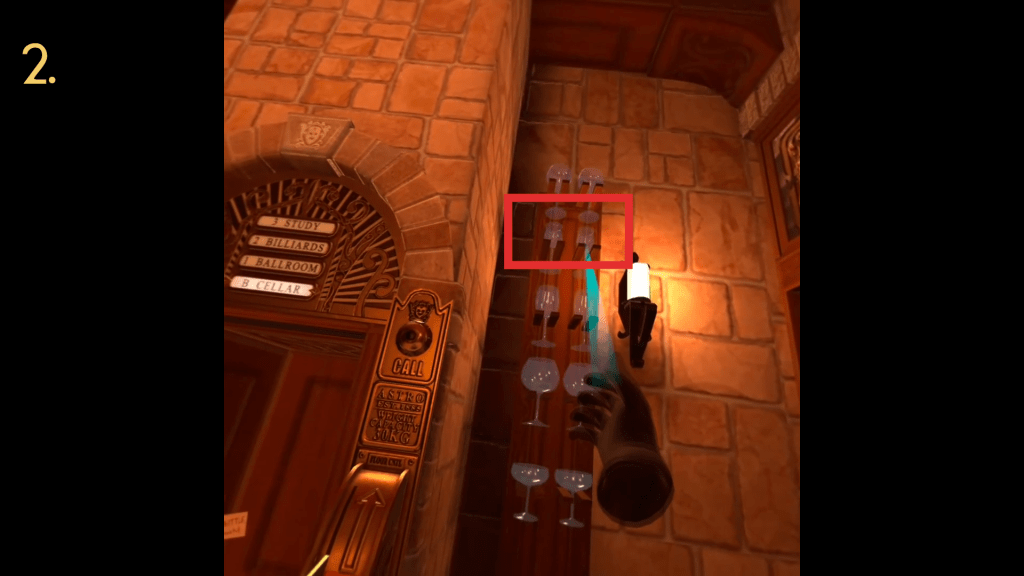
Grab the second from the top glasses. 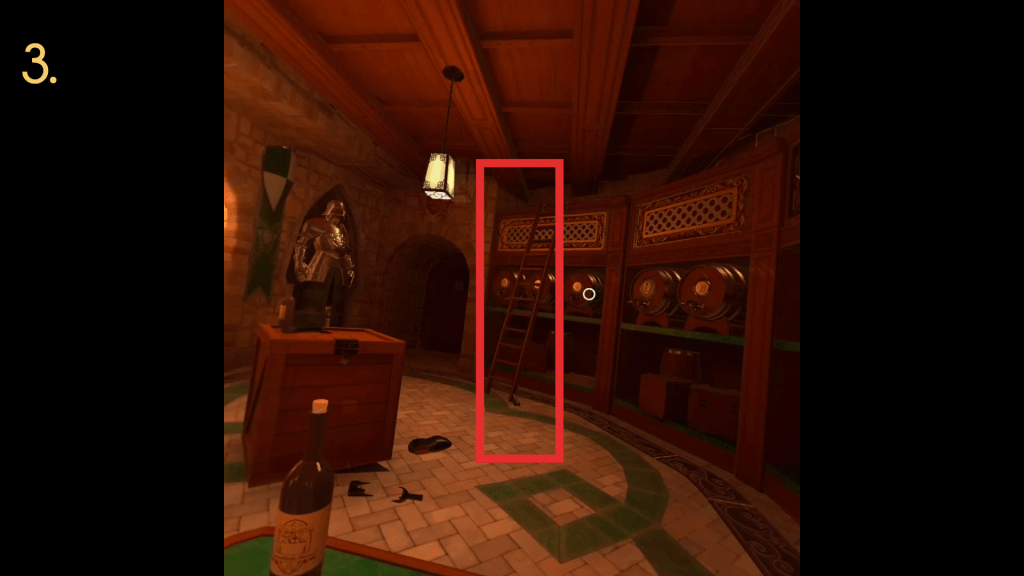
Move the ladder over to the second barrel. 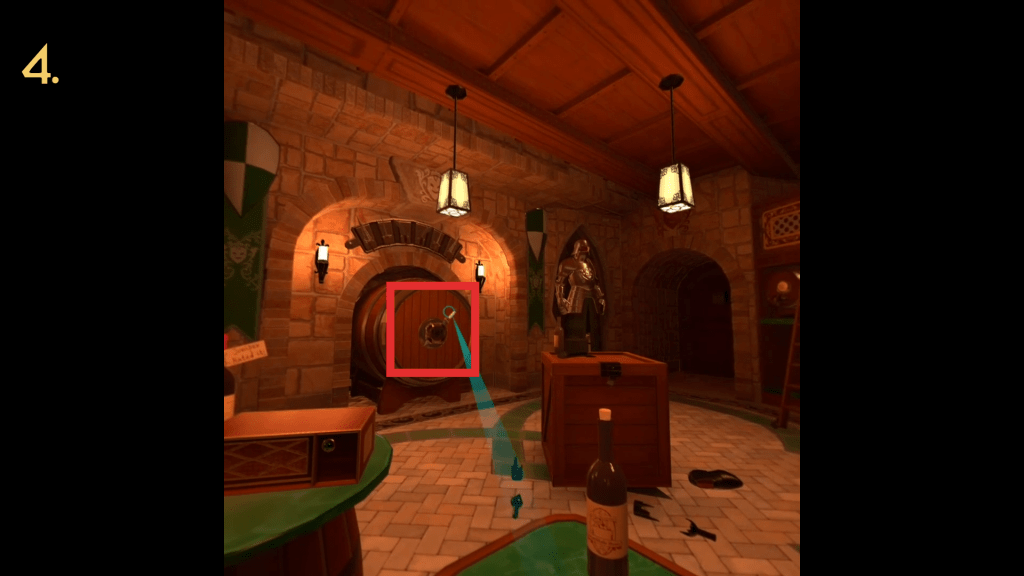
Remove the swords. 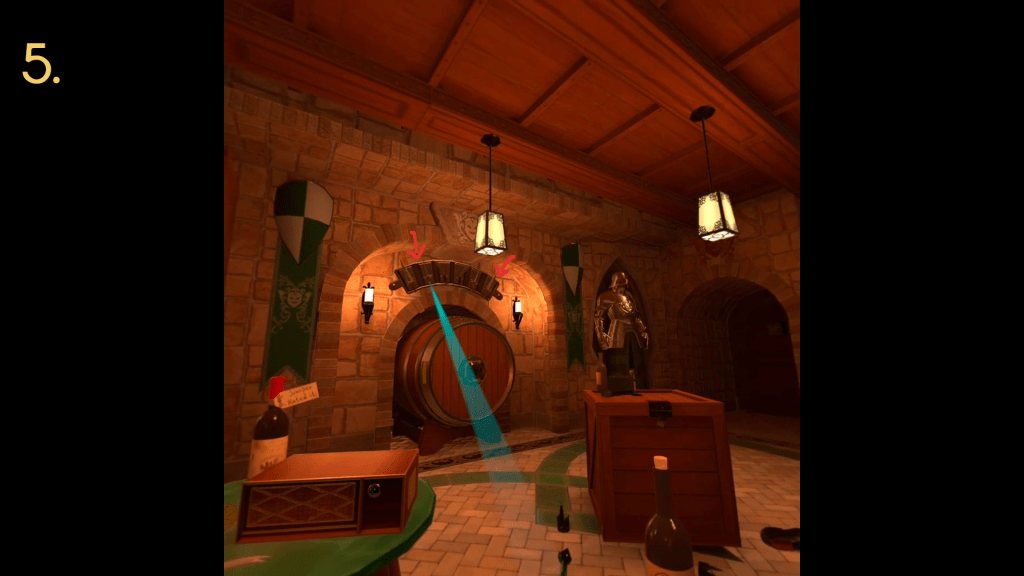
Replace them with the second from the left and right most daggers. 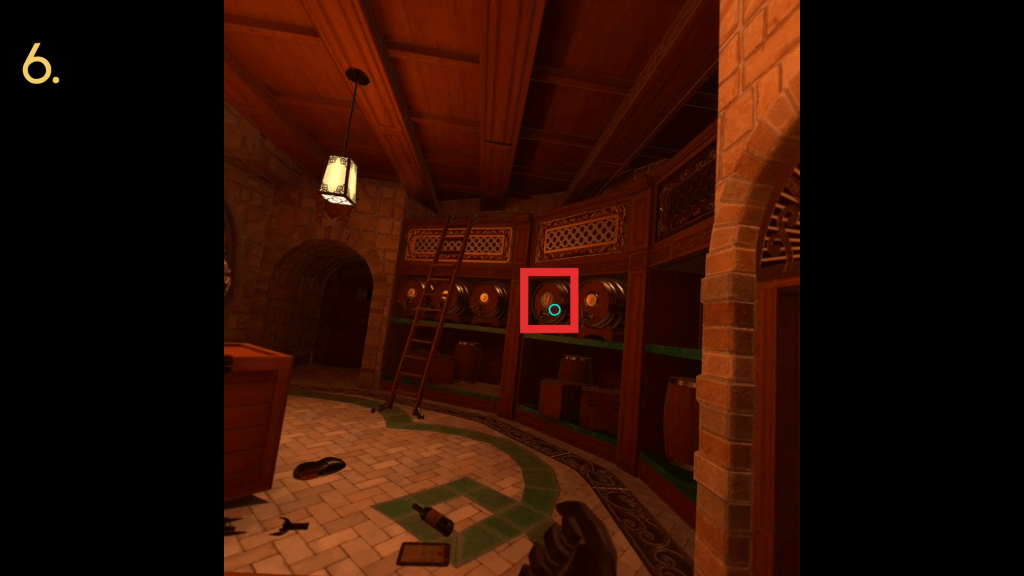
Place the key onto this barrel.
1. Grab the middle wine bottle and put it onto the dumbwaiter.
2. Grab the wine glasses second from the top and place two onto the dumbwaiter and send it to the first floor.
3. Slide the ladder to the second barrel to get ready for the next section.
4. Pull both the swords out of the large cask to your left.
5. Insert the second from the left and the right most daggers into the large cask to unlock it and pull it open.
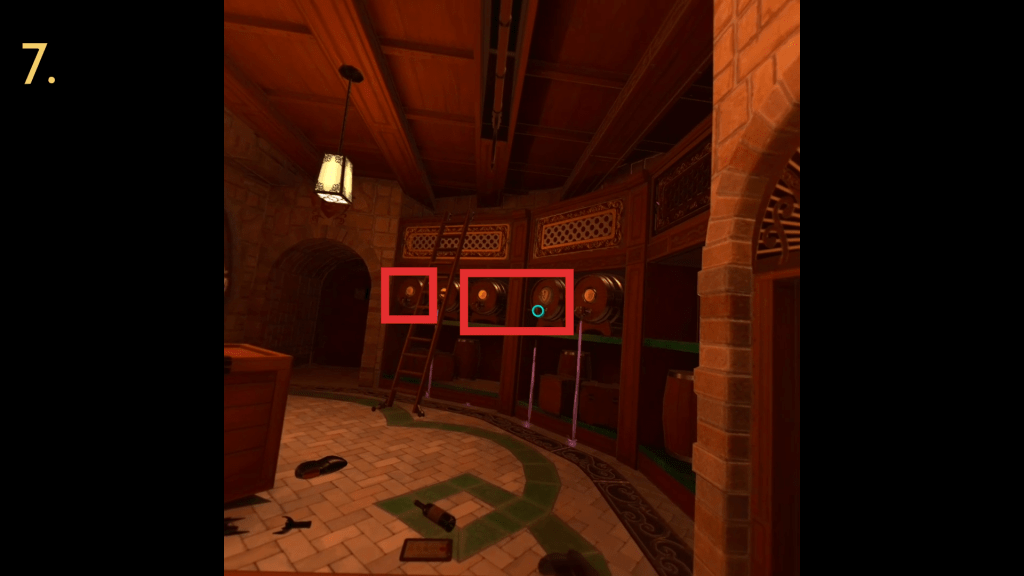
6. Grab the key that Juniper sends you from the dumbwaiter and insert it into the barrel second from the right. This will activate all the barrels.
Turn the first, third, and fourth barrels off. 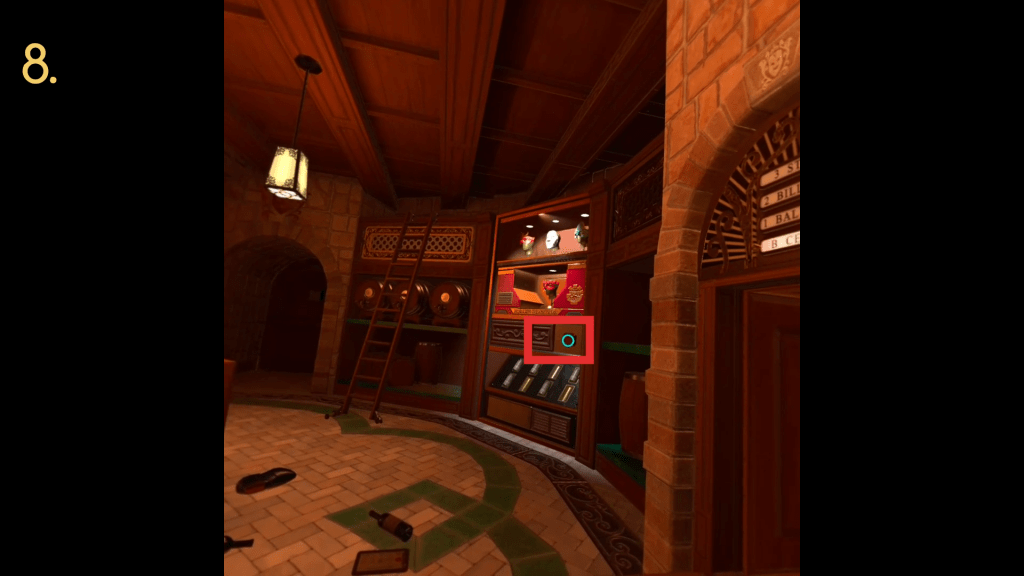
Press this right side on the panel to reveal a secret switch. 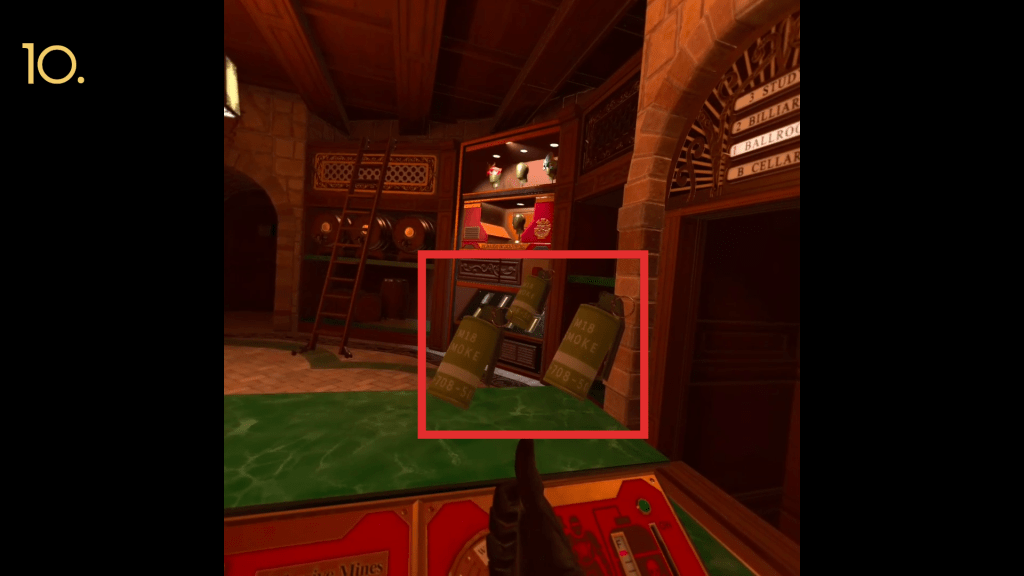
Save some smoke grenades in front of you for later. 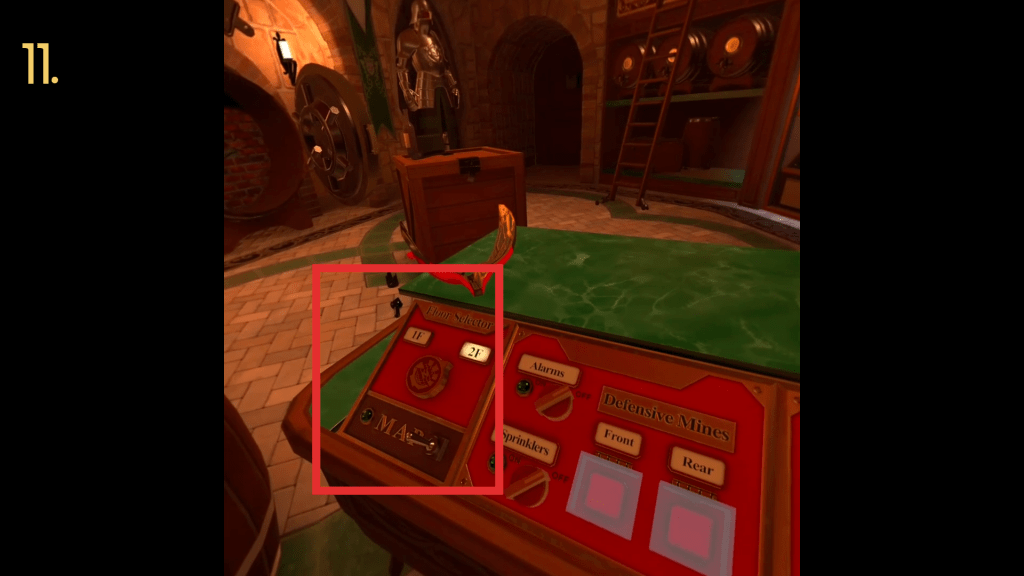
Flip the map to the second floor. 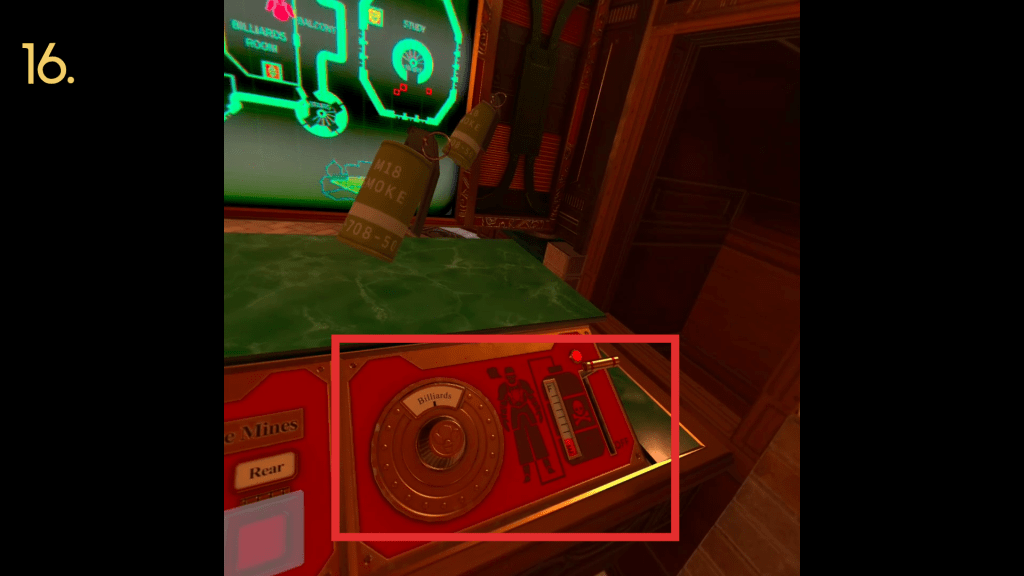
Make sure the gas is empty! 
Throw smoke grenades through this hole in the door.
7. Turn the first, third, and fourth barrels off (starting from the left hand side).
8. Press the right hand side of the thin wooden panel to reveal a switch. Press the switch to reveal a console with a map in front of you.
9. Grab the white mask and put it onto the dumbwaiter and send it up to the first floor and press the buzzer.
10. Grab some smoke grenades and keep them ready in front of you.
11. Turn the floor selector to 2F and turn the map on. Select the Upstairs Bar and release some gas. You need to empty it all of it so this is to save some time.
12. Bring the dumbwaiter back down and pull the ring from a smoke grenade and place it onto the dumbwaiter and send it back to the first floor.
13. Look at the map. When a goon enters the upstairs bar, activate the gas to knock him out.
14. Switch rooms to the gymnasium and activate the gas to knock out the second goon.
15. Finally send the dumbwaiter to the third floor and press the buzzer to lure the goon into the billiards room.
16. Activate and hold the gas until it runs out.
17. Turn the map off to get ready for the next section.
18. Grab the briefcase from the dumbwaiter once Juniper sends it down.
19. When Juniper orders the goon to shoot you, toss some smoke grenades through the small view port in the door. You can also block the shot with the briefcase.
20. They will toss a grenade in. Grab the grenade and move it to the large cask to break the wall down and escape.
5 -Operation Stage Fright (Click on pictures to embiggen)
Use the butter knife to open this drawer. 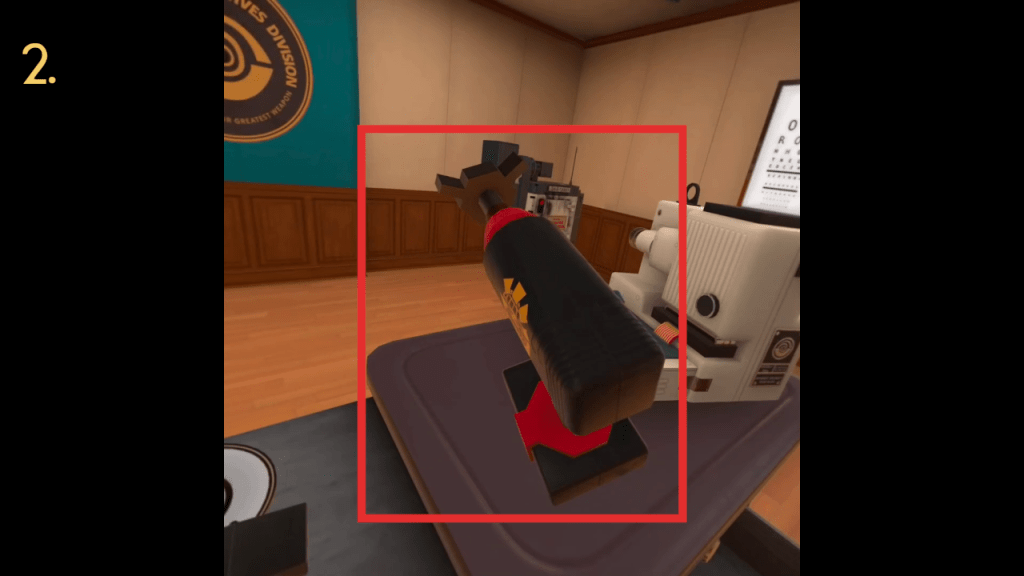
Grab the drill and attachment. 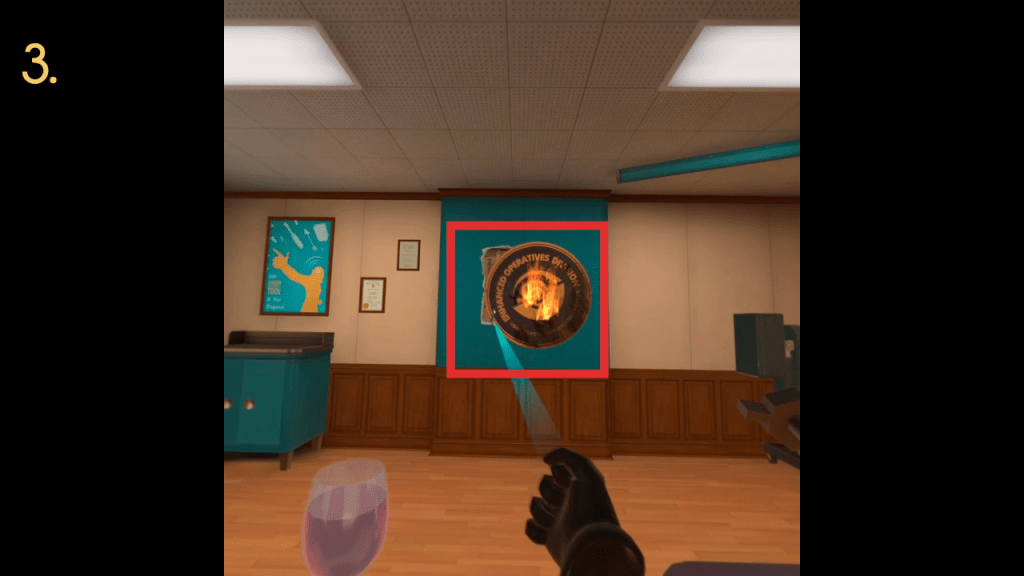
Use the lighter to burn down the logo. 
Move an item at Juniper to skip his evil monologue. 
Move the lighter at the camera and rocket launcher to destroy them. 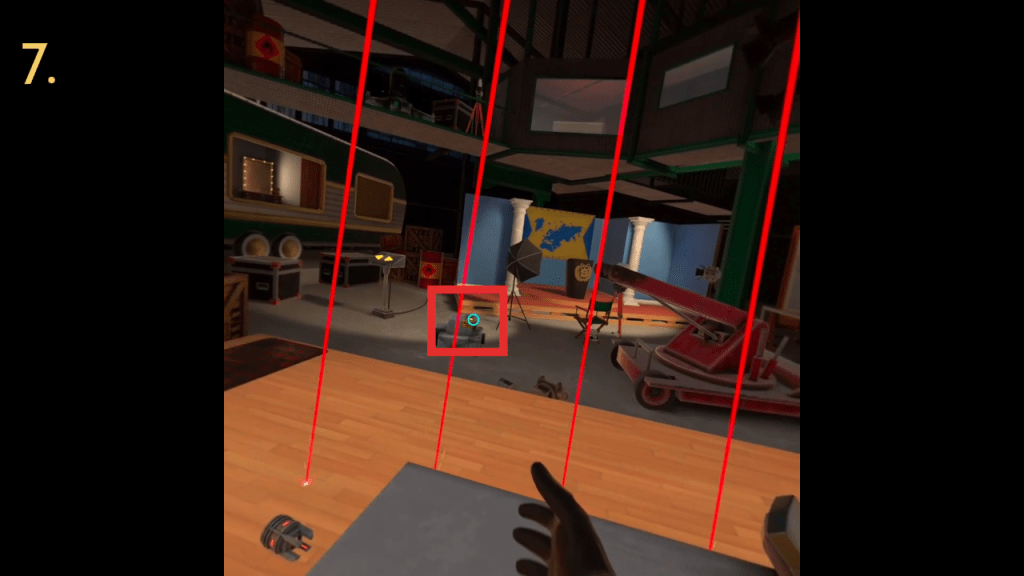
Grab the battery from the wreckage.
1. Grab the butter knife and use it to open the lower drawer on your right hand side.
2. Grab the lighter, drill, and drill attachment. You can attach the drill and the attachment in one motion as you grab it.
3. Turn the lighter on and burn the logo in front of you.
4. Once the laser prison is activated, grab the lighter and move it towards Juniper to skip the dialogue.
5. Move the lighter to the camera to destroy the laser beam.
6. Next, move the lighter to the rocket launcher to destroy it.
7. Grab the battery from the now destroyed rocket launcher and the laser beam attachment from the now destroyed camera.

8. Attach the battery to the drill, turn it on and remove the panel from the laser prison. This step may not be necessary.
9. Attach the laser attachment to the drill and aim it at the trailer.
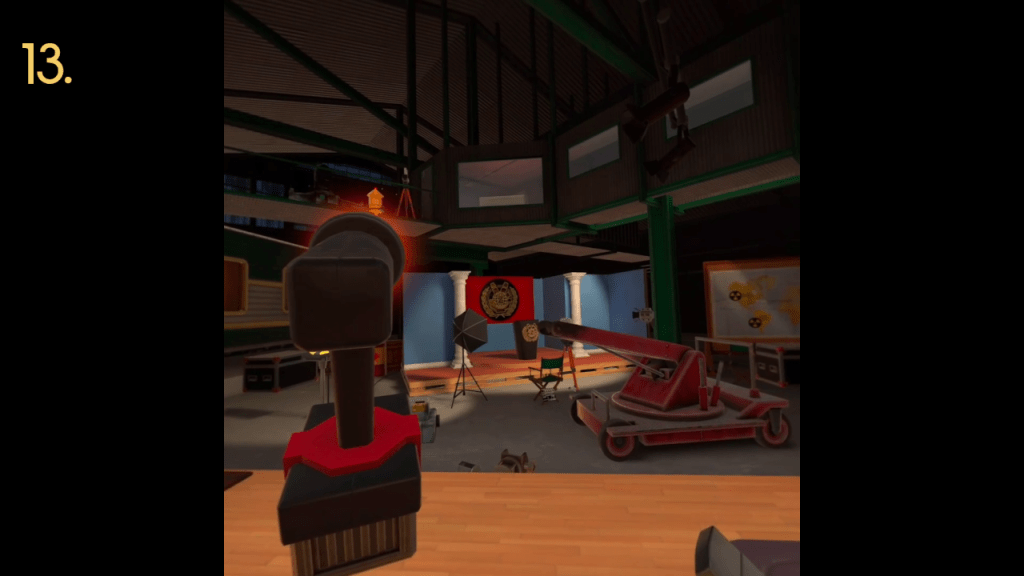
10. Press the yellow arrows on the console until the Zoraxis logo shows up on the wall of the news set.
11. Shoot the laser at the mirror inside the trailer.
12. Move the mirror until the laser hits the Zoraxis logo and bounces into the laser prison.
13. Use the laser to destroy the case on the upper walkway and you can light up the water tower in the far distance.
6 – Operation Rising Phoenix (Click on pictures to embiggen)
Grab this far right keycard. 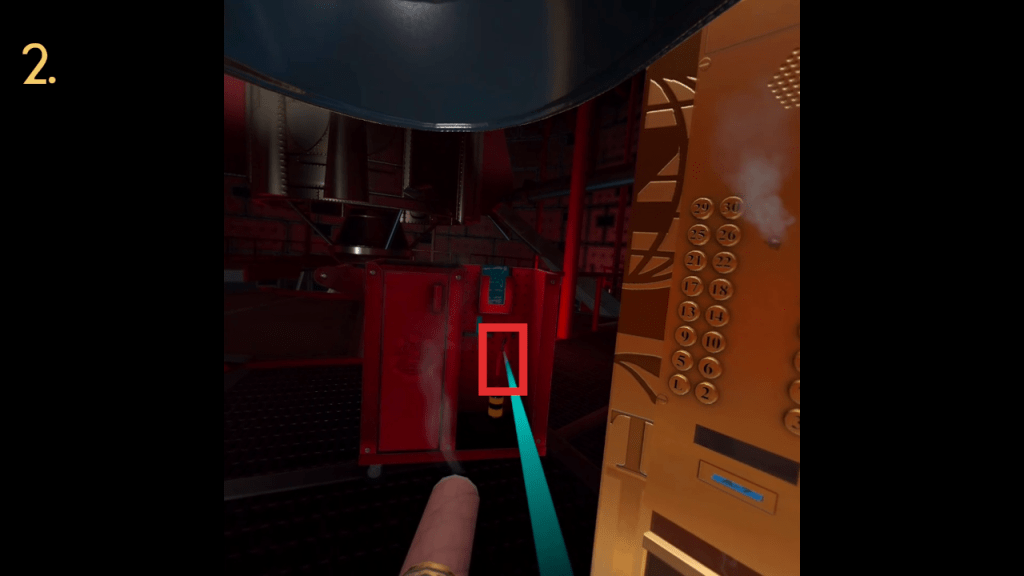
Grab the wire cutters. 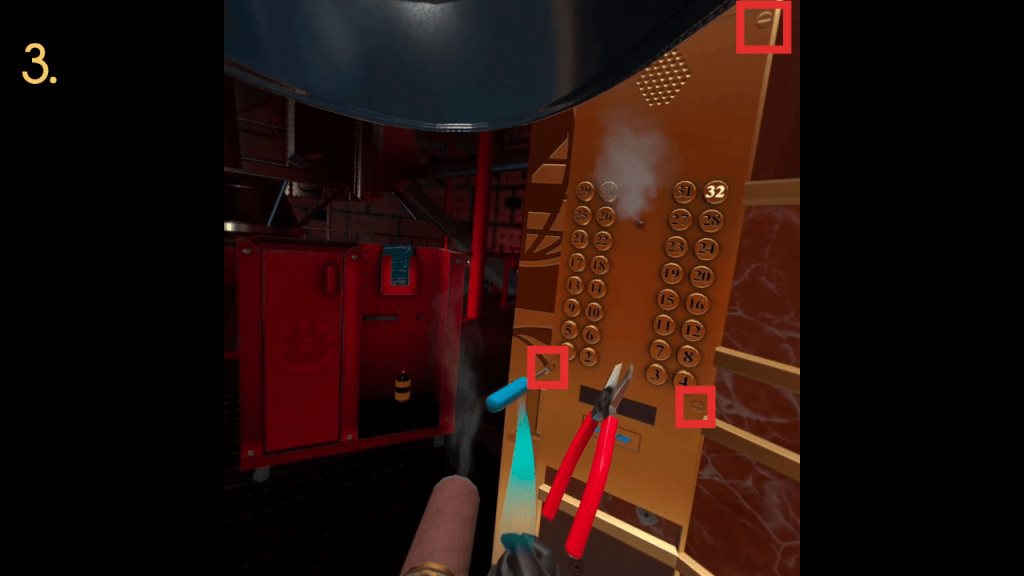
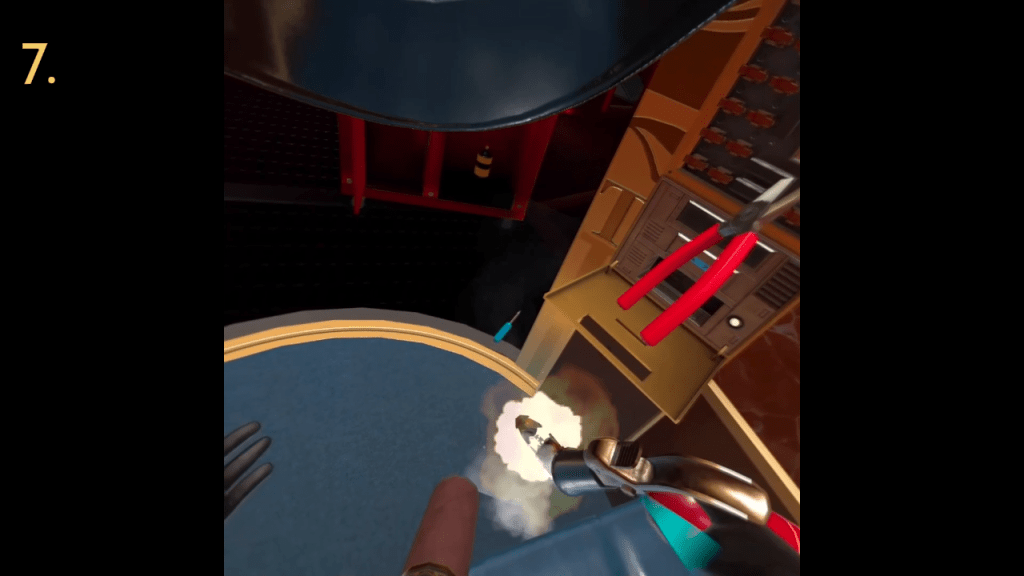
Use the screwdriver to remove the 4 panel screws. 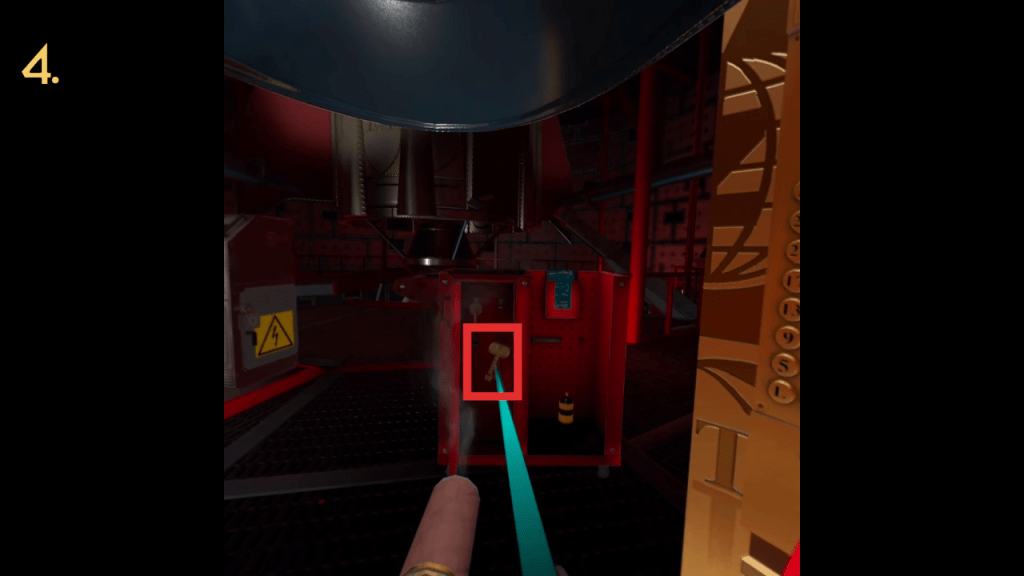
Use this elevator access key to open the hatch. 
You’ll need this hatch open to stop the saw later. 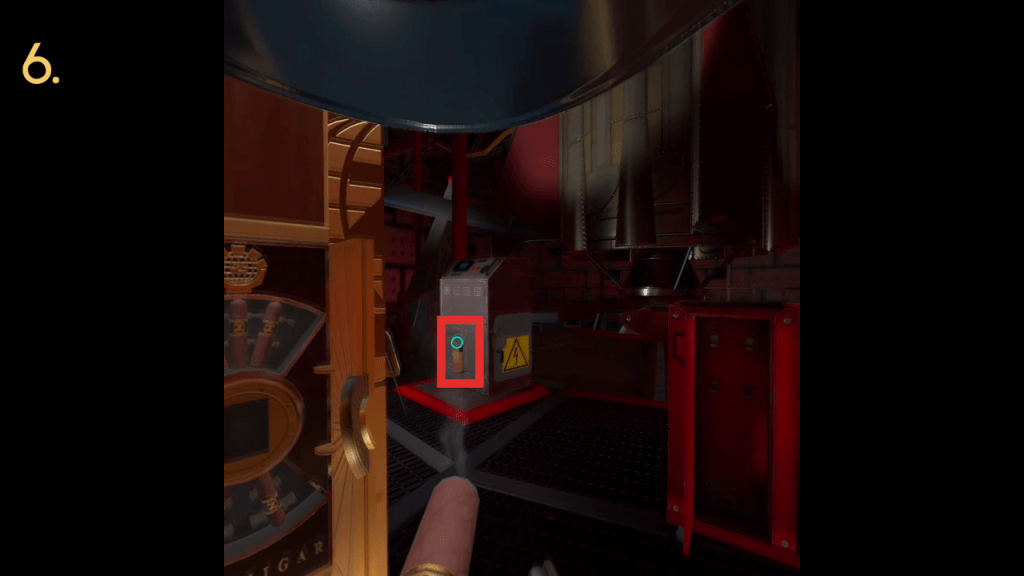
Grab the fire extinguisher.
1. Grab the far right card key (it’ll have an A-7 security clearance) and insert it into the elevator card slot and press the 32nd floor button.
2. Grab the wire cutters from the right and place it near you.
3. Grab the screwdriver and remove the four screws from the elevator panel.
4. Open the cabinet and grab the elevator access key to open up the hatch above you.
5. Grab the smaller key and keep it next to you.
6. Grab the fire extinguisher and have it ready.
Use the fire extinguisher to stop the fire once you remove the elevator control panel. 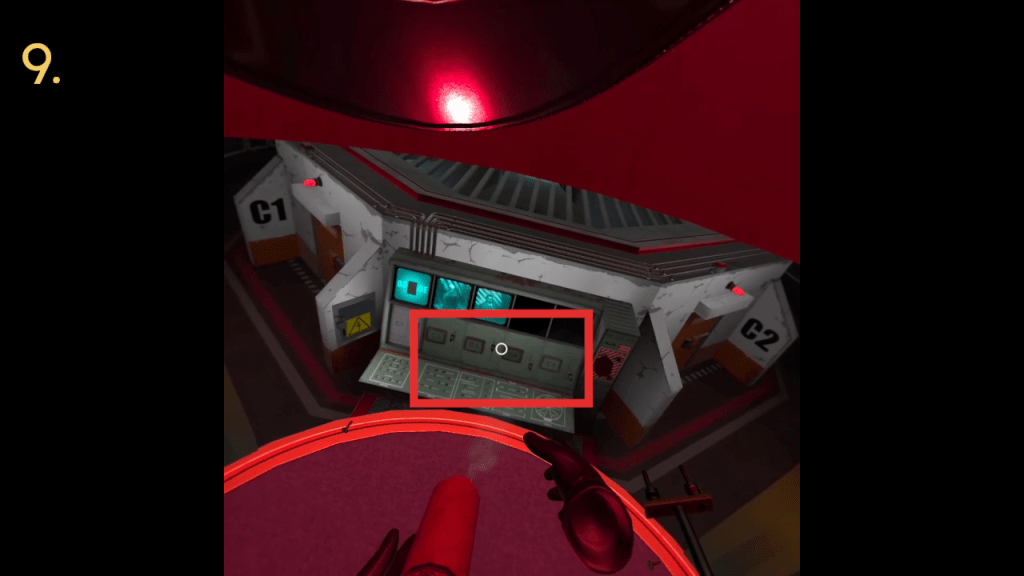
Pull the switches down to free the prisoners. 
Use the key on this lock to get access. 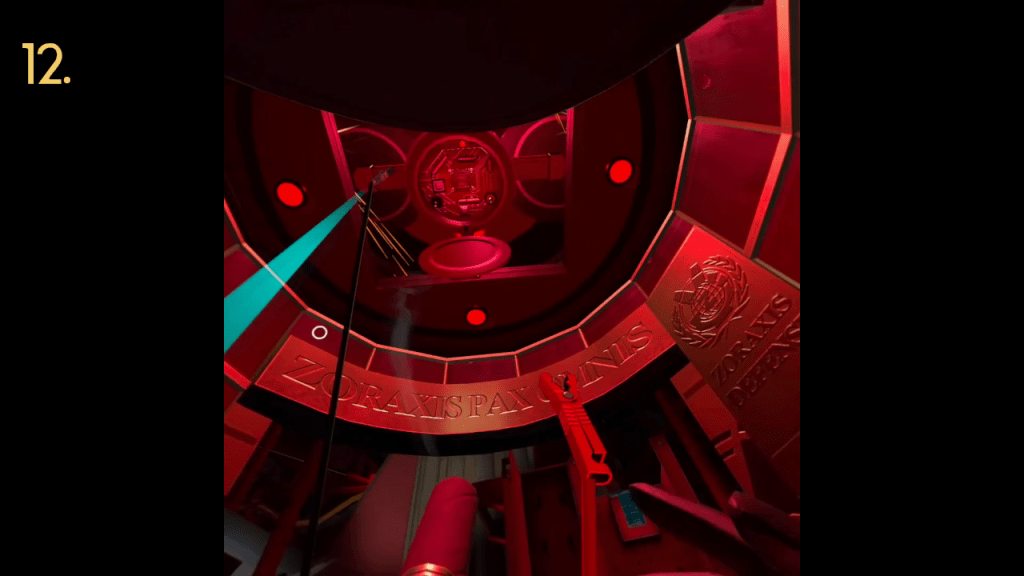
Stop the saw by connected the battery to it. 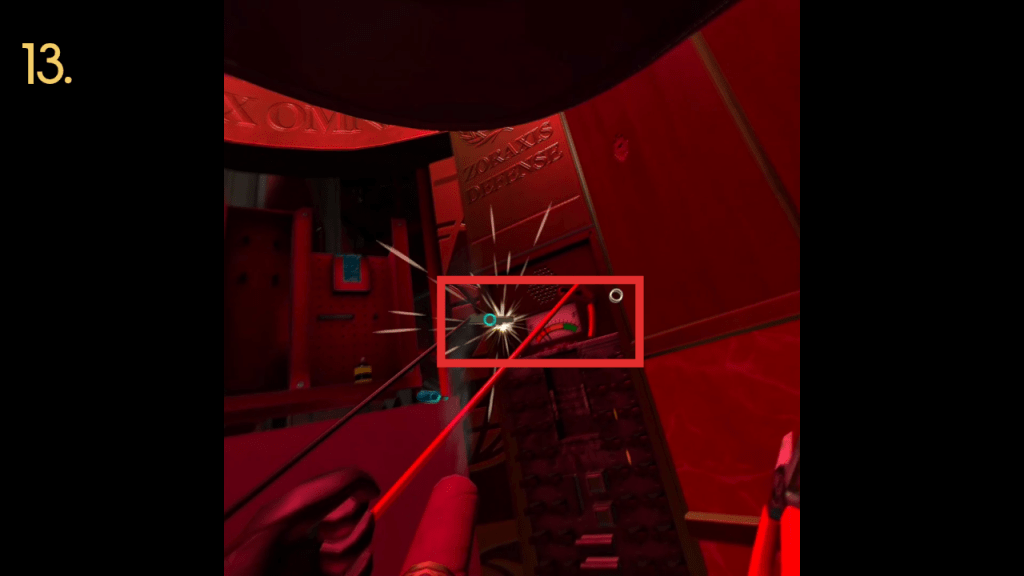
Connect the now charged battery to power the elevator. 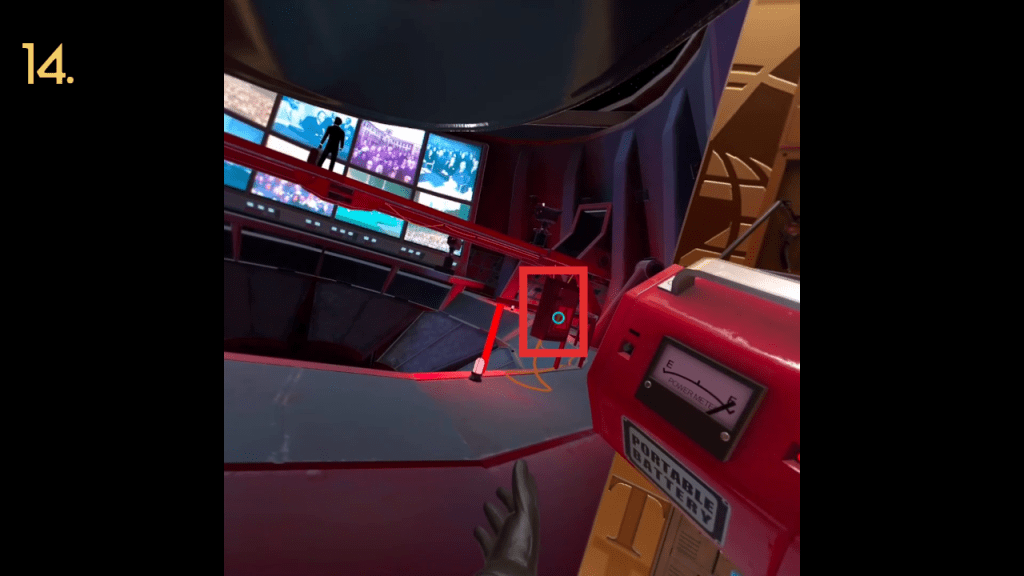
Open this panel and pull the switch to stop Juniper.
7. Once you remove the elevator control panel, a device will roll out and catch on fire. Use the fire extinguisher to put out the flames.
8. Use the wire cutters to cut the red and black cables.
9. Pull the switches down on the panel in front of you to free the prisoners.
10. Use the key to open the lock on the access panel and pull the switch down. This will open a door with a battery.
11. Grab the battery and have it ready in front of you.
12. Once the saw drops, open up the panel and connect the battery to it. This will drain the saw and stop it completely.
13. Connect the now fully charged battery to the elevator to power it again.
14. Once you get to the top floor, open the access panel on the right side and pull the switch down to say goodbye to John Juniper.
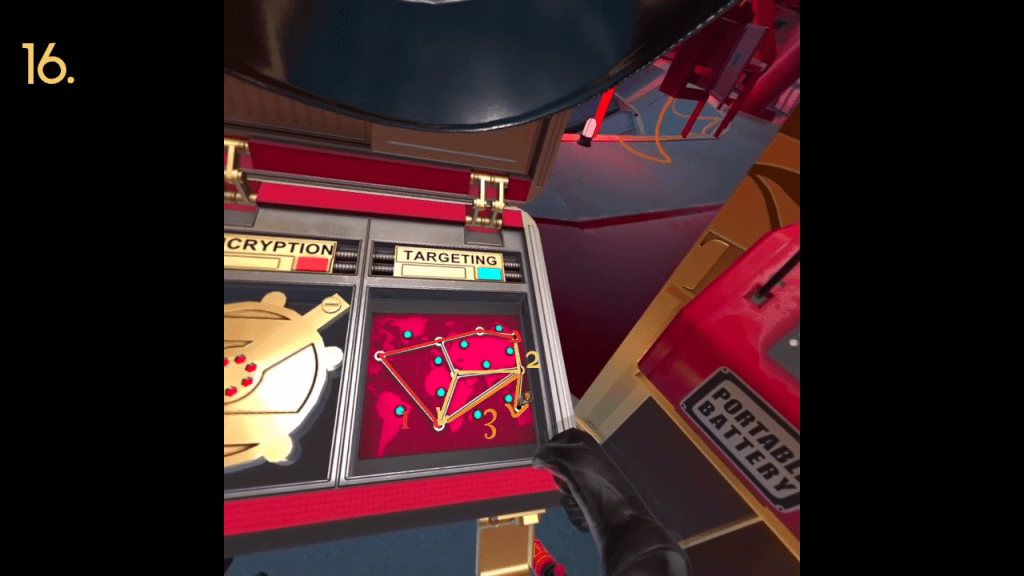
15. Once you open up the briefcase, you will have three puzzles.
Pull the pin in this pattern to light all the lights. 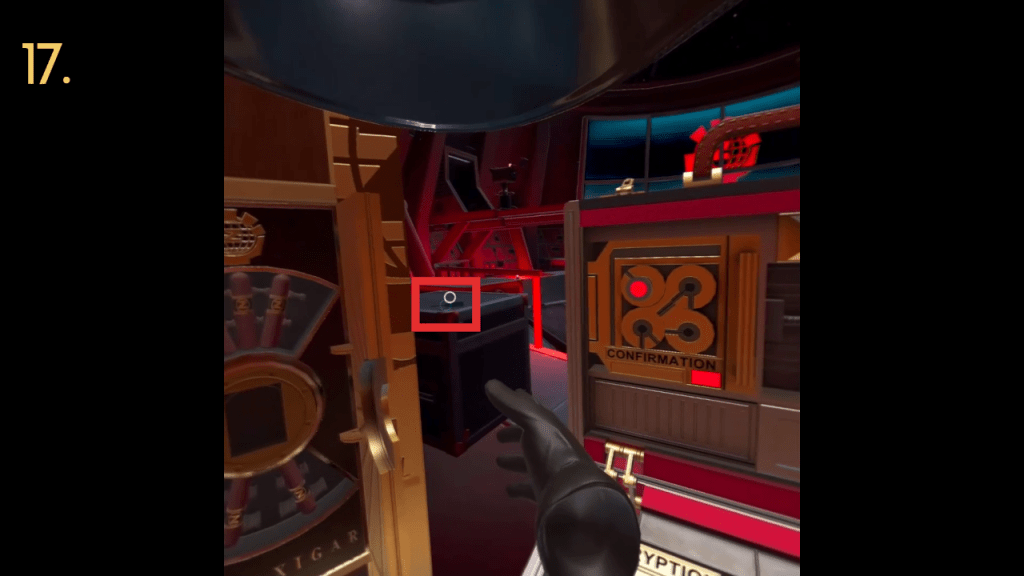
Grab the screwdriver. 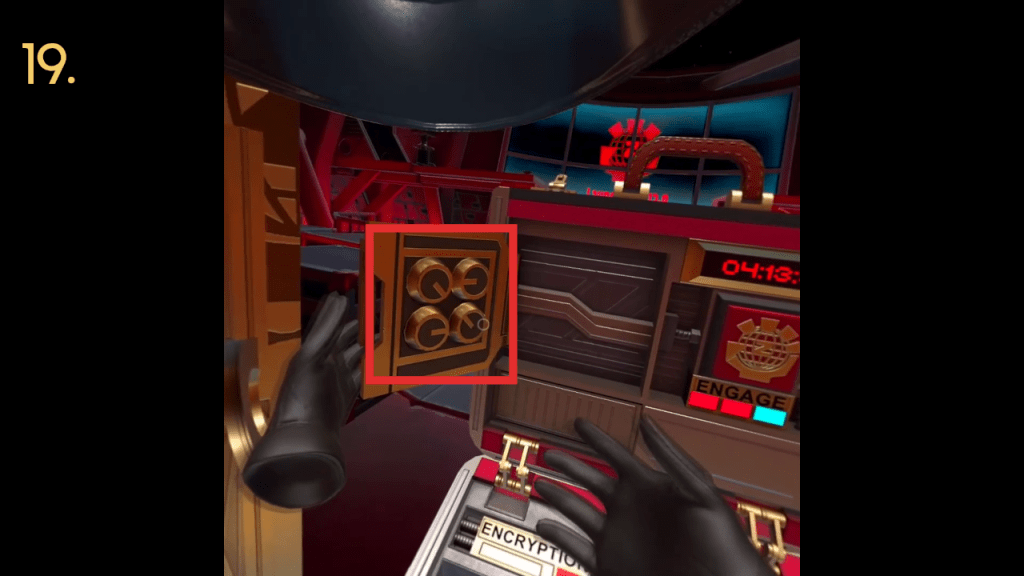
Rotate the dials this way to form a Z. 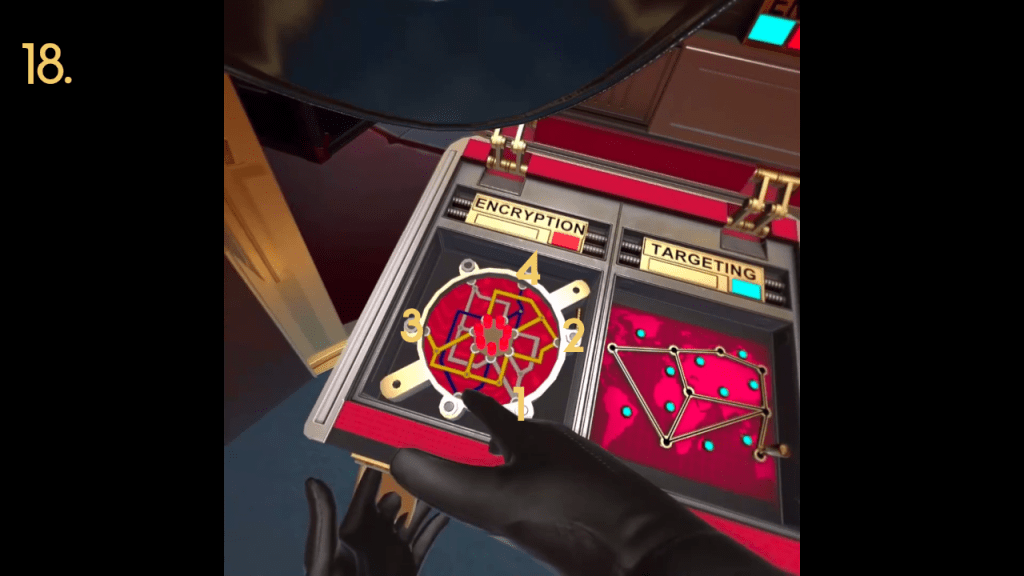
Press the switches in this order to light up all the lights. 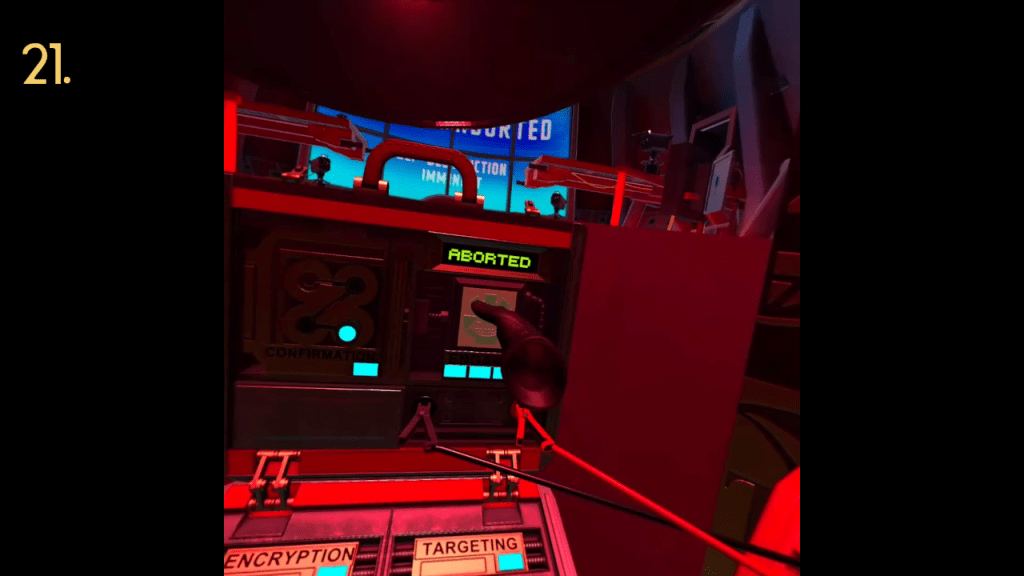
Now you’re finished with the game! Congratulations!
16. For the pin puzzle, you need to rotate it clockwise fully and bring it back through the middle path. From there, bring it all the way to the right using the bottom most path to light up all the lights.
17. Grab the screwdriver from the left hand side.
18. Remove the screws from cylinder. For this puzzle you need to hit the switches in the right order to turn on all the lights. You can press the lower right grey button first, followed by the upper right yellow, followed by the lower left yellow, and finish with the upper blue switch. This should light up all the center lights.
19. For the top puzzle, you need to rotate the circles until they form a Z. The upper left dial should be facing the lower right diagonal, the upper right dial should be facing left, the lower left dial should be facing right, and the lower right dial should be facing upper left. You can now move the stick in a Z pattern to activate the light.
20. With all three lights on, you can press the engage button.
21. There will not be enough power so you need to disconnect the battery from the elevator and connect it to the briefcase. Press the button again and this will end the game!
