Refer to the video above if you require more assistance.
Full Guide (Refer to the pictures for more help. The pictures will be numbered to match the step for each section. Refer to the video embedded above if you need additional references).
First Island – Elevator (Click on pictures to embiggen)
2. The ceiling panel shows a pattern (LRL)
4. Insert into these holes and flip all switches up.
After activating the elevator, it will break. You can use the thumbsticks to raise yourself to the ceiling panel.
Open the ceiling panel to reveal a pattern (Left, Right, Left, Button).
Lower yourself to the main console and input the pattern (L, R, L).
Insert the plugs into the middle right and lower left holes as shown.
Flip all the switches up, this will get you into the Nauticrawl.
First Island – Nauticrawl
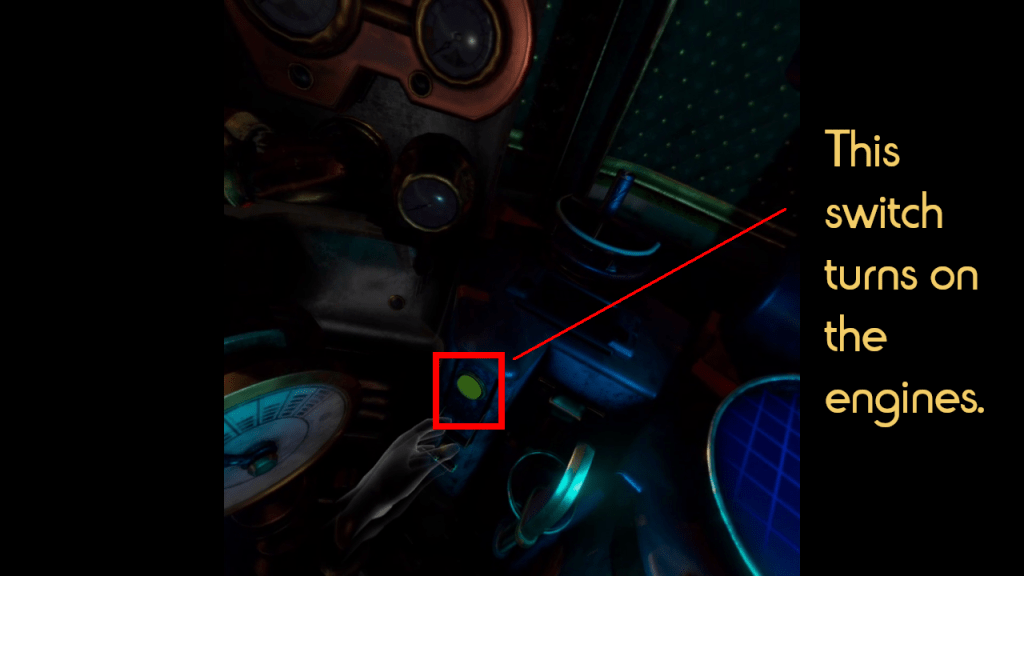
1. This turns on all the panels.
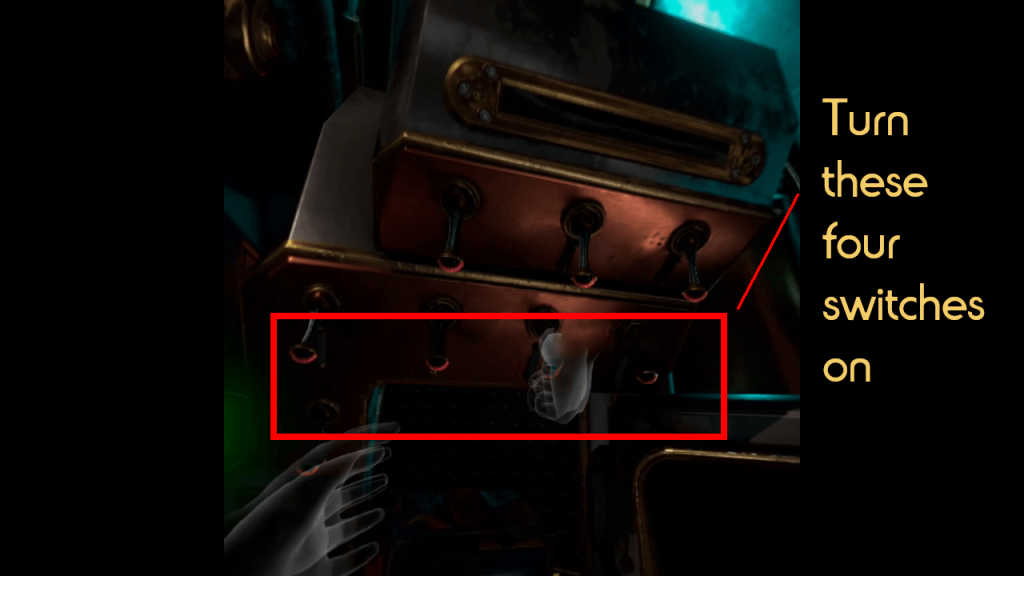
2. Turn these 4 switches on.
3. This button starts the engine.
4. These control fuel injection.
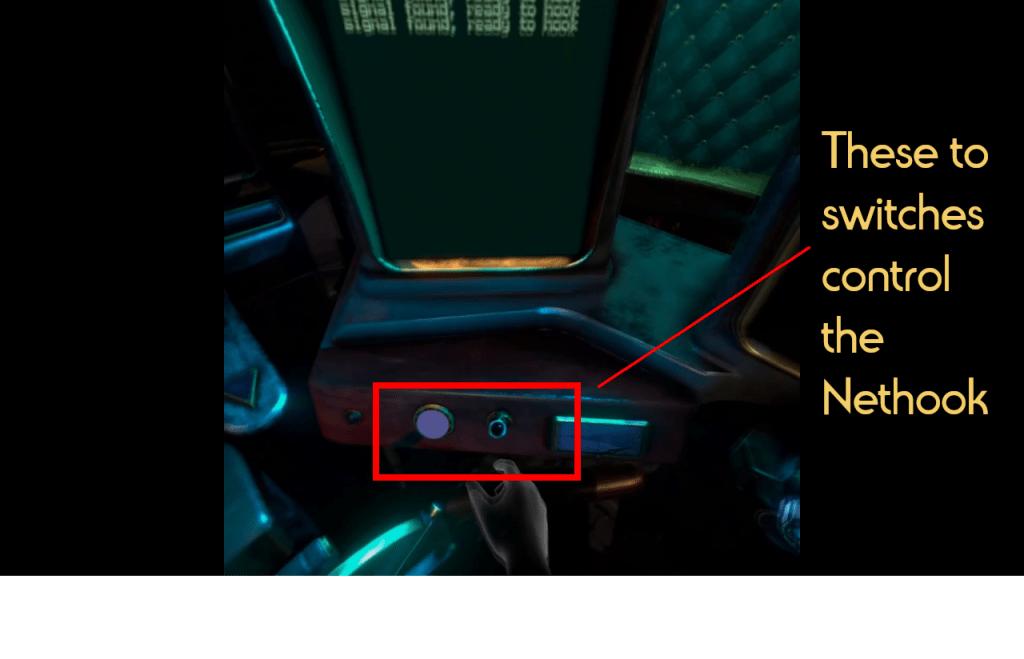
9. Nethook launcher.
Flip the large power switch located in the upper left side. This will turn on all the panels.
Flip all the small switches on the right hand side. These turn on the radar, the pinger, the screen, and the computer.
Swing down the cover on the lower left side and press the button revealed. This will start the engine and power the Nauticrawl.
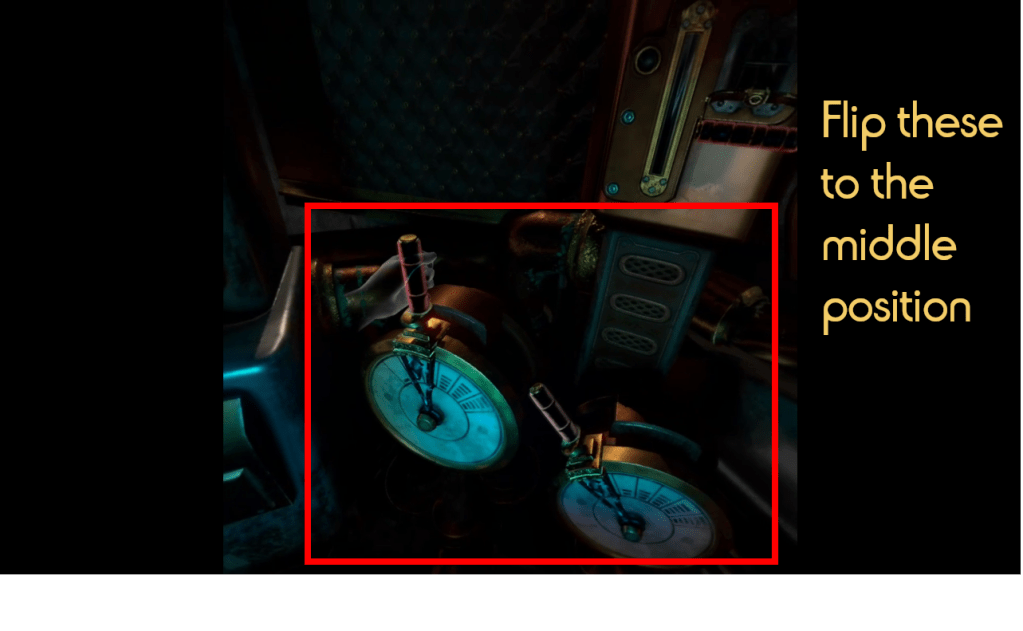
Move both levers to mid. You can increase it if you want but these levers determine how much fuel goes into the Nauticrawl and the speed/distance which you will move.
Turning the dial to middle with engage your cloak. This will avoid enemy encounters.
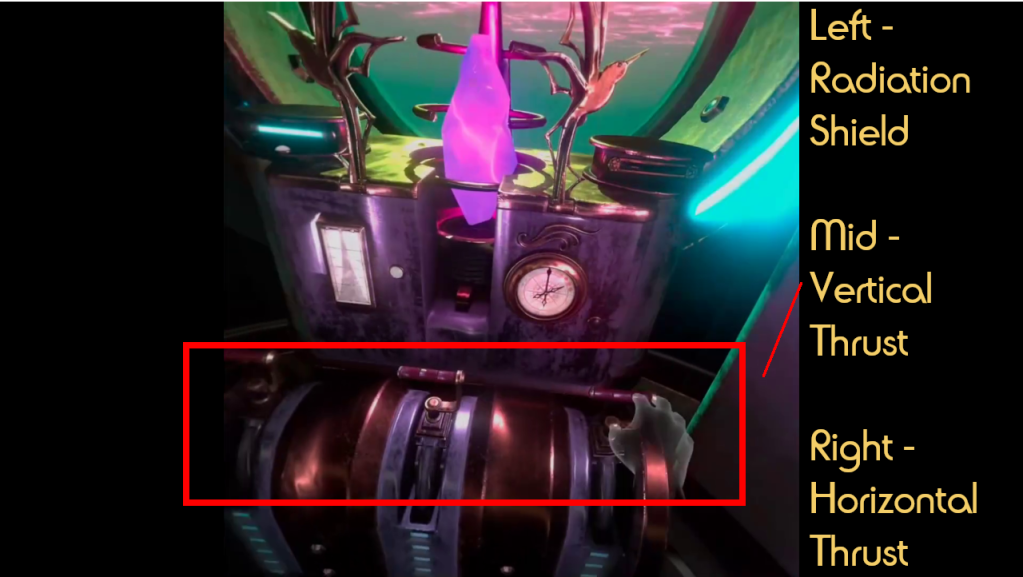
Pulling the vertical lever will move the Nauticrawl in the direction you are facing. The wheel changes the direction.
Press the yellow button on your right most side to receive the broadcast and then dismiss it from the computer.
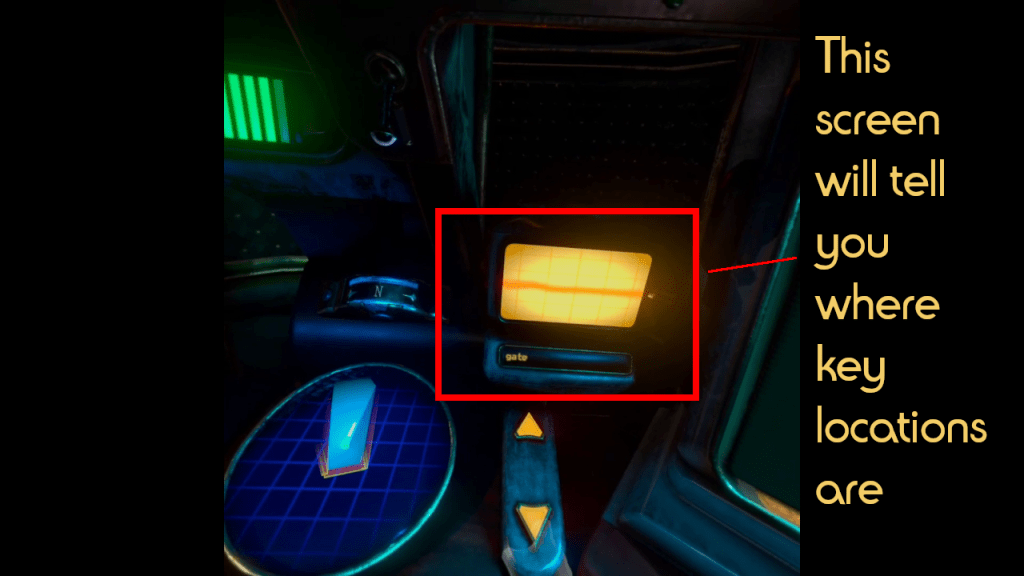
Move to the Gate.
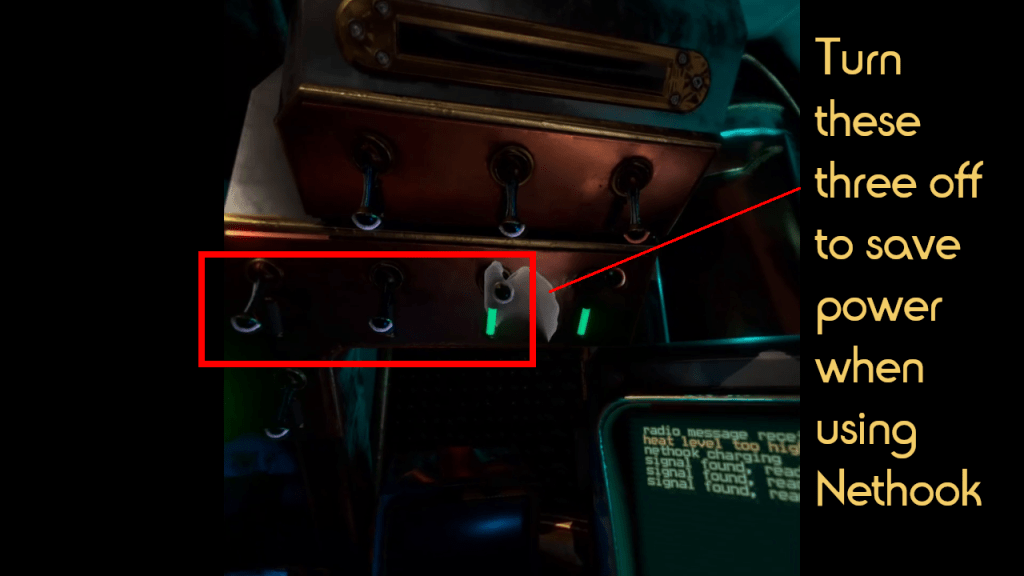
Launch the Nethook at the Gate and take all items. I turn off the first three switches, charge the Nethook, and then launch it, and then turn the first three switches back on to save maximum power.
Move to Worker 89.
Launch the Nethook and take all the items.
Mount the Heraldry Scrambler. This will let you connect to other hostile objects with the Nethook.
Move to the Crystal Tower.
Launch the Nethook and take all the items. The Crystal Tower has the crystal.
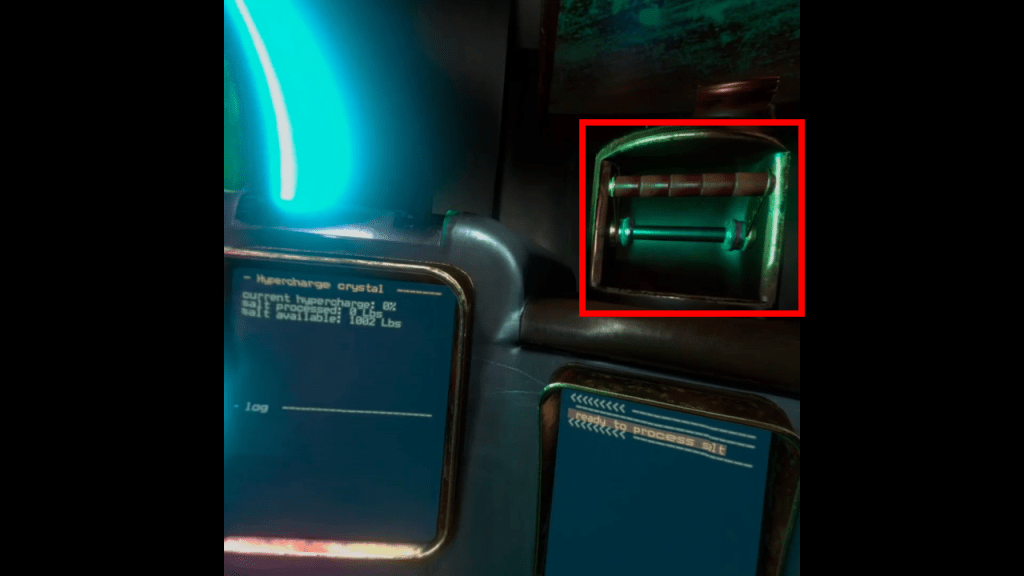
Go to your inventory and use the Crystal.
The three switches at the top right will start flashing, one by one, as the Crystal charges.
Flip the three switches in time with the indicators.
9. Turn these 3 off to save power when using Nethook.
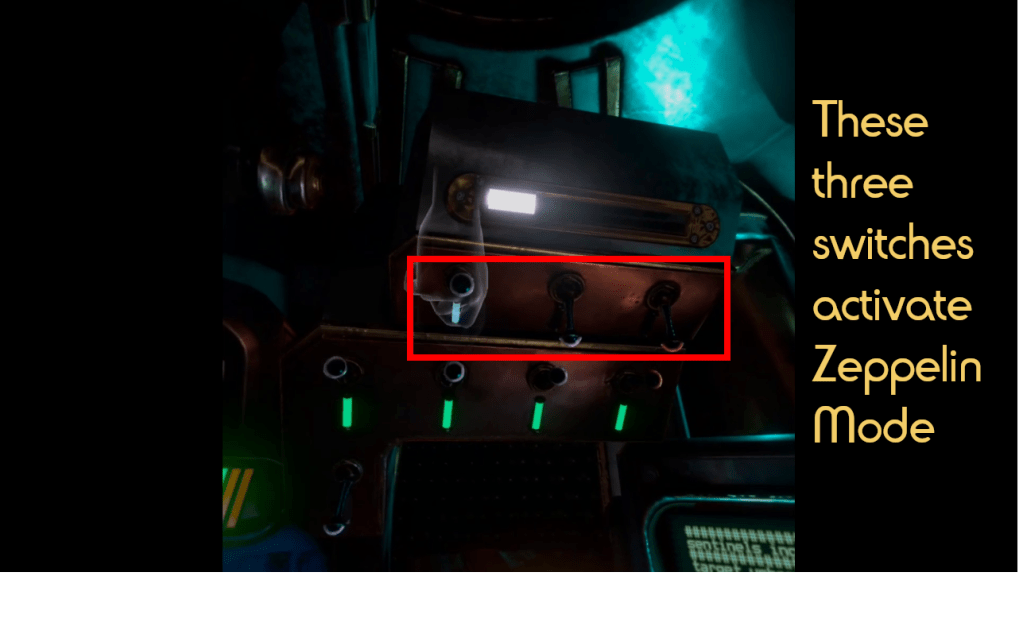
16. These switches activate Zeppelin Mode.
Nauticrawl – Zeppelin Mode
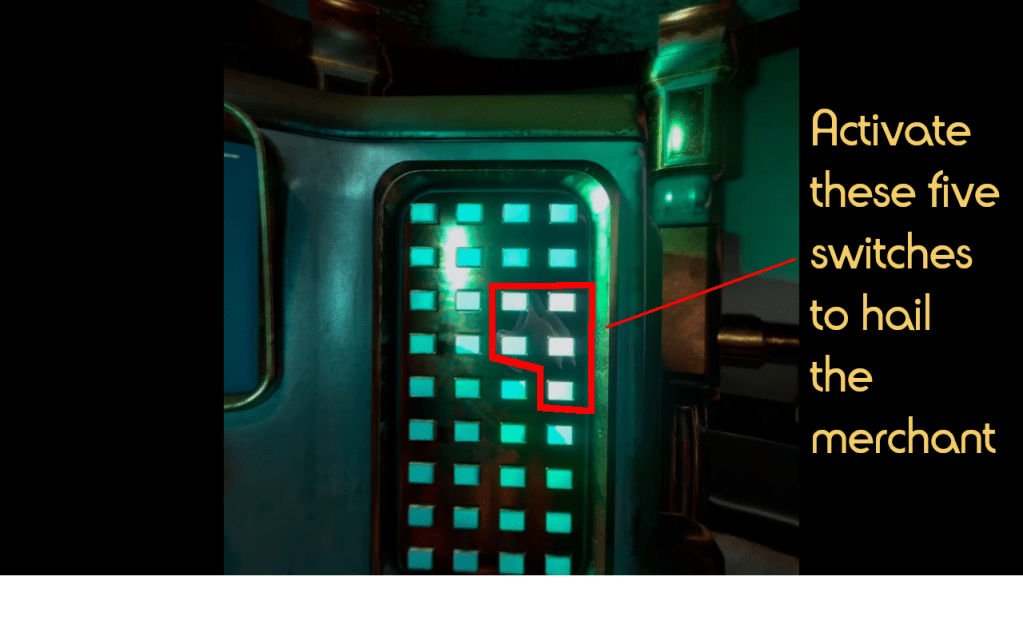
1. Press these to hail the Merchant.
4. Weigh anchor.
5. Use these levers to move.
Press the blue buttons that are fully white and press the console to hail the merchant.
Select Enquiries, and then The Lighthouse, and then Ask About Deal, and then Deal to receive the map.
Go to Map Coordinates and select an island.
Turn to your left and weigh anchor.
Push down the right most lever to increase velocity.
When close enough to the target island, decrease velocity and drop anchor.
Turn to the computer and select Start Landing.
Second Island
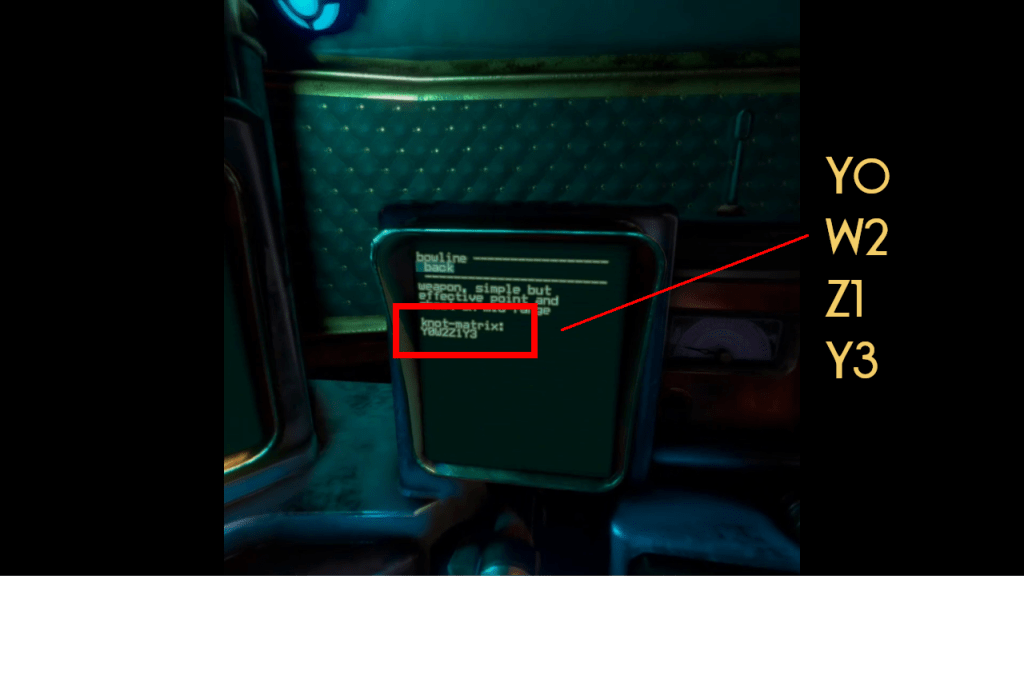
8. This is the code you need to configure the Bowline.
8. Move the plugs to match the code (Y0W2Z1Y3).
Push the button to start the Nauticrawl again and flip the four switches to on again.
Move to the Royal Arsenal.
Stay still then the giant squids are moving.
Launch the Nethook and take all items.
Go to your storage and mount the Knots Accumulator.
Activate the side panel to your right.
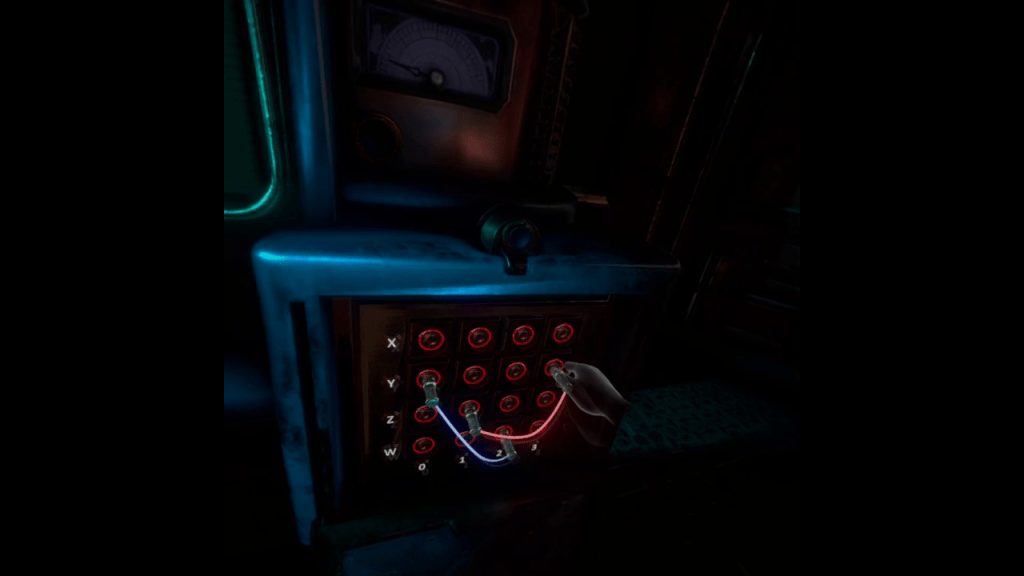
Go to Main Menu and select Knot-Matrix. Select Bowline.
Move the connectors in the panel to set your configuration to the Bowline (Y0W2Z1Y3).
Activate the side panel every time you want to activate the Bowline in the future.
Move to the Alter Terminal.
Second Island – Squid Attack
3. Turn the knobs until you get a straight blue line.
4. Pull this level to zap the tentacle.
As you are moving, you will get attacked by a squid.
Rotate the crank to open the window.
Turn the knobs to your right until the blue beam is solid.
Turn to your left and pull the lever to zap the tentacle.
Second Island – Alter Terminal
Use this button to activate the Bowline every time!
You will know the Bowline is active by checking the display.
Use the Bowline to destroy all five Alter Terminals.
You can do the same trick with the Nethook and turn off the first three switches, charge the Bowline, launch it, and then turn back on the three switches.
The Nauticrawl charges the battery every time it moves. If you run out of power you can either use a battery from storage to recharge or turn off all four switches and move the mech to recharge the battery.
Launch the Nethook at the Alter Terminal and take all items.
Go to your inventory and use the Crystal.
Go activate the Zeppelin mode.
Nauticrawl – Zeppelin Mode
Go to Map Coordinates and select Lighthouse Docks. Weigh anchor.
Pull the right most lever down to increase velocity.
There will be a storm so you can drop anchor and wait the storm out.
After a very short while, you can weigh anchor and get to the Lighthouse Docks.
Select Start Landing.
Light House
Start the Nauticrawl again.
Destroy the Guardian with the Bowline.
Launch the Nethook at the defeated Guardian and take all items. If you have not that much space, you can delete some fuel.
Move to the Lighthouse Gate.
Launch the Nethook and take all items. Use the Plug Key from the Guardian to open the gate.
Move to the Lighthouse.
Launch the Nethook and take all items.
Go to your inventory and use the Crystal.
Go activate the Zeppelin mode.
Nauticrawl – Zeppelin Mode
1. Pull this giant lever down.
2. Pull and hold this lever down.
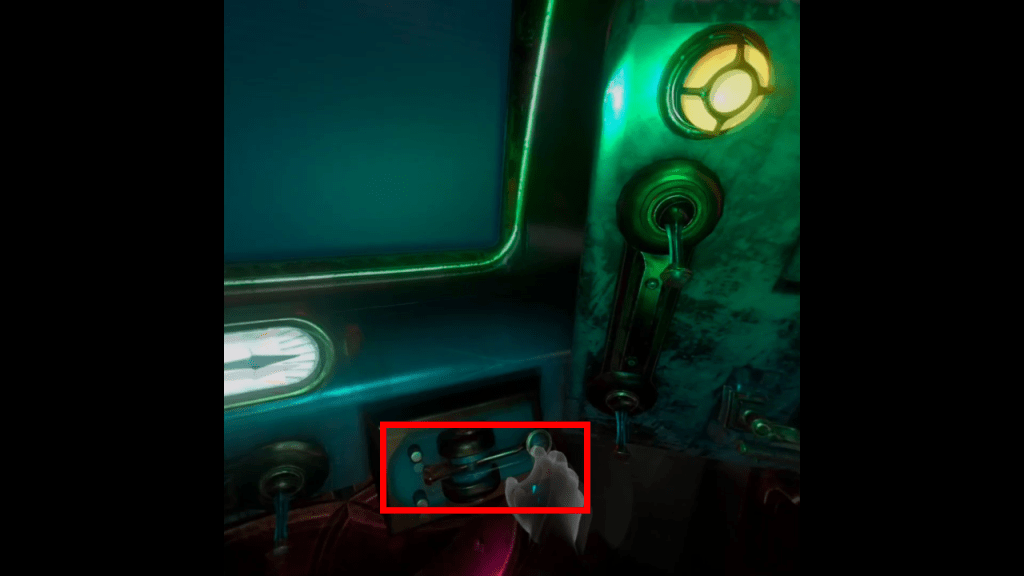
3. Press this button.
4. Flip these switches.
4. Tap the telegraph.
5/6. Flip these and then pull the down.
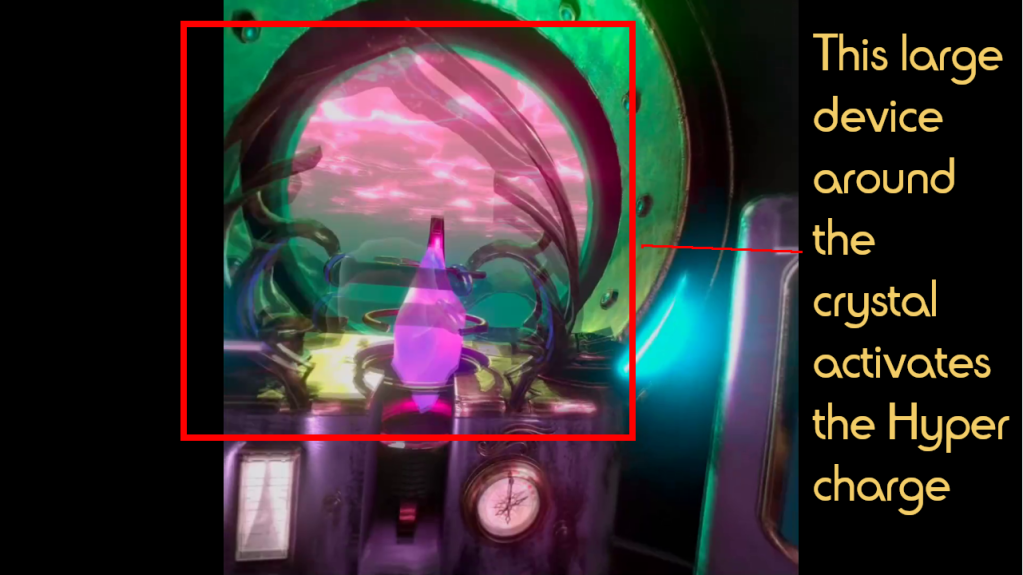
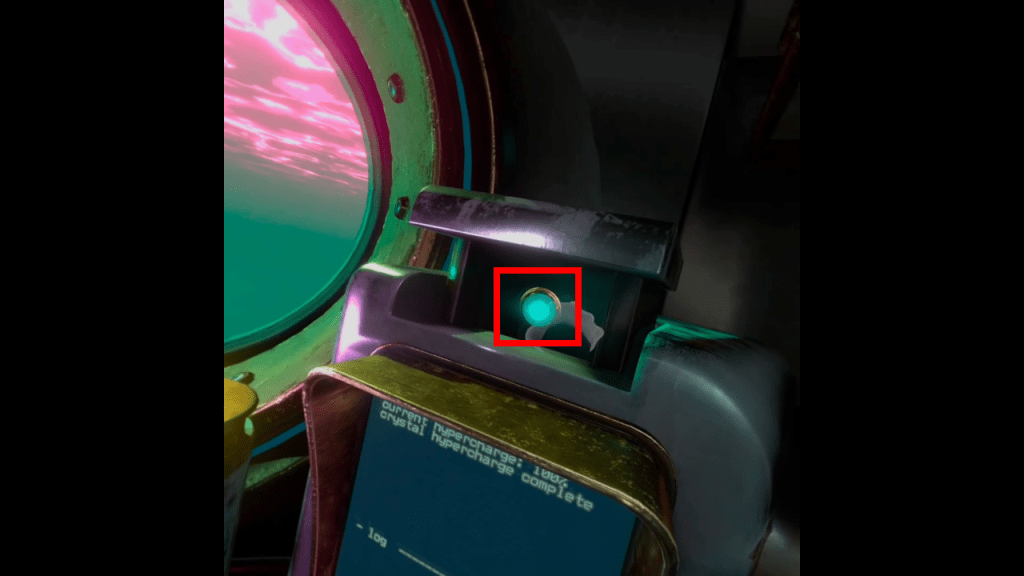
Pull down the lever around the Crystal to start the hypercharge.
Pull down and hold the lever that appears until the crystal is 100% charged.
Press the button that pops up when you reach 100%.
Flip each switch on in order. Tap the telegraph machine until the message is complete.
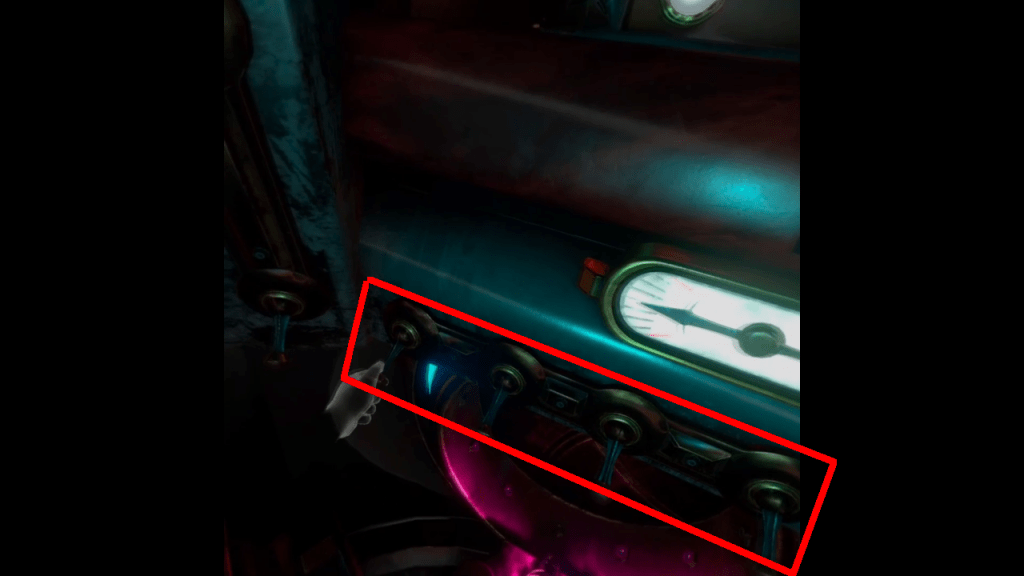
Flip the left set of vertical switches and then the right to unlock the fusion drives.
Pull down the top left switch and the top right.
Wait a bit and then pull down the bottom left switch and then the bottom right.
I used to make a lot of space survival crafting guides and indie game previews. Now I'm currently obsessed with retro handhelds.
View all posts by duckyobrien