
Short Guide (Keycodes and Ability Locations)
Short guide for people who just want the main information. Refer to the full guide below for more details.
These are the codes you enter into the box at the tower to unlock items.
2142 – Purple Lantern
5354 – Red Lantern Crystal
1263 – Final Gear
Shadow Hand Ability – Grabbing items that are far away – You get it from the ghost in the Shadowrealm once you take the bone, teleport back to the tower, place the bone in the chest, and then return to the Shadowrealm.
Commune Ability – Talk to animals – You light the candle in the tower room using the twig from the Shadowrealm. Once you go to the Feyland, you will see a group of fireflies and when you click on them, a nearby faery will teach you the Commune Ability.
Control Weather Ability – Control the weather – If you place the red crystal into the lantern and hang it in the tower and travel to the Skybridge, you can align the crystals to raise the city. Doing so will teach you the Control Weather Ability.
Ray of Fire Ability – Burn or heat things – Once you place all gears in the Underworld, you can place the rough gem into the device to your left and it will be refined. This will give you the Ray of Fire Ability.
Full Guide (Refer to the pictures for more help. The pictures will be numbered to match the step for each section. Refer to the video embedded above if you need additional references).
The Tower (Start)
1. Look up and grab the memory orb to trigger a memory.
2. Open the chest to your left and grab the skull.
3. Release it in the general direction of the skeleton and it will float there.
4. Grab the finger and place it into the compass to unlock the Shadowrealm.
The Shadowrealm (Start)
1. Grab the leg bone.
2. Teleport back to the Tower.
The Tower
1. Open the chest to your left and place the bone inside.
2. Teleport back to the Shadowrealm.
The Shadowrealm
1. Receive the Shadow Hand Ability.
2. Grab the Shadowrealm Runestone in the chest.
3. Teleport back to the Tower.
The Tower (Shadowrealm Runestone)

2. Turning off all sources of light will reveal the recipe.
1. Place the Shadowrealm Runestone on the circle of binding.
2. If you turn off the light near the far window, it will darken the entire room and show the recipe for the Faery brew (this step is not necessary as you can simply make the brew without seeing the recipe).
3. Use your Shadow Hand Ability to grab the amulet near the skeleton.
4. Teleport back to the Shadowrealm.
The Shadowrealm

2. You can use the twig to light small fires in the Tower.
1. Return the amulet to the ghost.
2. Grab the twig near the arch on the left hand side. Press B/Y to meditate and point out objects of interest if you have trouble finding it.
3. Teleport back to the Tower.
The Tower (Click on photos to embiggen).
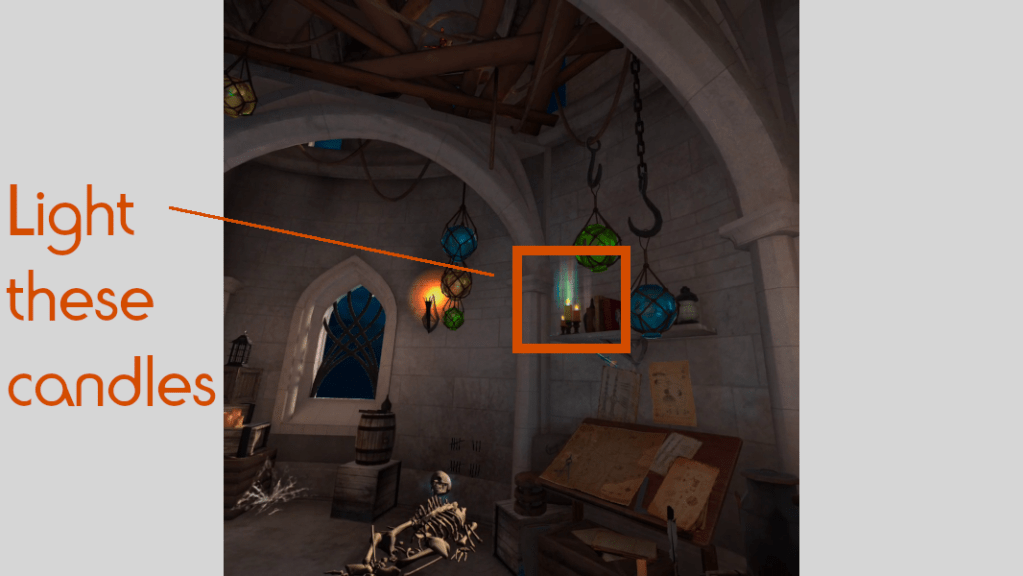
2. Light these candles with the twig before going to the Feylands. 
3. The key is above you on the ceiling. 
5. You need the wine before you go.
1. Use the Shadow Hand on twig to light it on fire on the torch.
2. Use the lit twig to light the candles on the book shelf on the right.
3. Use Shadow Hand to grab the Feyland portal key stuck on the ceiling above you.
4. Unlock the Feylands in your compass.
5. Grab the bottle of wine on the floor in front.
6. Teleport to the Feyland.
The Feyland (Start)
1. The faeries will help themselves to the wine and start talking to you.
2. Teleport back to the Tower and then to the Shadowrealm.
The Shadowrealm

1. Remove the stones on top to reveal a hidden acorn underneath.
1. Remove the stones on the right hand side and grab the acorn.
2. Teleport back to the tower and to the Feylands with the acorn.
The Feyland

1. Plant the acorn, you’ll come back to this once you get the Control Weather ability.
1. Place the acorn in the pile of dirt to your left.
2. Teleport back to the tower.
The Tower
1. Grab another bottle of wine from the same location.
2. Teleport to the Feyland with the wine.
The Feyland
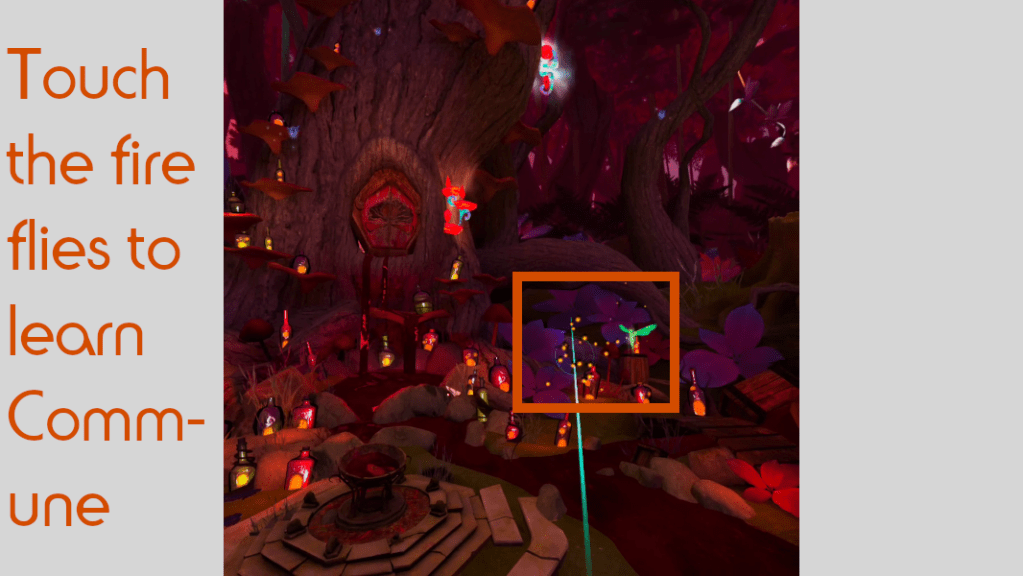
2. Touch the fireflies to trigger a scene and learn the Commune Ability. This is where you lit the candles in the Tower.
1. Place the wine in the center bowl.
2. Touch the fireflies (where you lit the candle in the Tower) to trigger a scene.
3. Receive the Commune Ability.
4. Use the Commune Ability on the fireflies. You will receive your first code.
5. The code is 2142 (the number of times the fireflies blinked in sequence).
6. Teleport back to the Tower.
The Tower (2142, 5354)
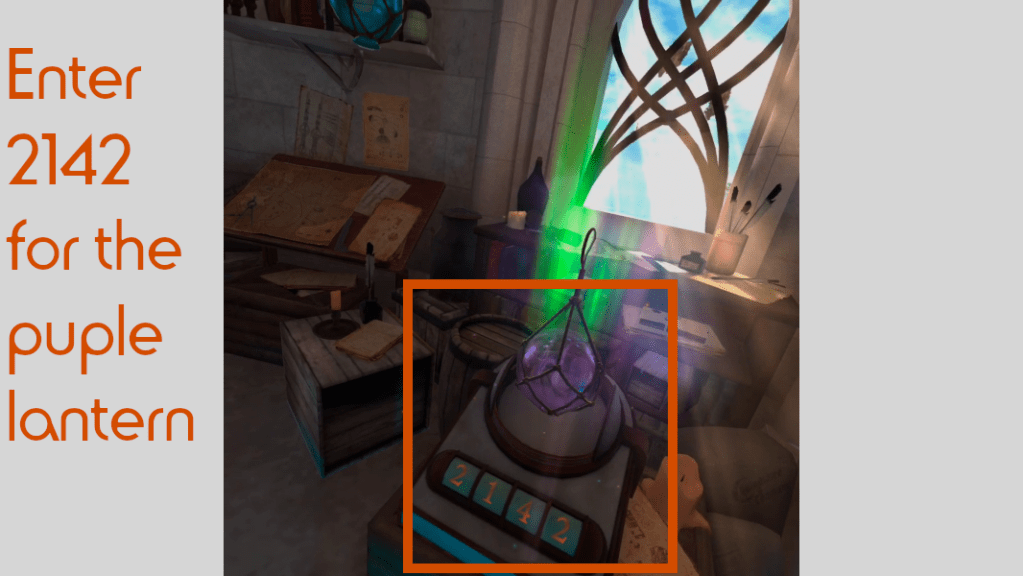
1. Code 2142 unlocks the purple lantern. 
2. Hook the lantern here. 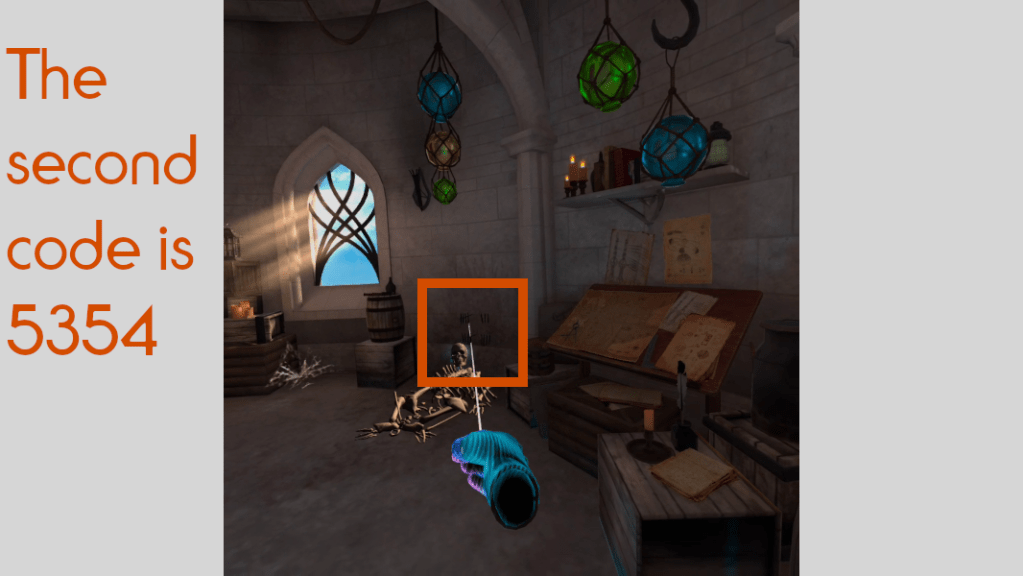
3. The code is 5354. 
5. Place the red crystal into this lantern.
1. Enter 2142 into the box on your immediate right to unlock the purple lantern.
2. Place the purple lantern on the hook to your right.
3. Look near the skeleton for the second code, 5354.
4. Enter 5354 into the box to unlock the red crystal.
5. Place the red crystal into the lantern across the room from you.
6. Teleport back to the Feyland.
The Feyland

2. Use Commune to talk to the rodent and have it dig the bowl up. If you don’t use commune, you cannot use the bowl.
1. Place the purple flower into the center bowl.
2. Use Commune on the rodent on the left side.
3. Use Shadow Hand to grab the bowl the rodent digs up.
4. Teleport back to the Tower and then to the Shadowrealm with the bowl.
The Shadowrealm
1. Use the bowl onto the ectoplasm to collect it.
2. Teleport back to the Tower and then to the Feyland with the ectoplaslm.
The Feyland
1. Place the ectoplasm into the center bowl.
2. Take the goblet and unlock the Underworld.
3. Teleport back to the Tower.
The Tower
1. Swap the purple lantern with the red lantern.
2. Teleport to the Shadowrealm.
The Shadowrealm
1. Use Commune on the dragon.
2. Use Shadow Hand to grab the key to the Skybridge from the dragon’s eye.
3. Unlock the Skybridge in your compass.
4. Teleport back to the Tower.
The Tower
1. Switch the red lantern to the purple lantern.
2. Teleport to the Skybridge.
The Skybridge (Start)

1. Check this floating island for the last piece. 
3. Use the center console to activate the rings.
1. Assemble the broken device on the right (sphere, cage, tube, cap). The cap is on the floating island to your right.
2. The beam should activate the center console (when the purple lantern is active in the Tower).
3. Touch the center console to activate the rings.
4. Teleport back to the Tower.
The Tower
1. Switch the purple lantern out with the red lantern.
2. Teleport back to the Skybridge.
The Skybridge
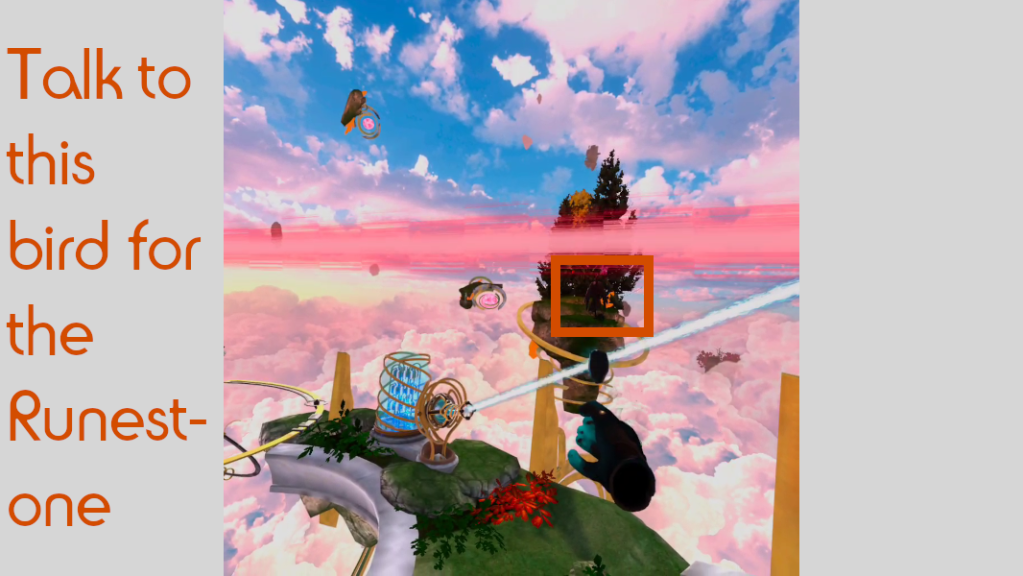
2. Use Commune on the bird to have it bring the Skybridge Runestone.
1. The red lantern will shoot a giant laser out now.
2. Use Commune on the bird on the floating island to your right.
3. The bird will bring back the Skybridge Runestone.
4. Teleport back to the Tower.
The Tower (Skybridge Runestone)
1. Place the Skybridge Runestone into the circle of binding.
2. Teleport back to the Skybridge.
The Skybridge
1. Click each ring exactly one time to align the floating islands. If you click a ring more than once, you’ll have to bring it back.
2. Unlock the Control Weather ability.
3. Teleport back to the Tower and then teleport to the Feyland.
The Feyland.
1. Use the Control Weather ability to make the acorn grow.
2. Teleport back to the Tower and then back to the Feyland so the acorn will be fully grown.
3. Use Shadow Hand to grab the Feyland Runestone from the fully grown plant.
4. Teleport back to the Tower.
The Tower (Feyland Runestone)
1. Place the Feyland Runestone on the circle of binding.
2. Teleport to the Underworld.
The Underworld (Click on pictures to embiggen)

1. Burn this rope. 
2. Burn this rope too. 
3. Burn this rope as well. 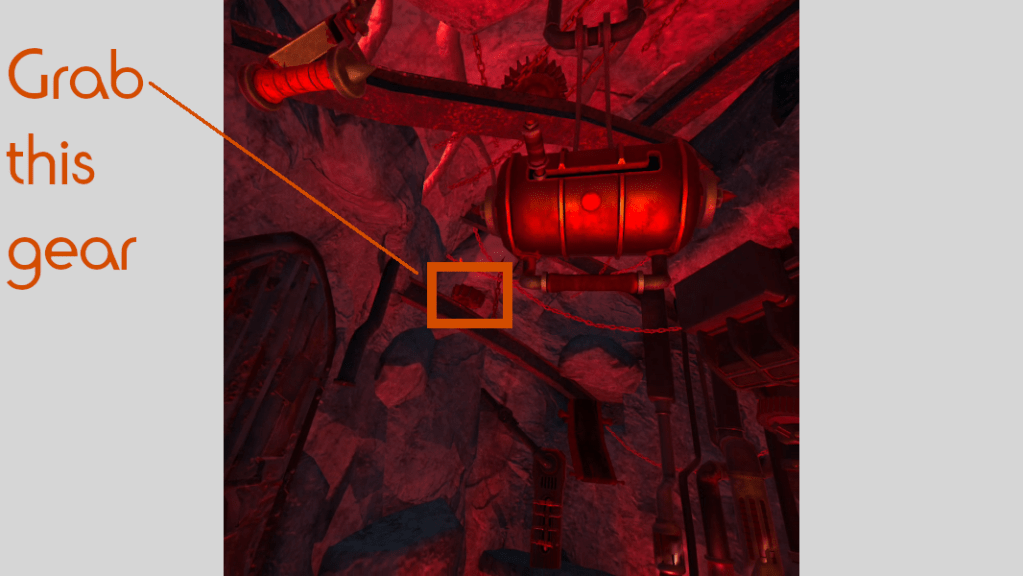
4. Grab this gear on the upper left. 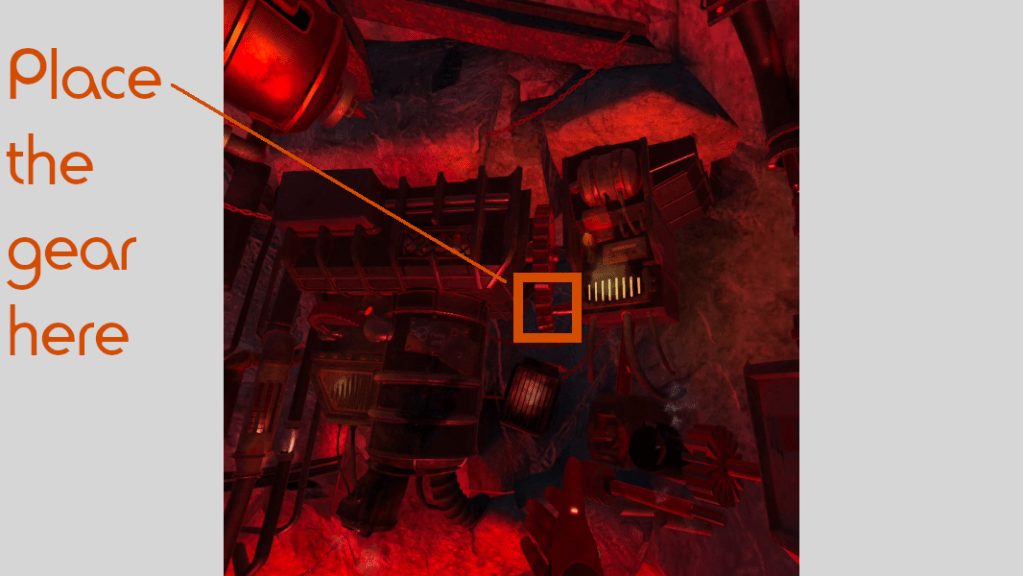
4. Place the gear on the upper right here. 
5. Grab the Large Gear here. 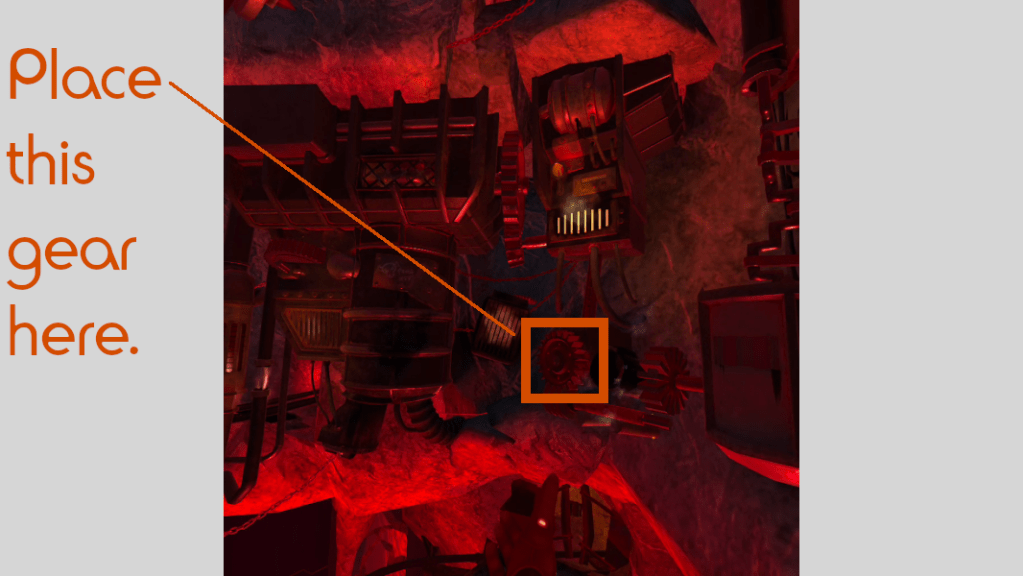
5. Place the Large Gear here. 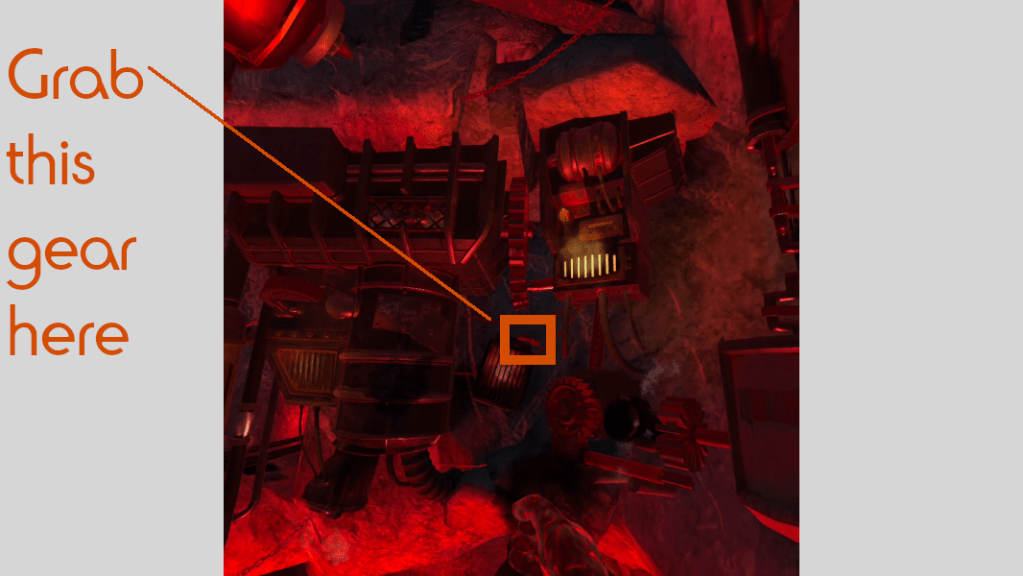
6. Grab the small gear here. 
6. Place the small gear here. 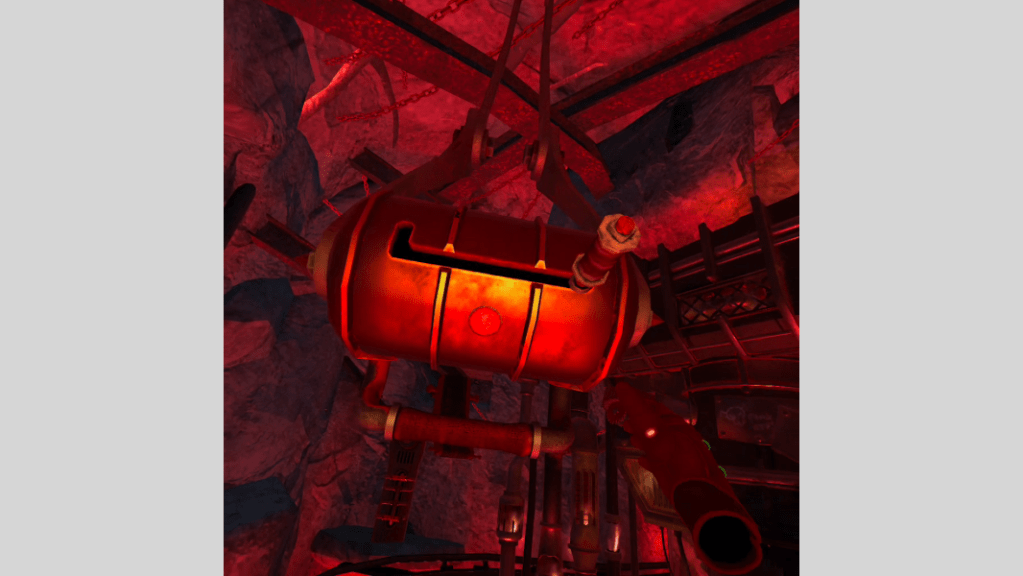
7. Pull this down and the lever to the right. 
8. Pull this handle down. 
9. Grab this gear.
1. Use Shadow Hand to burn the rope in front of you holding up a platform.
2. Use Shadow Hand to burn the rope to your right tangled on an axle.
3. Use Shadow Hand to burn the rope to your right tangled on another axle.
4. Grab the Medium Gear on the top left hand corner and place it on the upper right axle. (If the gears aren’t spinning, you placed the wrong gear in that location and you need to replace it).
5. Grab the Large Gear on the top center and place it the right so it’s flat against the surface.
6. Grab the Small Gear on the top of the device to your right and place it the left axle.
7. Pull the console down in front of you and pull the lever to the right (makes the cart go right).
8. Pull the handle to your left to send the cart out.
9. Look at the cart gate on your lower right. It will open as the cart passes and you will be able to grab another gear.
10. Place the gear on the bottom of the device near the middle.

10. Place the gear here. 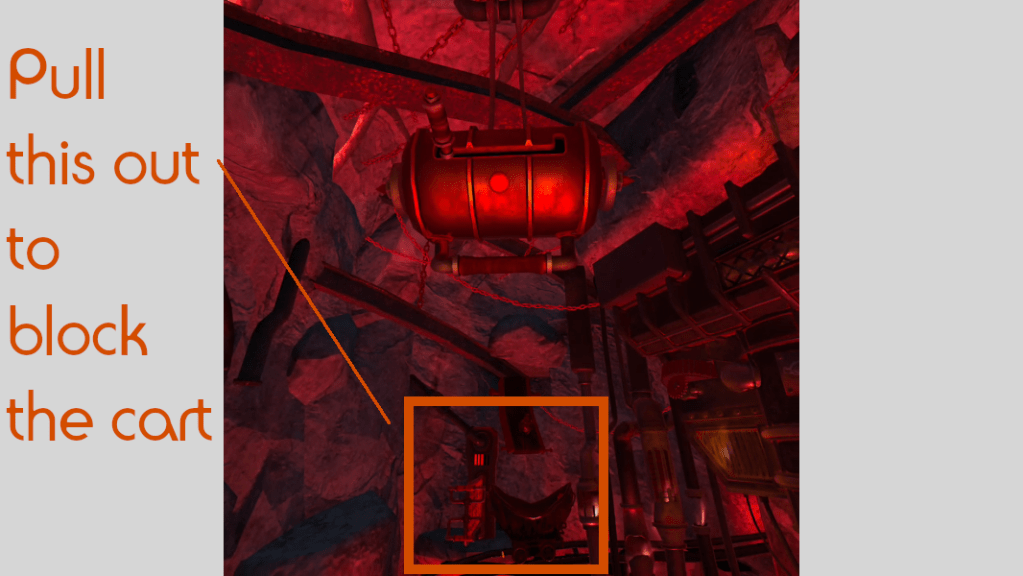
13. Pull this handle to block the cart. 
14. Place the rock on the crusher. 
16. Shake the bomb over this lever to oil it. 
18. Drop the gem into this device. 
20. The gem gives the code 1263.
11. Pull down the console in front of you again and pull the lever to the left.
12. Pull the handle to your left again to send the cart out.
13. Pull the handle across the room in front of you to block the cart and make the grenade drop into the cart.
14. Grab the rock in the cart and put it on the right arm rest of your chair to crush later.
15. Grab the grenade with your hands. If you use Shadow Hand it will explode.
16. Shake the grenade over the rusty lever on the bottom of your chair on the left hand side to oil it.
17. Pull the lever to drop a gem.
18. Put the gem into the top of the device on your left hand side.
19. Pull the console down in front of you again and press the button.
20. The red gemstone will fall down in the tubes across the room from you giving you the final code, 1263.
21. Teleport back to the Tower.
The Tower (1263)
1. Enter the code 1263 into the box to unlock the final gear.
2. Grab the gear and teleport back to the Underworld.
The Underworld

1. Place the final gear here. Now everything should have power to function. 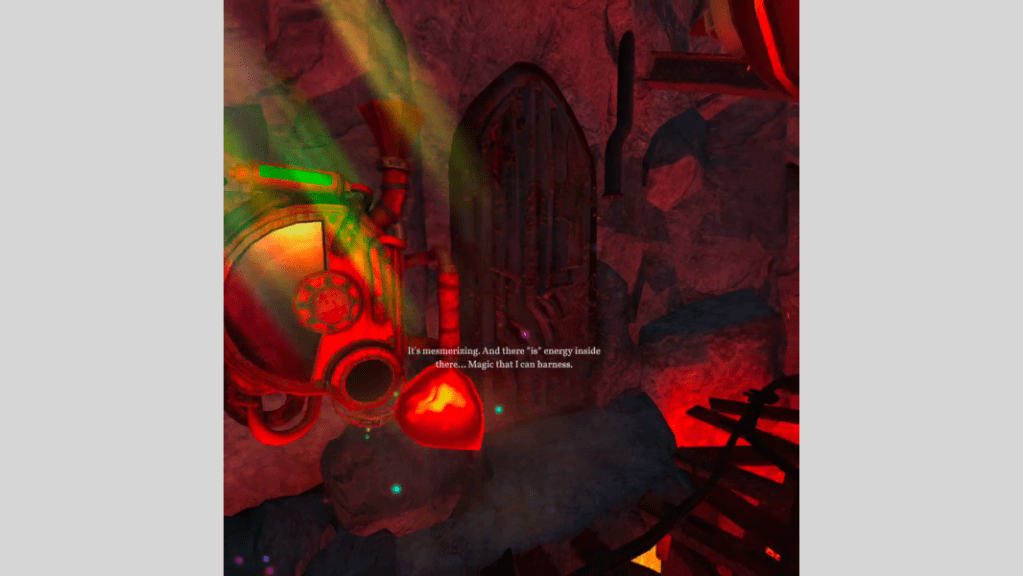
2. Use this device for the Ray of Fire. 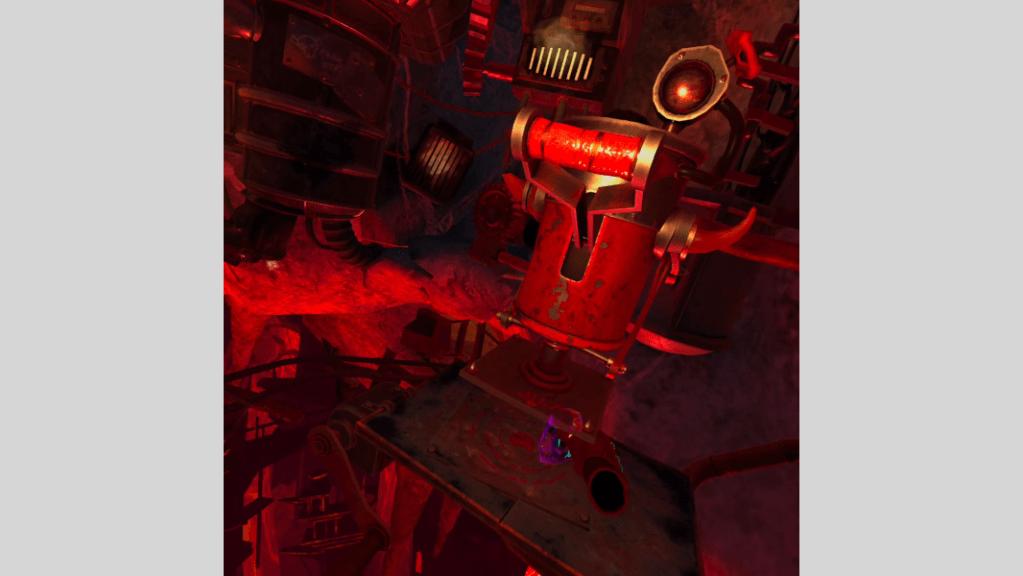
3. Crushing that stone will give the Runestone.
1. Place the final gear on the lower right hand axle. Everything should be powered now.
2. Activate the device to your left and the refined gem stone should be released, giving you the Ray of Fire Ability.
3. Use the crushing device on your right to break the rock and reveal the Underworld Runestone.
4. Grab the runestone and teleport back to the Tower.
The Tower (Underworld Runestone, Tower Runestone)

2. Burn the webs to free the mouse. 
3. Burn the boards. 
5. The final Runestone!
1. Place the Underworld Runestone into the circle of binding.
2. Use Ray of Fire to burn the cobwebs across from you to release the mouse.
3. Use Ray of Fire to burn the wooden boards.
4. Commune with the mouse to make him go into the previously boarded area.
5. Grab the Tower Runestone from the skeleton that falls over and place it into the circle of binding.
6. Teleport back to the Underworld.
The Underworld
1. Use Control Weather to bring down a piece of silver on your left hand side.
2. Grab the silver and place it underneath the crusher on your right.
3. Use Ray of Fire to heat it up.
4. Use the crusher to stamp it into a sheet.
5. Grab the sheet and teleport back to the Tower and then to the Skybridge.
The Skybridge

1. Place the sheet here. 
2. If you did it correctly a new area will show up. 
4. The final key, the mirror!
1. Place the sheet into the device on the left hand side (now freed since you burned the wooden boards back in the Tower).
2. In your compass menu, grab each power to unlock the final area.
3. Use Control Weather to imbue the sheet with energy, press Y/B to meditate.
4. Place the mirror into the compass to unlock the Realm of Mirrors.
5. Teleport to the Tower and watch the final cut scene.
Alright that’s it folks. Hope this guide helped. You can click on the pictures to make them bigger and I have a full video walkthrough from my YouTube channel embedded at the top of this article. The video will have time stamps in the description and comments. If you have any questions or would like guides on anything else, please feel free to leave a comment down below.
