Resources
Onion OS Github: https://onionui.github.io/
Official AdvanceMENU docs: https://onionui.github.io/docs/apps/advancemenu
Gdrive for Snaps (shaquille): https://drive.google.com/file/d/1KoHhrSxNa3u–W2rhGIwRdPQguP52tqD/view?usp=sharing
Skraper: https://www.skraper.net/
7-Zip: https://www.7-zip.org/
Intro
AdvanceMENU is an alternative front end for OnionOS on the Miyoo Mini and Miyoo Mini Plus.
The main thing that sets it apart are the video previews! Depending on the layout you picked for AdvanceMENU, you’ll have video previews along with audio playing for each game. After some time has passed, it’ll start displaying video previews full screen for games randomly as a sort of screen saver.
Not only does it look nice, it’s functional too in that if you want to check the game out, you can press the A button to launch it and start playing.
Setting Up AdvanceMENU
Installing AdvanceMENU
Navigate to the Package Manager in the Apps folder on your Miyoo Mini/Plus. Once in Package Manager, press R once to go to the Apps tab and then enable AdvanceMENU. Press Start twice to save the changes and install AdvanceMENU.
Booting to AdvanceMENU
You can boot directly into AdvanceMENU every time you turn on your Miyoo Mini/Plus.
Go to the Apps -> Tweaks -> System -> Startup… and change Start application to AdvanceMENU.
There is a possible bug where the audio doesn’t seem to work if you boot directly into AdvanceMENU until you exit AdvanceMENU and then restart it. You may want to keep the MainUI as your default start application and then boot into AdvanceMENU.
Adding Video Previews
If you have the Tiny Best Set GO ROM set, user shaquille has a Google Drive with all the videos already scraped and converted. You can find it here: https://drive.google.com/file/d/1KoHhrSxNa3u–W2rhGIwRdPQguP52tqD/view?usp=sharing
Adding Your Own Videos
You’ll notice that after downloading the AdvanceMENU preview set that some games will not have video previews. This is because either new games were added to the Tiny Best Set GO or they were renamed. You could also have added your own games.
Renaming Videos
If the games were renamed, you just simply rename the MNG and MP3 files to match the ROM files exactly. For example the ROM Dragon Quest Monsters - Caravan Heart (Japan) [T-En by The Translation Team v1.0] was changed to Dragon Quest Monsters - Caravan Heart (Japan) (Translated). Change the MNG and MP3 files to match the name.
Using Skraper
We’ll be using skraper.net to download videos for newly added games that the Tiny Best Set GO snap pack does not cover.
Go to skraper.net, click the download link, and download the correct version of skraper for your operating system.
Extract the contents and start skraperui.exe. The first time you do this, it will download files and will take roughly fourteen minutes or so depending on your internet connection.
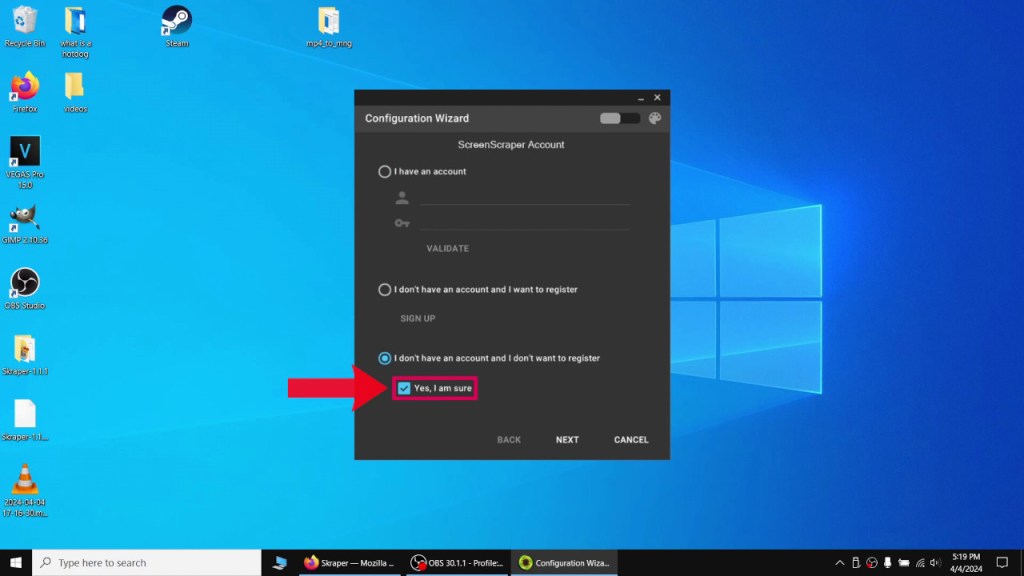
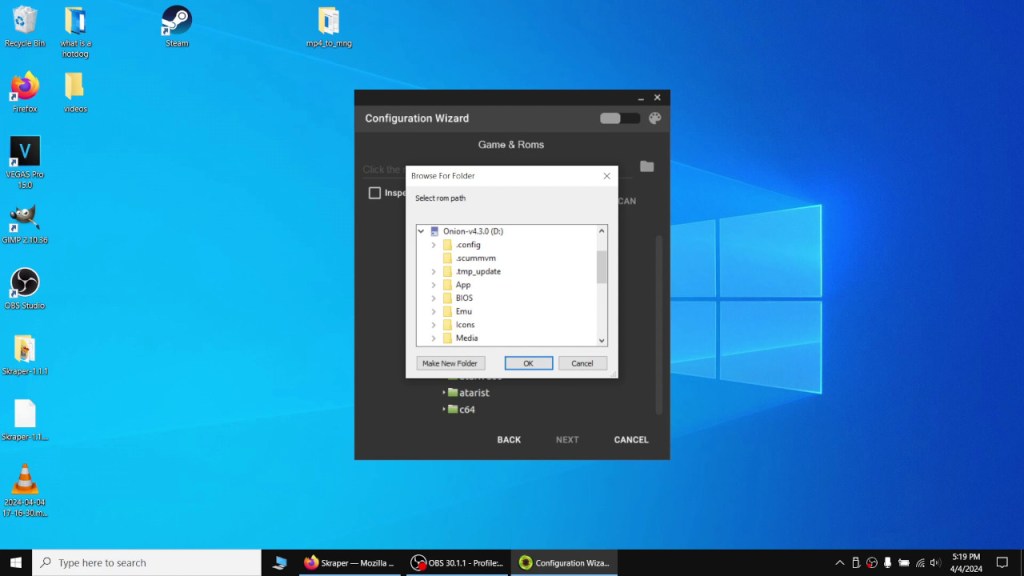
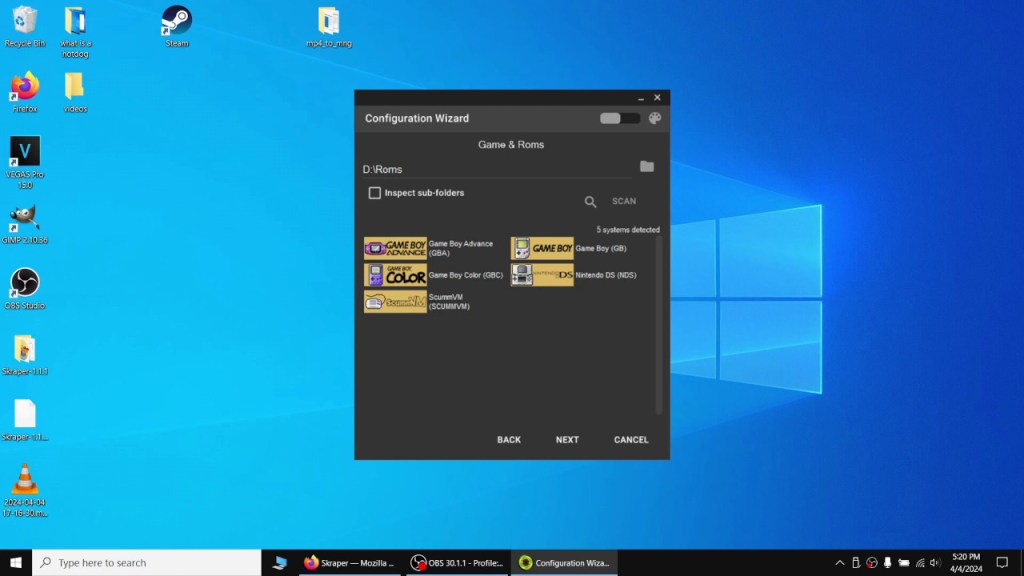
For the configuration wizard, I chose not to make an account, picked the generic front end, and selected the ROMs directory in my microSD card as the root. You can leave everything else as is. Once the wizard is finished, it will boot up skraper.

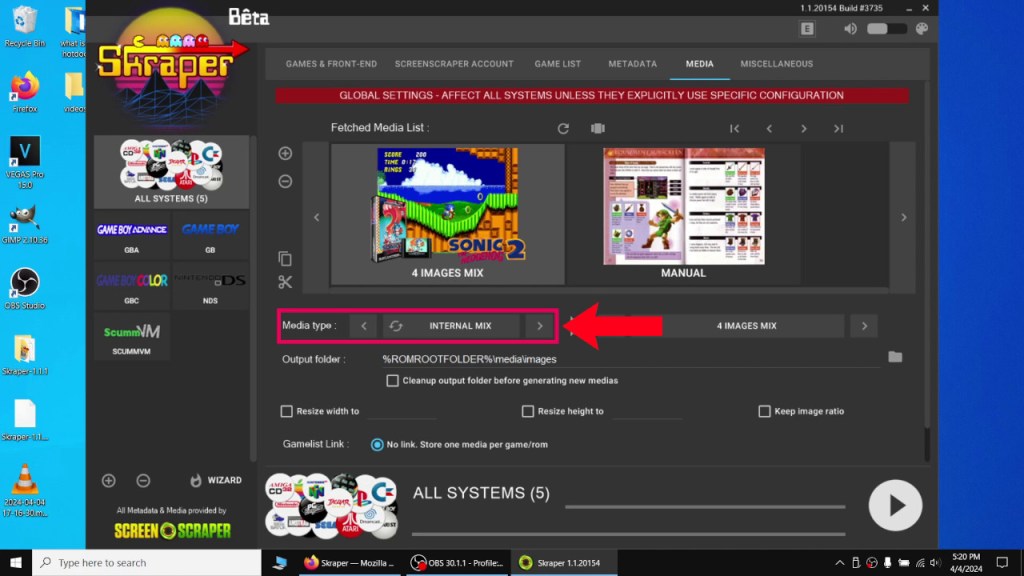
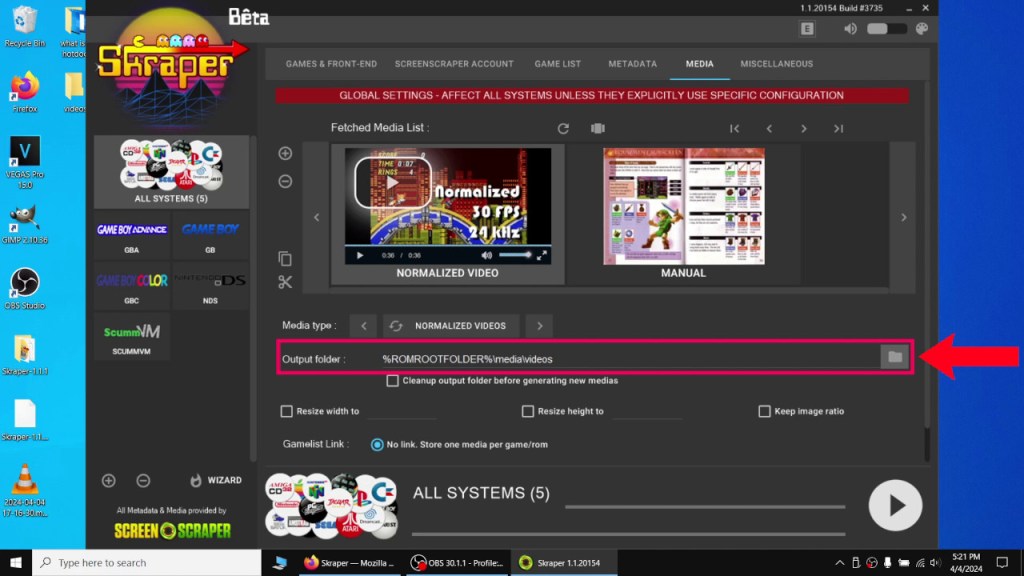
On the “Media” tab, change the “Media type” to video or normalized video since we want video previews for AdvanceMENU. I changed the output folder to a folder named videos on my desktop.
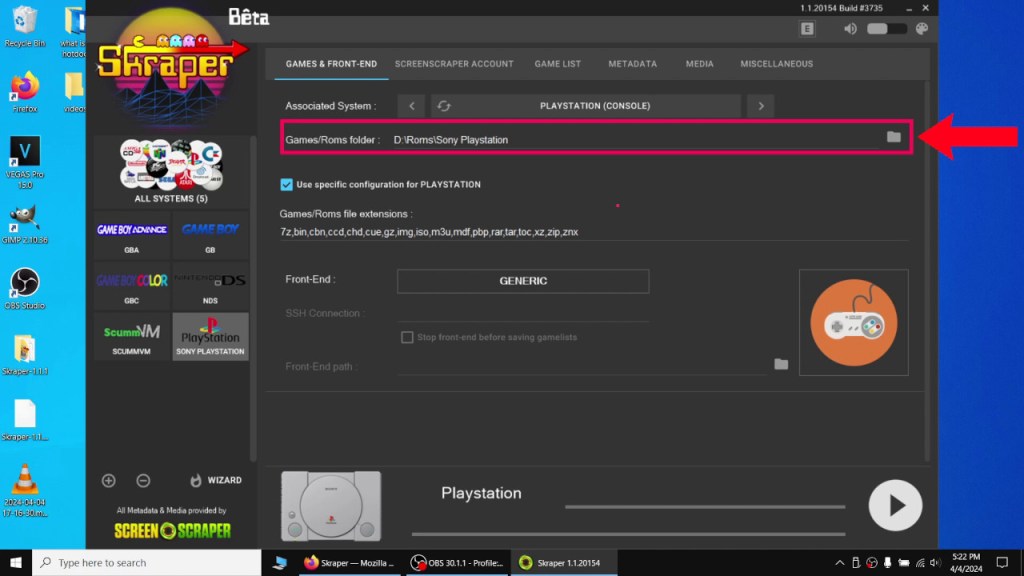
On the “GAMES & FRONT-END” tab, click the little plus icon on the lower right hand corner and add any systems that skraper did not automatically detect. For each system you added, go to “Games/Roms folder” and select the proper ROMs folder on your microSD card. For example, for PS1 it would be SD/Roms/PS. Skraper was expecting a different name than what Onion OS uses so that’s why it didn’t detect it.

After you’re all done, hit the big play button to start scraping. This process takes a long time and you’re also limited to 20,000 scrapes a day. If you go over that, just wait 24 hours and scrape again, it won’t repeat the games you already finished.
Converting MP4 to MNG & MP3
AdvanceMENU uses MNG files which are similar to GIF files. It’s a series of PNG images that form an animation. We’ll have to convert our scraped MP4 videos into MNG and MP3 files.
Thankfully Schmurtz has written a script to do that for us.
Copy the mp4_to_mng folder located on your Miyoo’s microSD card at SD\App\AdvanceMENU\tools\Roms_and_Medias_Management onto your desktop. Copy the scraped videos in your videos folder to the videos folder inside the mp4_to_mng folder.
Right click on mp4_to_mng.ps1 script and run it in powershell. It will convert the videos into PNG images and MP3 audio and combine the PNG images into an MNG file. Once a video is finished converting, it’ll be placed into mp4_to_mng\videos\done. The MNG and MP3 files will be placed into mp4_to_mng\mng.
Using AdvanceMENU
Controls
Start = Main Menu
Select = Change Display Mode
B/Menu = Exit AdvanceMENU
X = Sort Menu
L1/R1 = Scroll Game’s List
L2/R2 = Start/End of Game List
Emulator Menu
==========
Y = Toggle Emulator On/OF
A = Save Changes
Display Modes
You can change how many videos to display at once or switch to text only or a combination of text and video. You can do this by pressing Select or by going to Start -> Listing... -> Mode... and selecting a mode.
The different display modes are as follows:
Full – One video preview full screen
Full Mixed – One video preview with three images on the right hand side
Text – Two columns of text only
List – One column of text and one video preview on the right hand side
List Mixed – One column of text and one video preview on the right hand side with three images on top of the video
Tile Tiny – Two rows of three video previews
Tile Small – Three rows of four video previews
Tile Normal – Four rows of five video previews
Tile Big – Six rows of eight video previews
Tile Enormous – Nine rows of twelve video previews
Tile Giant – Twelve rows of sixteen video previews
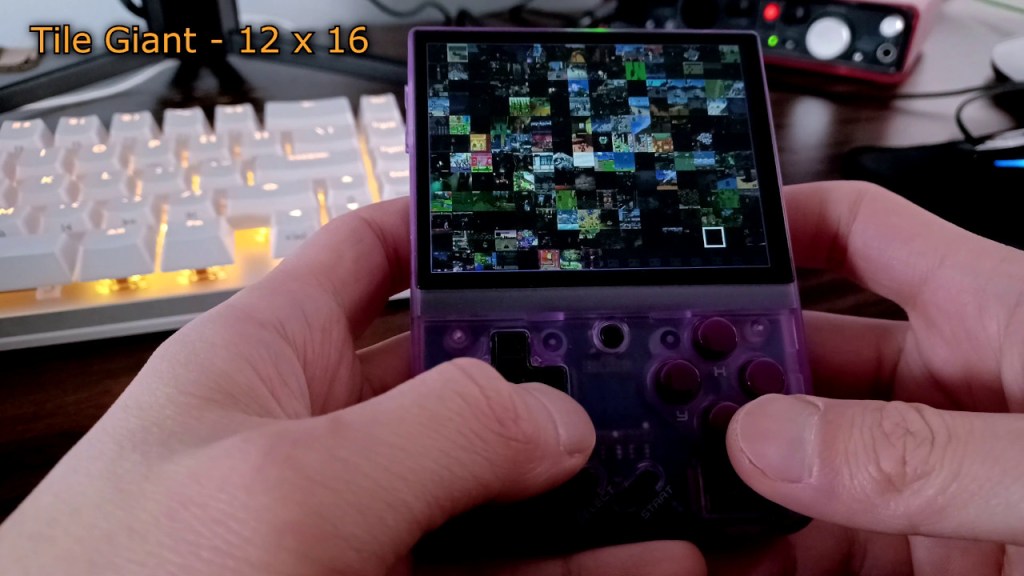
The last two perform very poorly on the Miyoo Mini Plus.
Emulator Selection
This menu is very handy in sorting your games by emulator. This is accessed with Start -> Emulators.... Once in the menu, you can toggle emulators on or off with the Y button and press A to save the changes. This will let you only display games for systems you want to see, making it much easier to sort through your games.
The rest of the settings are mostly for arcade games in a cabinet setting.
Conclusion
AdvanceMENU looks fantastic and while it takes a little bit of work to set up, I think the results are worth it. The video previews look more engaging and let you preview a game without having to start it up. It may not be for everybody but the option is there if you want to try it out.
Huge thanks to Schmurtz and the Onion OS team for so such a feature rich OS!
