This isn’t a guide as I have no idea what I’m doing. This is more documentation of the steps I took to compile gmu for the Powkiddy v90 running the miyoocfw 2.0.0. I hope this may help other people unfamiliar with Linux wanting to tinker around with building apps.
Virtual Machine (Virtual Box)
I used a virtual machine on my Windows laptop. It lets you run a Linux environment from within your windows environment without having to install Linux or boot directly into Linux.
This is very handy since you can experiment around with Linux without worrying about messing anything up.
You can also use WSL (Windows Subsystem for Linux) if you have Windows 10 or higher but I opted for Virtual Box. WSL is a bit different than running a virtual machine and is more vulnerable in terms of security.
Installing Virtual Box
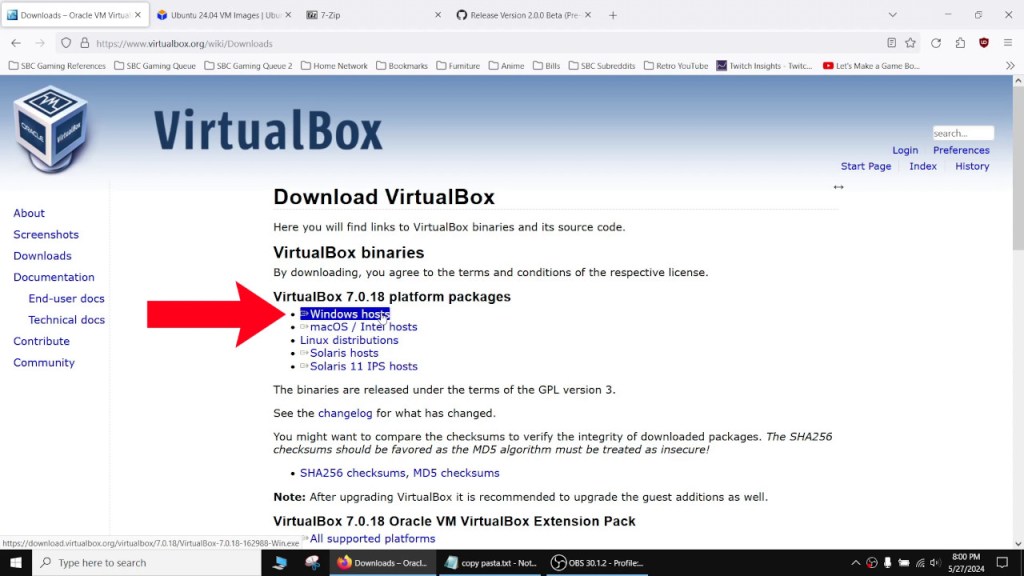
Go to the Virtual Box download page here: https://www.virtualbox.org/wiki/Downloads.
Click on the host version for your PC. I’m using a Windows laptop so I’ll be clicking on the “Windows hosts” link.
Double click on the .exe file to start the installer.
I left everything on the default settings.
Download a Linux Image (Ubuntu)
I used Ubuntu as my distro. You can use whichever distro you want. I picked Ubuntu because it seemed easy enough for a novice like me and since Ubuntu is popular there is enough documentation for any issues I might run into.
Download an Ubuntu image from here: https://www.linuxvmimages.com/images/ubuntu-2404/.

This image file will let Virtual Box create a virtual machine running Ubuntu.
Use a tool like 7-Zip to extract the contents. You can download 7-Zip here: https://www.7-zip.org/.
Once 7-Zip is installed, right click on the .7z file, go to “7-Zip -> Extract files…“, and then click OK.
Adding the Ubuntu Image
Once we have our image unzipped, we can add it to Virtual Box. Start up the Virtual Box app. Click on the “Add” icon to add the image.

This will bring up a window. Navigate to where you unzipped the image file. Inside the folder will be a .vbox file. Select this and press “Open“.
Now we have a virtual machine running Ubuntu.
Adding Mouse Support
Before we start our virtual machine, we’ll need to tweak one setting to add mouse support.
With our Ubuntu virtual machine highlighted on the left side, click on the “Settings” icon on the top. Go to “System -> Pointing Device:” and make sure this is set to “USB Tablet“.
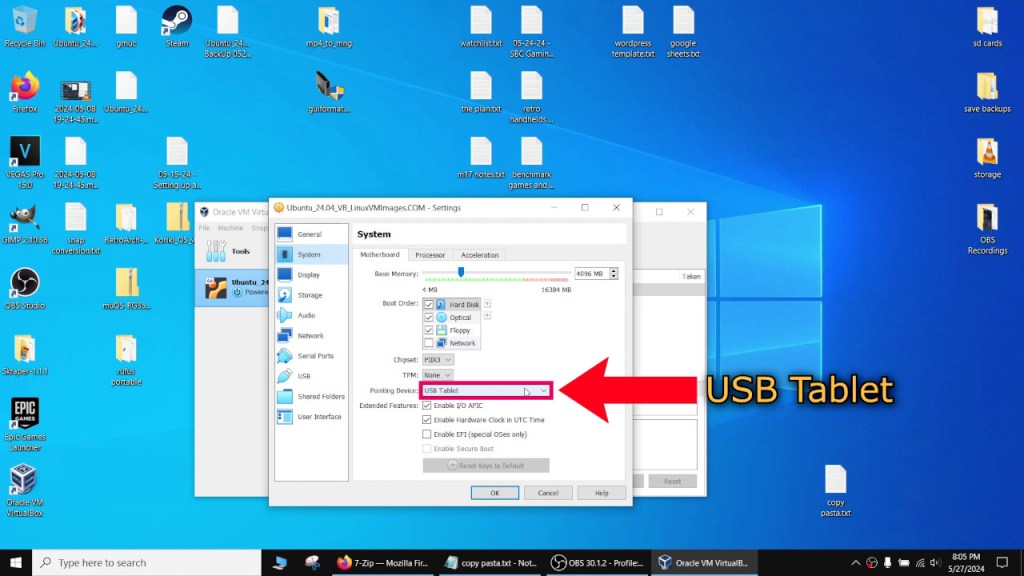
This will let us use our mouse when inside the virtual machine.
Logging In
Now click on the “Start” icon to start up the virtual machine.
The default password is “ubuntu“.
Setting Up a Shared Clipboard
Once we are logged in, this step will let us share the clipboard. I find sharing the clipboard handy since that will let us copy and paste from our Windows environment into the virtual machine and vice versa.
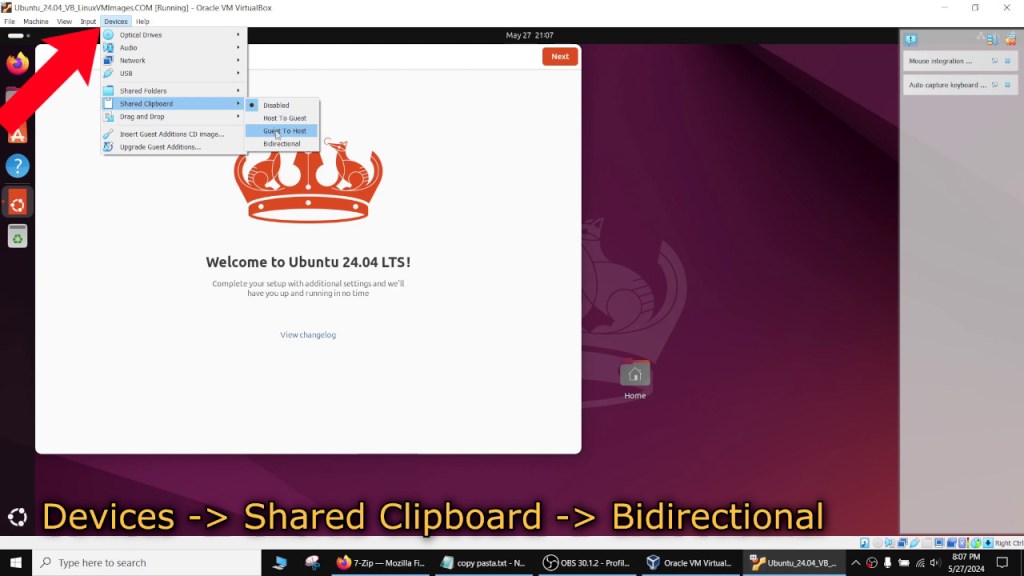
To do this, go to “Devices -> Shared Clipboard” and set it to “Bidirectional“. If you are worried about any security vulnerabilities, then set it to “Host To Guest” or leave it off.
Setting Up a Shared Folder
This step will create a folder that will be shared between your Windows environment and the virtual machine. This will be handy when it comes to accessing any compiled files in our virtual machine.
Go to “Devices -> Shared Folders“.
Create a folder in the root of your C drive. It can be called anything but I named mine “ducky“. Click on the “Folder Path” field and type in the address of the directory you just made or click on “Other...” icon in the drop down box and navigate to your folder.

The folder name will change to whatever directory you selected.
I set “Mount point” to “/mnt“.
Check the “Auto-mount” and “Make Permanent” boxes if you want the shared folder to persist.
Now we have a folder to copy the compiled binaries to and access them from Windows.
Docker
Docker is sort of like a light weight virtual machine used to set up a dev environment. We’ll be using a docker image from the Miyoo CFW developers to set up a dev environment.
Before installing Docker, we’ll run sudo apt update to update our list of installed packages. You can run sudo apt upgrade to download the updates if you want to.
Installing Docker
After that, run sudo apt install docker.io -y to install docker. The -y will let us skip any prompts by automatically answering “Yes” to them.
You have to use sudo every time you want to run docker but you can add the current user to the docker group to avoid this.
sudo usermod -aG docker ${USER} will add the username to the group.
For example, since my username is “ubuntu“, my command would look like sudo usermod -aG docker ubuntu.
Now we can log into the docker group by typing in newgrp docker.
After all this, we’ll check to see if docker is installed and running properly by using docker run hello-world.
If it isn’t working, you can check if the docker group was created by typing in groups. You should see docker listed in there.
If not, you can create the docker group by typing in sudo groupadd docker.
Toolchain
Our next step is to download the docker toolchain used by the developers.
A toolchain will let us create an environment that will produce compatible binaries for the Linux build our handheld is using.
You can find the Miyoo CFW 2.0.0 toolchains here: https://github.com/TriForceX/MiyooCFW/releases/tag/2.0.0-beta
It’ll be under “Important Notes -> For other developers:“.
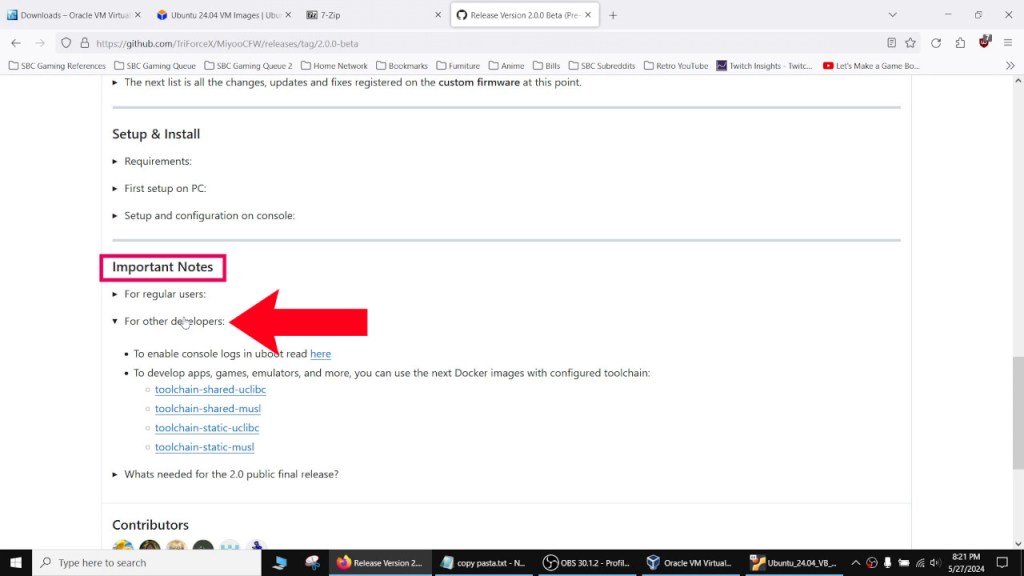
This will provide the command for docker to pull the toolchain image.
The toolchain provides a specific build environment. There are two versions, shared and static. Shared will add shared libraries when files and libraries are added to memory. Static will have the libraries built into the file and will be larger.
You will also notice two different versions, uClibc and musl. uClibc provides a more stable experience while musl is more experimental but aims for better performance.
I have no idea which is better but I used the static uClibc toolchain.
Run docker pull miyoocfw/toolchain-static-uclibc to download the toolchain.
After it finishes, you can use the command docker images to double check if it downloaded properly.
Starting the Toolchain
docker run -it miyoocfw/toolchain-static-uclibc will start the toolchain.
You don’t have to type the whole thing in, you can type in “miyoo” and then press Tab to autocomplete the name.
The -it runs an interactive terminal inside the docker container.
This is sort of like a virtual machine inside our virtual machine.
I ran apt update again once in the container.
Cloning GMU
We’ll clone the gmu repository next.
git clone https://github.com/denis-n-kuznetsov/gmu
This will create a directory named gmu with all of the gmu source code.
Switch to this directory by typing in cd gmu.
Simple Linux Terminal Commands
Here are some simple linux terminal commands to navigate the directories and files. They are similar to MSDOS commands if you had any experience with that.
cd (change directory) will let you change the directory.
ls (list) will list the contents of the current directory.
pwd (print working directory) will show the address of the current directory.
A single period stands for the current directory and two periods next to each other stands for the previous directory. For example, if you wanted to go back a directory, you can type in cd ...
Configuring GMU
Before we compile gmu, we need to run the configure script.
./configure
We’ll see that most of the header and library files failed. We’ll need to install them before compiling.
Installing Dependencies
If you’re wondering what the libraries are, most of them are audio codecs. For example libFLAC is for the FLAC audio codec, libvorbisidec is for ogg vorbis, and so forth.
apt install libsdl2-dev libsdl2-2.0-0 libmikmod-dev libfishsound1-dev libsmpeg-dev liboggz2-dev libflac-dev libfluidsynth-dev libsdl2-mixer-dev libsdl2-mixer-2.0-0 ibfreetype6-dev libsdl2-ttf-dev libsdl2-ttf-2.0-0 libsdl-gfx1.2-dev opus-tools libmpg123-dev libvorbisidec-dev libmodplug-dev libopenmpt-dev libsdl-image1.2-dev liblirc-dev -y
If you’re wondering how I got the commands, search in google “how to install [missing library name] in ubuntu 24.04” and some of the results should give you the install commands. The website https://ubuntu.pkgs.org will give you the package names to use with apt install.
For example for sdl I googled “how to install sdl in ubuntu 24.04”.
Just a side note here, I can’t seem to get opus to install so this just means our compiled gmu binary won’t be able to play opus files.
Run ./configure again.
You should see all the libraries as being okay now.
If something is showing as failed, run the install command again and then run configure again.
Now we’ll type in make.
Fixing the Compiler Error
We’re going to see an error at the very end “multiple definitions of ‘dlsymunion’:”.
To fix this, we’re going to make one edit to the makefile.
To do this we’ll need a text editor like vim or emacs. You can use either one.
I’ll be using vim for the purposes of this guide.
Install vim
apt install vim -y
Open the makefile using vim.
vim Makefile
Navigate the cursor to line 21 after “-pipe“, and press the “i” key to edit the file.
Add -g -O2 $(CARCH) -fcommon inbetween -pipe and -Wall.
Press “Esc” to exit edit mode.
Type in :wq to save and exit.
make clean
make
Now it should compile.
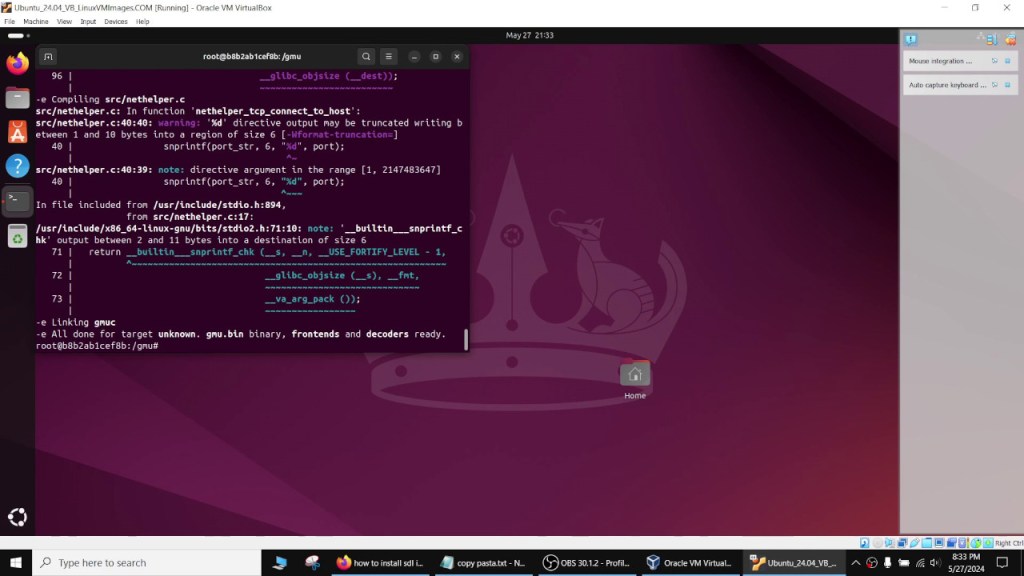
You should see a file named “gmuc” in the directory.
Copying the App to the Shared Folder
To copy the file we need to exit the docker container without stopping it.
We can do this by pressing “ctrl + p” followed by “ctrl + q” in the terminal.
After exiting the container, we can use docker cp to copy a file from a docker container to our Linux host.
sudo docker cp container_id:source target
For my virtual machine, the container id was b8b2ab1cef8b. You can find the container id next to root in the terminal for the container or by using the docker ps command in the Linux terminal.
sudo docker cp b8b2ab1cef8b:/gmu/gmuc /mnt
Now our compiled file is copied into our shared folder and will be accessible from Windows.
According to nogamelife1997, the gmuc file works on the v90. I don’t have one so I can’t test it out myself. At the very least, I hope this article helped to get you started in dabbling with building apps. Once again, I have no idea what I’m doing or if these steps are correct or optimal but it did produce a working file for the most part.
I hope this helps, and as always hope you guys are staying safe and sane out there, which may not be possible using Linux, and catch you guys next time.
